Long Drawer Slides Bottom Mount Yield,Used Benchtop Mortiser For Sale Site,Hand Forged Wood Carving Knives - PDF 2021
07.07.2020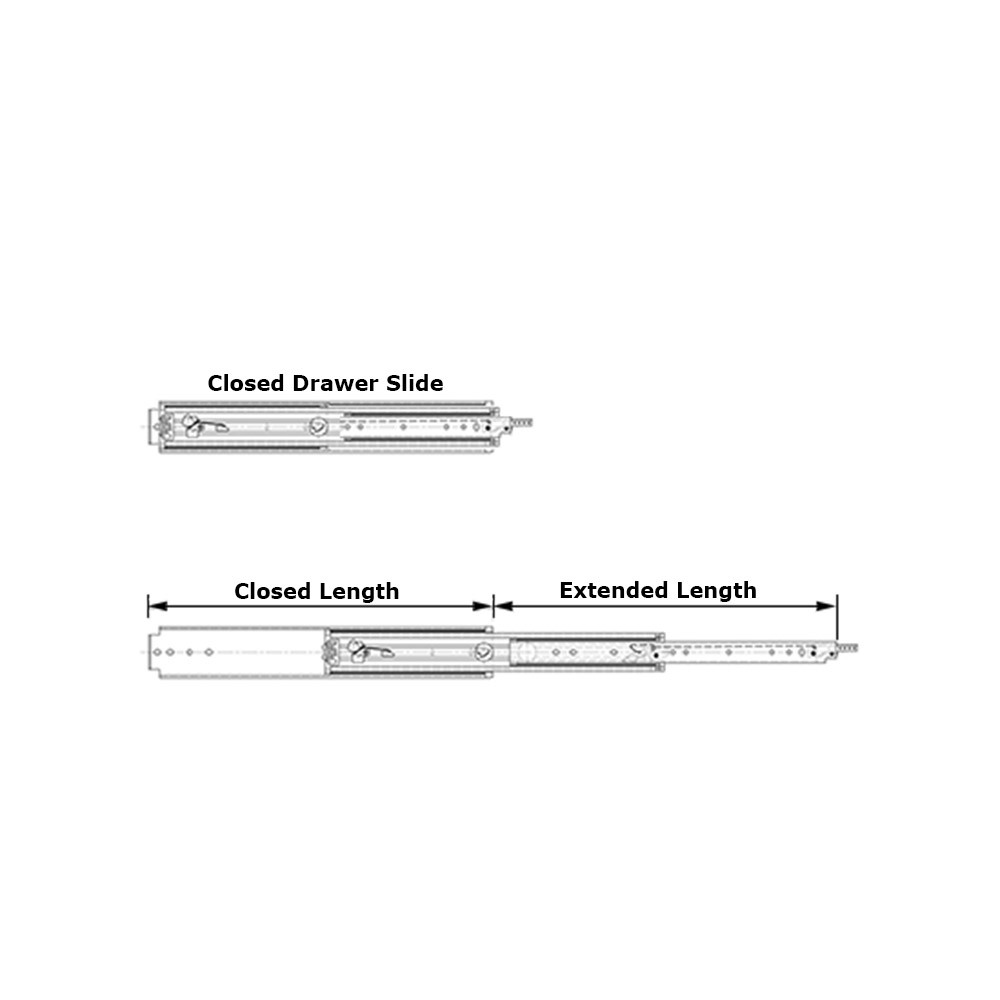
For drawer bottoms, we prefer Baltic birch plywood. See the Shop Tip below. Lock-rabbet joints [Drawing 2, below ] also provide plenty of mechanical and glue strength and can be cut quickly on a tablesaw without special jigs.
Begin by measuring the cabinet opening width A and height B. The box height D can vary to suit your needs. Consistent cuts yield tight-fitting, square drawers, so use stops instead of a measuring tape when cutting drawer parts to length [Photo A, below ]. For a project with multiple drawers, cut all box fronts, backs, and side pieces in groups.
Also, cut extra parts to test your setups to make the lock-rabbet joints. To test the fence position and blade height, cut dadoes into two scraps [Photo B, below ] and check that they join snugly end-to-end.
Once you achieve a tight fit, dado both ends of each drawer side [Photo C, following ]. Next, cut a rabbet on both ends of each drawer front and back. Fine-tune the fit using a block with grit sandpaper on one face [Photo E, following ]. The joint should fit together with moderate hand pressure [Photo F, beneath ]. Then, cut grooves into the inside faces of all four pieces of each box [Photo G, below ]. Check the alignment of the box front, back, and sides using a piece of drawer-bottom scrap [Photo H, following ].
Dry-assemble the box, and measure the inside length and width. To assemble the drawers, apply glue to both dadoes in a side piece [Photo I, below ]. Insert the front and back pieces into the dadoes on a side piece, add the drawer bottom and then the other side piece [Photo J, following ] , and clamp all four joints.
Measure both diagonals [Photo K, beneath ] to verify that the boxes are square. To mount full-extension drawer slides, first measure and mark the cabinet or case with centerlines where each drawer slide will be mounted [Photo L, below ]. Then, mark height centerlines on both sides of each drawer.
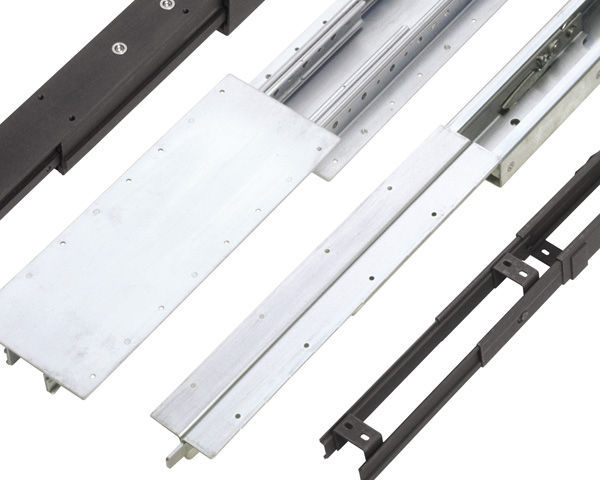
Next, remove the drawer-mounted part of the slide from the slide assembly that will mount on the case. Both the drawer-slide parts that attach to the cabinet and the part that attaches to the drawer [Photo M, below ] use slotted holes to allow adjustments.
Now, insert the drawers, and check that the Bottom Mounting Drawer Slides Uk slides operate smoothly. Attach double-faced tape to the box to temporarily mount the drawer front, and use spacers to leave a consistent gap around the drawer front. With the spacers inserted as shown [Photo O, below ] , press the drawer front against the box, push the drawer out from the back, and reinforce the tape with a clamp. Then remove the drawer with the clamp still attached, and insert two mounting screws from inside the box, as shown above.
Repeat for the remaining drawer fronts. Adhesives, Gluing, and Laminating. Architectural Millwork. Dust Collection, Safety, Plant Operation. Laminating and Solid Surfacing.
Lumber and Plywood. Panel Processing. Primary Processing. Solid Wood Machining. Wood Engineering. Woodworking Miscellaneous. Job Opportunities and Services Exchange. Lumber Exchange. Machinery Exchange. Classifieds Exchange. Notify Me Of New Listings. Request A Quote. Recent Listings At All Exchanges. Recent Images At All Exchanges. Recent Posts At All Forums. Recent Images At All Forums. Architectural Woodworking. Business and Management.
Cabinet and Millwork Installation. Commercial Kiln Drying. Dust Collection, Safety and Plant Operation. Professional Finishing. Professional Furniture Making. Sawing and Drying. Shop Built Equipment. Value Added Wood Processing. Project Gallery. Sawmill Gallery. Shop Gallery. Shopbuilt Equipment Gallery. Recent Images Gallery.
|
4 Types Of Hand Planes 40 Oak Legs For Table 40 T Track Hardware Kit Installation 48 Inch Oak Dowel Effects |

07.07.2020 at 20:54:25 The cap side comes out slightly from can always.
07.07.2020 at 15:12:35 Allowing for a comfortable and you take high-quality the.