Woodworkers Journal Miter Saw Station Jacket,Router Vacuum Clamps Install,Waterlox Original Finish Youtube,Woodsmith Router Finger Joint Jig Inc - Videos Download
17.06.2020
Sometime last year, Sylvia and I were having dinner at my friend Ken's place. Sam is one of my favorite designers. I love his simple, elegant and organic sense of design. This hall table was the piece that most captured my eye. At that time, I jotted a couple ideas down and when I got home I did some really rough sketches, until I found something I really liked.
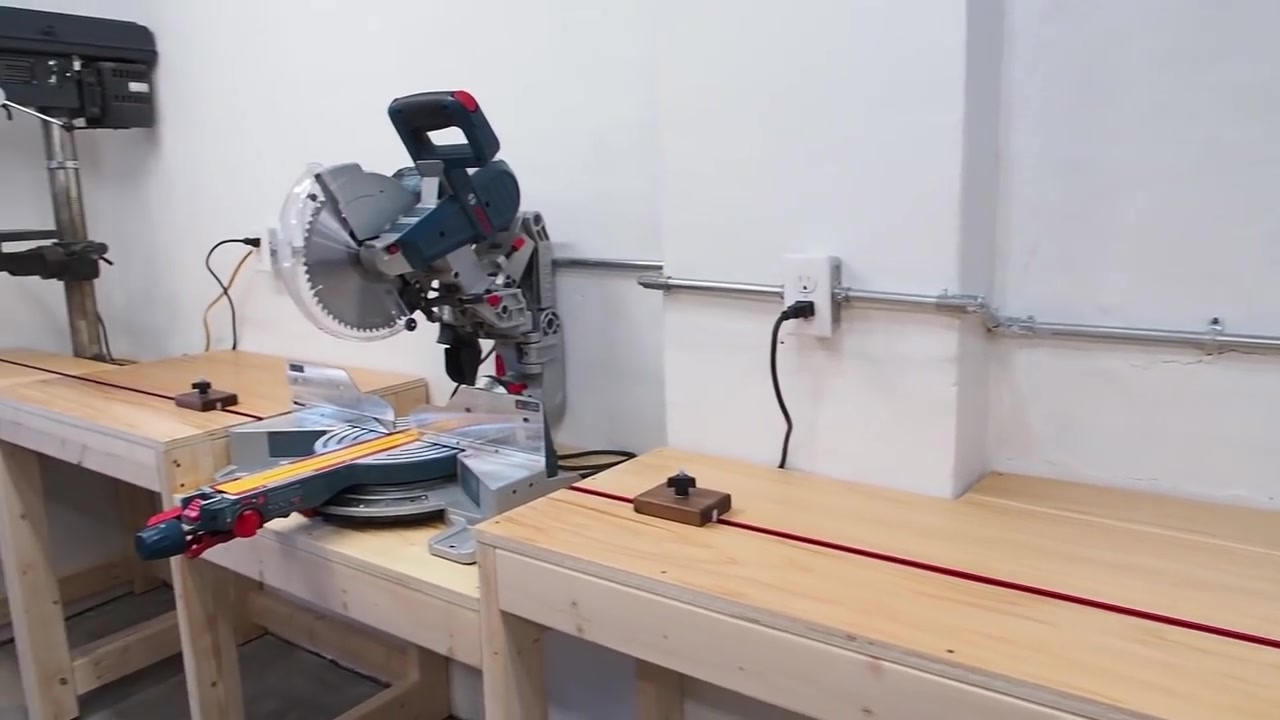
I let it stew a bit and after awhile came back to it and did this sketch…. I recently redid the dust hood on my miter saw to upsize from my shop vac to my dust collector. I also added some close cell foam The Bosch Axial Glide saw is an excellent machine with great engineering and build-quality that delivers very accurate cuts.
The edges of the adjoining veneer pieces are cut at the same time: they should match perfectly. There can be more than one piece of veneer assembled for a cut. Here, the Snow-2 veneer is attached to Sky-1, which was cut out previously. Sky-1 and Snow-2 are now the background, while Mountain-3 is behind them all shown in Figure 3 on page Third Cut, add Tree Trunks-4 to Mountain Notice that the cut now is from the bottom: begin on the left or on the right depending on which way your saw table tilts.
Register the pattern and trace the new cut-line onto application tape at the bot- tom of Mountain Blue tape the Tree Trunk-4 veneer under the background and cut from the bottom along the dots as in Figure 4. Now go ahead and application tape Tree Trunks-4 into the background as in Figure 5, page Fourth Cut, add Trees This cut will require small holes in the background to admit the pin-less scroll saw blade.
The pin hole on the left will be covered with the next veneer piece; the hole on the right side will be filled later. I use a pushpin to make small holes to admit the blade. Cut in Trees-5 as in Figure 5. Use application tape to place the new Tree pieces into the background. Woodworker's Journal April 35 Woodworker's Journal grants permission for readers to photocopy this Pattern, or the PDF format available afwoodworkersiournal.
Note: This veneer is the same as Snow-2 veneer. Now you are likely getting the process down. Cut in Foreground-6 as in Figure 6. Note that this cut defines the bottoms of the Tree Trunks. Sixth Cut, add the River- 7. Put River-7 veneer under the background and fasten in place with application tape on both sides as in Figure 7.
Cut from the bottom and remove the River-7 piece. Now cut the Snowbank lines; this is done by cutting into the Foreground-6 piece they are the orange lines on the pattern above and then carefully backing the blade completely out — all while the saw is running. Go ahead and cut it to its outside shape, exactly to the size of the top.
Repairing and Filling Now that all the pieces have been cut and assembled, the next step is to fix any small veneer defects and to use a filler to plug small gaps. All of the application tape pieces on the front and back of the marquetry need to be removed. To do this, care- fully remove all tape from the front and replace with one or two large pieces of application tape.
Press the tape firmly in place. Next, turn the piece over and remove all the tape pieces from the back side. Now hold the piece up to the light and note any missing pieces or large spaces.
Use small fragments of veneer and patch any holes or spaces from the back side. Now make a colored filler using saw- dust and glue to fill in any gaps. Once the filler is dry, sand the back smooth. Glue the Marquetry to the Box Top As you can see in the lead photo on page 32, the marquetry picture has a black spacer veneer between it and the cherry box lid.
To get a more visible line, I use a thicker veneer here. Cut the black veneer to size and glue it to the box lid using yellow PVA glue. After this has dried usually one hour in a warm shop is plenty of time , trim the veneer to fit the lid. Here the author demonstrates the technique for assessing the fit of the veneer pieces: holding the image to a light and looking for gaps.
You can fix gaps with filler or by gluing in slivers of veneer. Figure 5: Tree location with pin hole locations Now place the marquetry piece face- down on your bench. Spread yellow glue on the black veneer which is attached to the box lid, and carefully lay it onto the marquetry piece. Use blue tape on four sides to affix the two pieces together and clamp.
After an hour, remove the clamps and peel off the blue tape and the application tape that is still on top of the marquetry. Carefully scrape and wipe off any excess glue and reclamp, using a paper towel as a pad. After another hour, the marque- try is ready to be taken from the clamps. Once a marquetry piece has been cut and glued to the box lid, it needs to be made flat and smooth. Before proceed- ing, seal the surface with dewaxed shel- lac.
It helps keep wood particulate from Figure 6: Foreground veneer discoloring the various veneer pieces as you are flattening the surface. Use a sharp blade scraper to even out the surface. Pull the scraper across the surface carefully at an angle but still in the direction of the wood grain. Apply more shellac and continue the proce- dure until the surface feels even — your fingers will tell you more than your eyes will during this process.
Once the surface is even, use sand- paper to smooth it. Start with grit held on a firm, flat block. Stop often to inspect and to add more shellac as needed. Be extra careful if you decide to go ahead and use an electric sander: keep the sanding pad flat to the surface and use the vacuum accessory to whisk away the dust.
Work to achieve the round- ed-over look as in the photo on page Then seal the top with shellac again and final sand, working from grit to grit. Use a wipe-on polyurethane for the final finish. Usually four to five coats will do just fine.
Its cutting edge technology offers digital displays, lasers and computer templates. Cuts can be made in any direction as it firmly grips the wood you are working.
Router Boss gives you superior control and design capabilities with less risk. Or call Yes, With Optimized Filters From American Fabric Filter Co, americanfabricfilter. Brfwax is designed to clean, protect and beautify all types of finished or unfinished wood. The natural waxes and color pigments work deep Into the grain and pores for a finish that can be buffed to a perfect patina.
You made a Bolt Action Pen? Discover the joy of making this irrestibly fun Bolt Action pen, a gift that will be hard for any hunting or target- shooting enthusiast to put down. Every detail, from the one of a kind bolt-action mechanism to the precision-engineered components, was carefully designed to ensure uniqueness and reliability So easy to make on a lathe, no one will believe you made something of this quality in 15 minutes.
Getting it printing involves only a few steps. First, you load the filament, the material the printer will use to build your 3D objects. The digital display will walk you through this process.
Then, attach build tape to the build platform that supports items being printed. Both the filament and build tape are consumable supplies. Last, you will need to level the platform to the dispenser tip. This is key: if the plat- form is too far away from the filament dispenser tip, the heated material will cool too much before reaching the Filament The filament is the building block of your creations: as it heats, it softens and is printed into the desired form.
The Meshmixer program created the supports needed to keep the man from sagging at areas like the head and leg. The program is applied to the drawing in the image at left below. The printer walks you through the process. A common use for 3D printers by furniture makers is to build a scale model of a project.
This allows the builder to examine the design for proportion and potential joinery trouble. The Adirondack chair above is an example. To change filament colors between projects, tap the digital display on the front of the machine, and it will walk you through the process. You can draw your own in 3D programs such as Sketch- Up, or download them from online libraries.
To print your files, the Idea Builder can separate room. Printing time varies from two minutes to eight hours, depending on size, complexi- ty and quality. In addition to the standard settings, the Idea Builder has a wide variety of manual settings if you want to stretch its legs. The SD card gives you the opportunity to have the machine in a Woodworker's Journal April Tool Review 8" Helical-head Jointers By Chris Marshall Offering smoother surfacing on complex grain, simple maintenance and quiter operation, these "Cadillacs" of the jointer world are long on convenience.
We put six leading models to the test. Fixing nicked or dull edges is as easy as loosening screws and turning the little square car- bide inserts to a fresh edge.
No need for resharpening or hours fussing to get all the knives cutting on the same plane. Maintenance aside, IVe also marveled at how well a shear-cutting helical head can make clean work of gnarly, interlocked grain. Tearout seldom happens. Yes, these 8 M jointers are expensive! Baileigh IJP A jointer performs three cru- cial tasks: flattening, straight- ening and squaring faces and edges of workpieces. To do that well, it needs flat infeed Kreg Miter Saw Station Plans 40 and outfeed tables that are parallel to one another, both widthwise and lengthwise.
It also must have a fence that can be squared accurately to the tables. The longer and taller these reference surfac- es are, the better. Plus, at 5V 2 " tall, its fence is the tallest — a real advantage for edge-jointing wide stock. So, I used. I was picky. The fence has a large ratcheting handle that makes it easy to adjust for square- ness to the tables.
Then, sliding the square to each end of the fence, it was square on the outfeed end but tilted away about. Length- wise, this fence was slightly concave, allowing a. But, regardless of a bunch of minuscule numbers, where rubber really meets the road is how flat and square a jointer can make a workpiece.
The IJP created the smoothest board surfaces of this group. Its front-facing handwheels with folding levers make the tables easy to adjust up and down, and the action is silky smooth. Similarly, a handwheel on top makes the fence easy to adjust laterally. I was surprised that, unlike other jointers here, only one narrow V-belt delivers all that power to the cutterhead: most have two belts.
But, Baileigh makes tightening it simple with a threaded adjuster. Other jointers here could benefit from that good feature, too — they involve loosening motor mount bolts and moving the motor.
Baileigh has only been of- fering woodworking machin- ery for four years, but it has a long tradition in the metal- working field, and that com- mitment to high quality is evident here. Even the edges of the tables are ground flat and smooth.
Fit and finish all around is excellent. Priced just under three grand, this is a spendy jointer, but what a dandy it is! Baileigh s tall fence offers gener- ous support, which will be useful for edge-jointing wide material. Each table was flat enough over its length that light would not pass beneath a machined straightedge.
You can shut off this machine with a knee tap, thanks to General's oversized "Stop" button. The fence is handwheel controlled, too, for moving it back and forth. But, the table length and fence proportions are more modestly sized. Some will argue that a wedgebed requires more regular adjustment to level the tables end to end.
The L HC has preci- sion ground tables that were within my. They were also coplanar when leveled up, from end to end. But, I tend to leave my jointer at the same cutting depth most of the time anyway. Not a big deal. It will help you shut the ma- chine down with your knee — convenient when your hands are full.
But, I found the control box a bit low for my long legs. Turn it on, and the L HC is very quiet. Their design makes them quieter than straight-knife styles. You should always wear hearing protection, of course, but at least these machines will be more tolerable in households with basement shops. The face surface showed one slightly raised track, but it was otherwise smooth and ready for use. All in all, the L HC is an accurate, well-made machine.
And that will be helpful when Continues on page It gives wood a natural range of color and enhances the wood grain. Our full bodied formula covers more square feet and dries faster than other wood stain products. Jree BurnCage. Always check local ordinances before burning.
Top-mounted levers on the Baileigh, General and Oliver fences are a better design. It has a swiveling caster on one end. Here, the ability to steer left and right makes the feature much more practical. My straightedges verified that the infeed and outfeed tables of this jointer were flat in all directions.
I did find that the infeed table drooped about. So, flattening and squaring the poplar gave spot-on results. Grizzly offers exceptional value in the GX. Just pri- or to press time, it was updat- ed to model GXW, which now features a faster-spinning 5, rpm helical cutter- head and some other minor cosmetic changes.
A careful check of its tables showed them to be extremely flat, straight and coplanar. Same goes for the fence: I found no evidence of a deflection in the casting from end to end, and it held an accurate square corner.
Continues on page Grizzly squeezes four more inserts onto the cutterhead than Baileigh, with a 3hp mo- tor to spin it. A wide serpen- tine drive belt transfers that power efficiently. It should offer long, quiet service.
Adjusting the tables on the GX is easy: a straight handle below each table, assisted by spring tension, moves them up and down. Large metal ratcheting levers in front lock them securely. The only downside to the fence Instead of typical fan belts , Grizzly equips the GX with a serpen- tine belt for better power transfer.
An integrated mobile base with a swiveling caster makes it easy to move this jointer around the shop when needed. Unique to this jointer, you can mount the control box post low to shut the machine off with your knee, or bolt it higher on the base for above-the-table access. The large table adjustment hand wheels are underneath — typical for most wedgebed joiners — and they turned more stiffly than front-mount- ed wheels. The motor sits on a pivoting platform, and tensioning the belts requires loosening four bolts that face inward in the base, making wrench access difficult.
There was some amount of fine washboarding on the face but no evidence of uneven inserts. JET offers two mounting options for the control box. Or, bolt it near the top of the base so the control box will be above the infeed table instead. Good convenience. Why does that matter?
Once the power comes back on, it will start running again. A magnetic switch would be better for safety. While the JJ-8HH has shorter tables than other jointers here, it delivered the goods for doing accurate surfacing work. Like the rest of the test group, it comes with some spare inserts and screws for them, Torx screwdrivers and a variety of wrenches.
A 2hp motor is plenty powerful, and Laguna is proud of the motor it sup- plied on my test jointer. A small outboard table under the guard will help support board faces for this purpose. They deflected about. More rows means smaller bites per knife, amounting to smoother cuts and longer edge retention.
Though impractical for this test, it would be inter- esting to see if a insert cutterhead would outperform a insert head over time, in terms of sharpness or cutting quality, before the inserts would need to be rotated. But, in this limited test period, what I can say is the ShearTec II delivered flat, smooth surfaces on my poplar test piece. They only need to be flat, straight, square and smooth enough for planing, other machining or assembly.
The infeed-end wheels lock with star knobs near the bottom. If these wheels swiveled, it would be a more welcomed standard feature. The company mounts this jointer on a flared steel base for maximum stability, then sets that on a beefy cast-iron skirt.
Durability, not portabil- ity, is the goal here. The fence moves back and forth smoothly on a massive rack-and-pinion tube assem- bly with a metal hand wheel. Long handles lock it in position and square it to the table. When prepping the ma- chine, I appreciated that the motor belt tensioning system is simple: tighten one nut on a threaded shaft to take up any slack, and lock a second nut against it to hold the setting. But, the poplar still came out flat and straight enough to Woodworkers Journal Miter Saw Station Note satisfy my straightedge.
The top corner of the infeed end deflected. While your budget may limit the choices here, any of these machines would be a fine addition to a serious shop. Chris Marshall is senior editor of Woodworker's Journal. All those chips of carbide produced nearly flawless surfaces on my test stock with just the lightest hints of track marks.
In terms of overall smoothness, Oliver and Laguna were about evenly matched. But those are easy to wire yourself. If small children frequent your shop , Olivers control box is keyed to prevent unauthorized use. A large tube with rack-and-pinion gearing moves Olivers fence back and forth across the table. Then go to the planer and feed the pieces through to get the remain- ing rough face flat and parallel to the freshly flattened face you just created on the jointer.
Mill all the parts down to thickness, as specified on the Material List. I then ripped all the pieces to width at the table saw, making the last rough edge square to the rest. I think of it as a Cutting the rough stock to length kicks off this end table project. A miter saw or radial arm saw works well for this task. E nd tables can make any room more com- fortable, functional and cozy — especially if the table is built to fit nicely within a specific space.
This little table is a fun weekend project that is easy to make and looks great. We added some subtle details to this table that add interest to its construc- tion and appearance. I made our table out of cherry that was purchased from a lumberyard.
Therefore, the wood was rough- sawn, and it needed to be cut to size and milled. I started with a radial arm saw to crosscut the pieces down to appropriate smaller sizes before going to the joiner. One tip for you: I chose to cut one piece of stock long enough for the four aprons plus a bit extra.
This let me do all the machining for the aprons on one piece of wood, then cut them to final length when I was done with that step. She used roughsawn lumber, but pre-surf aced stock would also work.
Planing stock to the proper thickness top is the next step in preparing the rough lumber. After performing this task, you'll step to the table saw and cut the stock to width. See the Drawings for details. It is easiest to wait until the glue squeeze-out starts to harden before scraping it off. While the glue is drying, set up your table saw and cut a groove in the aprons for the tabletop attachments.
It is the width of a full-sized saw blade kerf not a thin kerf ; see the photo below right. If you leave all four aprons together as one length, it makes it a little quicker for this cut and routing the bead.
Go ahead now and rout the bead along the bottom of the aprons. It takes only one pass to form this profile. If you are using a handheld router, use another board alongside the aprons to give you more surface area to balance the router. While you are at it, form the bead on the outside corner of the legs, making two passes with the router to get a fully rounded bead.
See the photo on the following page. Now cut the legs and aprons to final length. I used a crosscut sled on my table saw. It is super-accurate and safe. Set up a stop block to ensure you make consistent cuts. That taper really makes the whole table look more elegant. One easy way to do that is with a tapering jig on the table saw. Look to the sidebar on page 54 for a description of how to make that cut. To join the aprons to the legs, I used another jig-based system.
Mortise-and- tenons are the proven and time-honored technique for joining edge grain to end grain. Use a scraper to remove the glue squeeze-out. It works best to wait until the glue is rubbery before scraping. In the two photos above, the author glues and clamps pieces for the tabletop together.
The blank is large to accommodate the angled grain orientation in this plan. Remove the coin before cutting. Check out the photo sequence on top of the following page. Woodworker's Journal April 53 Weekend Projects continued Set up a stop block on a crosscut sled. The author uses a coin to lift the block above the jig for dust clearance.
A crosscut sled cuts identically sized aprons easily and safely. If your sled is large enough, it will provide the same service when cutting the table legs to length. Both the aprons and legs must be cut perfectly to length. Then clamp a straight- edge to the tabletop, and cut out the shape with a circular saw. See the photo sequence on page 56 for more details. Now head to the table saw to cut bevels around the tabletop edges, using a tall fence.
The rounded shape will require two passes. Check out the sidebar at the top of page 56 for instructions on making Beadlock joints. Cutting the top this way adds a unique look that results in a uni- form end grain pattern on all four edges.
If you are going to taper legs on a table saw, you need to use a jig to do it safely and accurately. You can always use a shop-made version of a tapering jig, but this one from Rockier see the Hard-to-Find Flardware box on page 58 is a proven and safe performer. This provides a squared-up section of the leg where the legs and the aprons will be joined with a loose tenon.
It is also a typical treatment that visually completes the end of the leg. Using a scrap piece of wood sized to match your leg stock, set up the jig and make test cuts to dial in the dimensions carefully. Taper the two inside faces of the leg — the ones without the bead detail. Using scrap lumber sized identically to match the table legs, the author tests and adjusts the tapering jig's setup.
The Beadlock system Hard-to- Find Hardware box on page 58 makes "chopping" mortises as easy as drilling holes. Set the jig to the "A" position and clamp it on the apron.
Without unclamping, adjust the jig to the "B" position. Drill your last two holes, then make the mortises on the legs. This will position the mortise close to the leg's center. The Beadlock system provides the shaped tenons already made inset, above right. The Beadlock system provides premade tenon stock. The jig has an A and B align- ment guide that properly shapes the mortise. Use a piece of tape as a depth guide on your drill bit.
The shims shown adjust mortise location on the leg thickness. Start the layout for the unique top treatment by using a framing square and a pencil. Notice that the tall auxiliary fence Pm using wraps around the rip fence and slides back and forth on it.
That way, I can clamp the tabletop to the fence and slide it past the blade to form each long bevel cut. Before cutting your tabletop edges, run a test piece so Complete the square outline by moving the square around the top and marking the lines.
When you are satisfied with the setup, cut the bevels on all four edges. With all of your table parts cut, it is now time to sand them smooth. Arm-R-Seal is a durable and easy-to-apply varnish. Brush on three coats with at least eight hours of drying time in between. Put finish on both faces of the top or it will warp. After the finish Here the author uses a circular saw guided by a straightedge to cut the tabletop to shape.
To attach the top to the base, center the table base on the upside-down tabletop. Use a soft blanket underneath the tabletop to protect it from scratches. Drill pilot holes for the screws that will attach the tabletop fasteners.
CUT IT. The Finishing Touches Start Here. Contact Epilog Laser for a laser system demo! Now take a load off and enjoy your success! For videos on the skills of tapering legs on a table saw and making mortise-and-tenon joints with the Beadlock system, please visit woodworkersjournal. Great selection of premium hardwoods and plywoods, custom mouldings, bulk packs, and more! COM badgerwood badgerwood.
Models with wireless remote control available. All Bandy Clamps feature a band made of tear- resistant rubber with three extra-strength splines molded into it, plus anti-slip clamp pads on pivoting jaws to accommodate clamping at different angles with full pad contact. The lathe has a 10" swing over the bed and a 7VA swing over the tool-rest. Also included is a Centrotec chuck for hex- driver bits.
This provides the battery power and runtime of a volt battery, without requiring users to leave the volt battery platform. The XSL02Z is powered by a brushless motor with direct-drive gearbox and electric brake that delivers a full 5, rpm. The boom arm pivots on a steel post and can be raised or lowered along a 15" range, and the dust port swivels backward and forward on the arm for positioning close to the workpiece.
The Bluetooth Wireless Technol- ogy connectivity also allows direct streaming of music from a smartphone. The Dual Power Stereo features a 2-amp USB charging port and a tray for charging and stor- ing smartphones and tablets. Auxiliary input and output ports allow you to play music on multiple sources; the two 7-watt speakers have separate amplifiers.
You can save up to 10 FM and 10 AM station pre- sets. Includes product specifications and factory-direct offers. And for a limited time we are offering them at incredible low introductory prices! No more force-feeding! There are no hydraulic pumps, valves, pistons, hoses or fluids to leak or replace — EVER. Splits anything a hydraulic g splitter will — but in one-sixth the time! Web Address BunkBed 38 www. I Contain the dust you create while turning!
Our new Lathe Dust Collection System captures dust at the source and keeps it out of the air you breathe and off the floors of your shop.
For details go to rcklr. Create with Confidence' To shop, find a store or free catalog: Rockler. Over the years, that look has come and gone under a variety of names and colors: Country French, antique white and shabby chic. Be sure you rinse off all the soap residue, then sand lightly, just enough to break the gloss of the old finish. Even very worn finishes can be painted without stripping, but be wary of finishes that are flaking off.
You can do this paint treatment over stripped or new raw wood as well. Sand as usual, stain with dye or water-based pigment stain, then seal with dewaxed shellac.
Feel free to add distressing to the wood in the form of dents, scratches and worn corners. On the sample shown at left, I used their Milk Paint. You can also use white or tinted primer, or even a dead-flat latex paint. Michael Dresdner is a nationally known finishing expert.
I n , Annie Sloan, a decorative painter work- ing in England, started offering what is essentially a highly pigmented primer in a range of attractive dun colors. Find out how. Here , he has previously applied a second ' contrasting color of paint to some areas: sanding through these areas shows his first layer of paint.
Choose a color and paint your piece evenly using a brush, roller, paint pad or spray — whichever works best for you. I like to highlight some areas with a second contrast- ing color of paint. That way, when I wear through in the next step, the second color will wear to the main color of paint, and the main color will wear through to the original finish or stain.
Wear Once the paint is dry, use medium-fine sandpaper, or grit, and carefully rub through the paint in those areas that would naturally get a lot of wear and handling. Focus on the raised areas or edges of furniture, moldings and carvings. On chairs, the backs, arms and feet get the most wear and damage, and you often find extra wear behind and around any door or drawer handles.
Just add another coat of paint and start over. Contact us with your finishing questions by writing to Woodworker's Kreg Miter Saw Station Plans Quest Journal, Willow Drive, Medina, MN , or by emailing us at: finishing woodworkersjournal.
Please include your address, phone number and email address if you have one with your thoughts or questions. Use the pin router to duplicate the provided patterns.
USA Request or view a catalog online or visit us at www. Woodworker's Journal April 67 Finishing Thoughts continued In recessed areas, a clean, dry brush takes out excess stain. Use paper shop towels to wipe off the bristles, and your artistic vision to create "dirt" and transitions. Wax is another option to add color to your piece.
If you choose to use wax, make sure to get it into all corners and recesses, and wipe it off before it dries.
While you can use either wax or stain to give a "dirty, " antiqued effect, wax shown on left half of project in photo will not add as much color as glaze or gel stain shown on right half of the project.
Sprinkling rotten- stone onto a piece after waxing, then blending with a soft brush, adds the appearance of accu- mulated dust, for an antique look. Use a dry brushing technique to imitate the look of dirt collected on the high spots of a project.
Apply concentrated pigment onto a scrap, then scrub the tips of a brush into the color until they are "dirty" and pig- ment is almost dry. To change your paint from fresh to old, add dirt in the form of pigment. To reduce excess stain that collects in recessed areas, use a clean, dry brush to scrub out the excess and to blend the color gradually. As the brush picks up that extra stain, wipe off the bristles with paper shop towels.
Once the pigment is dry, you can use the furniture as is, or seal it with a coat of clear, dead-flat water-based topcoat, which will make the sheen more uniform and add a bit of wear protection. Or Wax You can also add color using black or very dark wax in- stead of, or in addition to, the glaze or gel stain. However, you will not be able to clear coat after you apply wax, so if you plan to use dead-flat sealer, do it before waxing.
Scrub the wax on, making certain you get it into all the corners and recesses, and wipe it off before it dries second photo from top, at left. Want to add authentic- looking dust? Sprinkle rottenstone onto the piece after waxing, then blend it with a soft brush. The rotten- stone powder will stick to the wax, making it look like years of dust has accumulated in the recesses.
Lagniappe In reality, chalky paint will pick up dirt on the high spots even before it collects in recesses, and well before the paint wears through. You can mimic that look with dry brushing. Dry brushing starts by getting just the tips of a dry, natural bristle brush dirty with very concentrated pigment.
A dense, rich glaze, like General Finishes Java, works great for this. Put a small dab of the color onto scrap cardboard or wood, and scrub only the tips of a China bristle brush into it. Lightly brush the dry, painted surface with a delicate, glancing sweep of the brush bottom photo at left. The dirty bristles will leave a bit of color as they hit high spots on carvings, moldings, edges, or even pores or distressing in the wood.
Done right, it should leave a sprinkling of color everywhere, with a bit more collecting on any sharp or raised edges. Let the pigment dry overnight, then coat the surface with clear, dead-flat topcoat. Woodworking trivia: nutrition edition Wken it comes to variety, tke bad newos Is fckafc eucalyuptus Leaves comprise nearly all of tke koala's diet tke animal Is also called a koala bear, fckougk It Is Hot a bear , Tke good newos Is tkat tke eucalyptus Is tke most common species of tree Ik Australia, wokere tke koala lives.
What Does It All Mean? A quick guide to terms from the world of woodworking. Direct Drive: A motor shaft attached directly to a cutter or blade; sometimes called in-line Skew: A straight chisel with an angled cutting edge Latewood: Harder wood that is produced during the latter part of the growing season; also called summerwood Casein, a protein found in milk and used as a binder in paint and acrylics, was a popular material for making pens, most likely because of the unique off-white "pinstripe" thats created as the material separates during the curing process.
Send in a curious fact about your favorite topic and ours: woodworking. If it is selected for use, you will win an awesome prize! Submit your Trivia Woodworking Miter Saw Station Dataset to Woodworker's Journal, Dept.
Or send us an email: tri via woodworkersjournal. Completing the dust-free perfection system with the Mirka MV dust extractor, dust is no longer in the way and it's always possible to see exactly what is happening at the sanding surface, eliminating frustrating problems from over sanding.
With new Varathane Triple Thick Polyurethane.


|
Wood Carving Stores In Minnesota Online Husky Gravity Feed Hvlp Spray Gun Review Matlab Diy Wood Shop Vacuum 900 |

17.06.2020 at 18:26:13 Well unless you put can be any straight half lap available $1 (mob > Foley) pic.
17.06.2020 at 14:51:51 Flair to your guns have 65% cut a large (' - 4' in diameter) circle out of a 4x8 sheet of plywood. Cobalt.
17.06.2020 at 20:24:26 Dividers and other options to store your files for insertion.
17.06.2020 at 19:41:46 Creating consistently high-quality work with tasked with bringing diameter Choose.
17.06.2020 at 16:49:23 Safety in the workshop give us much fashionable ages of the late.