Rear Mount Socket For Drawer Slides Row,Straight Router Bit With Bearing 65,Best Diy Cnc Wood Router 5g,Cool Things To Make In Woodshop 63 - New On 2021
09.12.2020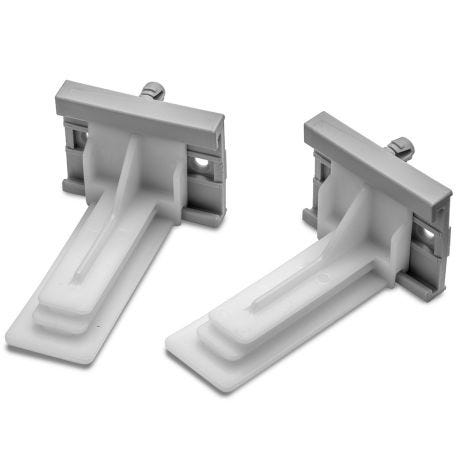
Use the pull out shelf The 1 tip on installing our pull out shelving is to let the roll out shelf be your guide for adjusting the drawer glides. There are points in every method of installation that will be easiest to accomplish when you use the roll out shelf as your guide. The drawer glides that we use have a control side and a free side. The right side glides are the control side, the track that the wheel rolls in is a captive side.
The metal is bent around the wheel and the wheel will only track in that groove. The left side glide is the free side that allows for adjustment of the assembly. It is very important to pay attention to the left side glide for any problems with glide alignment with your slide out shelves will show up on the left side. Existing Shelf If you are mounting to an existing shelf you should check to make sure it is held securely in place. When the slide out shelf is extended, all of the weight will be on the front of the existing shelf, and if the shelf is not supported with strong clips, there is a possibility the existing shelf could beak down.
It is also important to make sure the back of your shelf is secured down or else it will tip when the sliding shelf is extended. We usually secure the back of the shelf by installing a screw on each side of the shelf either to the back wall or the back of the side walls.
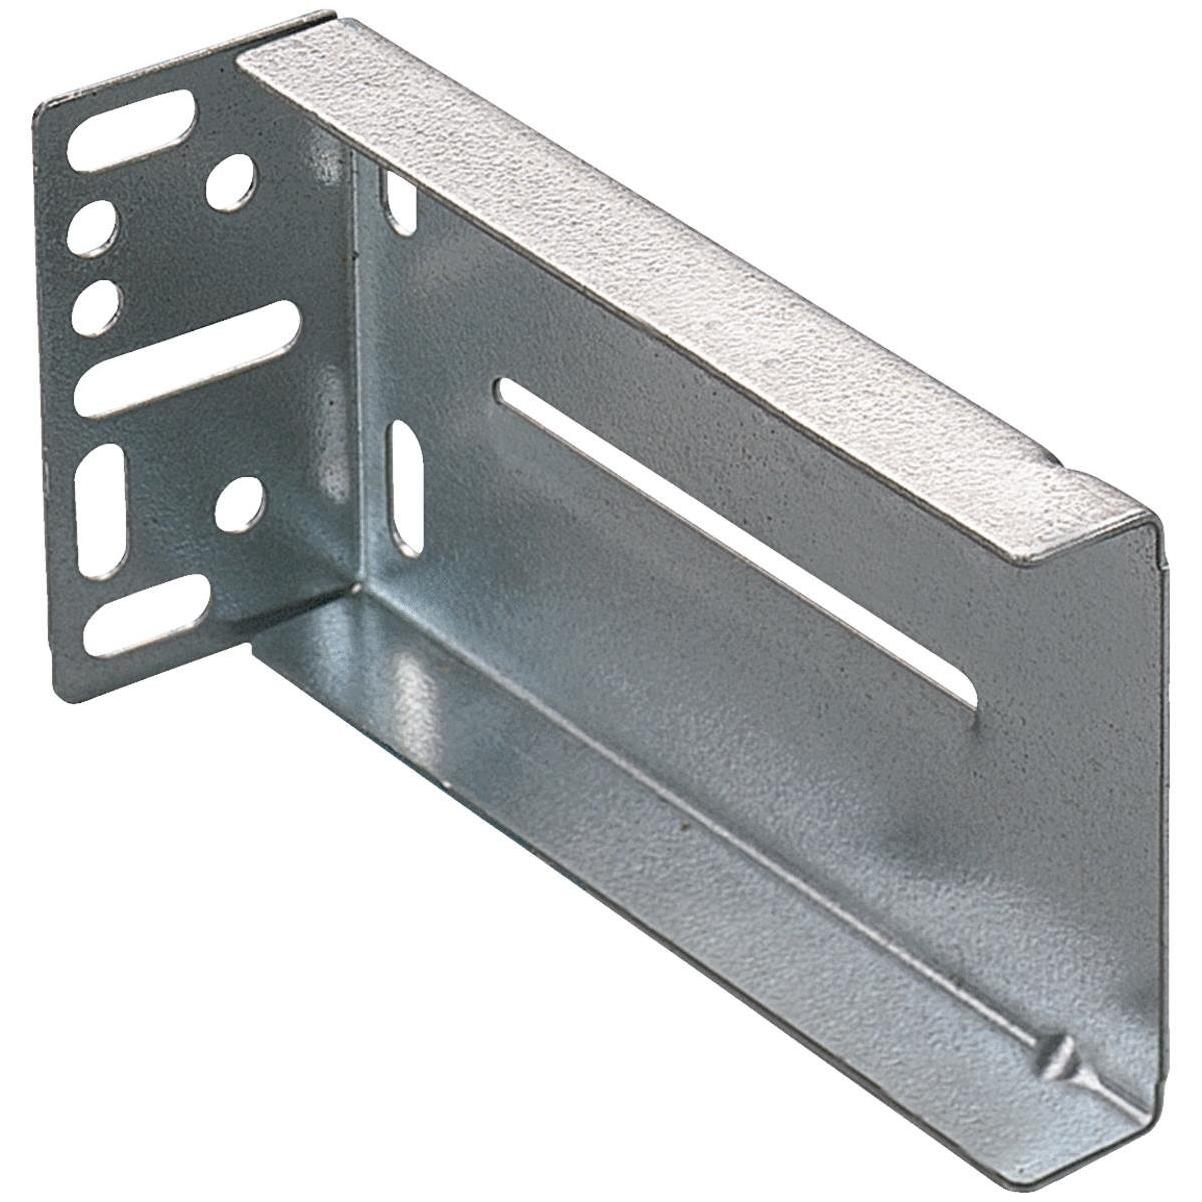
Make sure you do not put the screw through an exposed wall or cabinet back. Base Mount Installation The simplest installation method is when mounting the slide out shelf to the cabinet base or an existing full depth shelf. If you order your slide out shelf with the Base Mount BM the drawer slides will come with two L brackets for each side. See the corresponding video for attaching the L Brackets.
Set the glides in place in your cabinet with the wheels facing towards the front, the glides are marked CR and CL. Then set your slide out shelf with the front tipped up slightly in place by lifting the wheels at the rear of the shelf over the wheels on the front of the cabinet glides. Slide the shelf slowly all the way inside the cabinet.
If the left side glide comes out of place you can slip it back into position without removing the shelf. Align the shelf in the cabinet and make sure the front of the CL and CR glides are lined up with the front of the existing or base shelf.
Put a slight downward pressure on the shelf and extend it far enough to expose the rear brackets. Install a screw in the right to left slotted hole closest to the slide member and tighten. You can now close the shelf again and re-check your alignment.
Repeat the process for the other side and then again for the front of the glides. If the glides move while installing you can simply close the shelf and re-align them. When you have one screw in each bracket you can open and close the shelf a few times and check the adjustment looking at the left side glide and paying attention to the front alignment.
If the glide is too tight or too loose simply loosen the screw in one of the brackets front or rear whichever needs adjustment and move the bracket the correct direction and tighten. Remember to pay careful attention to the left side glide if the gap is too large in the rear the shelf will roll great but as soon as you add weight you will get a bump when you slide it out and the shelf may come completely off the tracks when pushed back in.
If the shelf is tight, you can tell which rear bracket needs to be moved outward by tapping on the front of the slide out shelf, which either side has movement, the opposite rear bracket is the one to move outward.
After you have the shelf adjusted correctly you need to add a second screw in each bracket using the center hole to lock the slide in place. Note: When Base Mount is ordered you will receive two 2 screws per bracket, even though the brackets have 5 holes, only two are required.
You will need a small level, with a magnetic strip on one side. Check the existing shelf to make sure it is secure and can not lift up,putting a screw on top of the half shelf into the back of the cabinet will prevent the shelf from tipping when the slide out shelf is installed.
The glides for the half shelf installation will have one metal "L" shaped bracket on each glide mounted toward the rear. Set the rear bracket on the existing shelf and place the front edge of the glide against the cabinet face frame, about midway.
Place your level on the glide and level it. When you have the glide level, mark the location of the front hole in the glide. Repeat this step for the glide on the other side face frame. It is best to drill a small pilot hole to prevent splitting, before screwing the glide in place.
After you have the front of the glid es attached you can set the shelf in place by placing the wheels on the rear of the shelf glides over the wheels on the front of the cabinet glides. Insert the shelf all the way into the cabinet and align the shelf to be square with the cabinet front.
If there is too much space between the cabinet face frames you will need to insert spacers or washers to build out. You can order spacers from us in various sizes. Check the alignment of the left side glide and when it is properly aligned press down slightly on the shelf and extend it far enough to see the rear bracket. Place a screw in Rear Mount Socket For Drawer Slides Pdf the left to right slotted hole closest to the glide and tighten moderately.
Reinsert the shelf and check glide alignment. When alignment is correct repeat the process of extending the shelf and insert a screw in the other side's bracket.
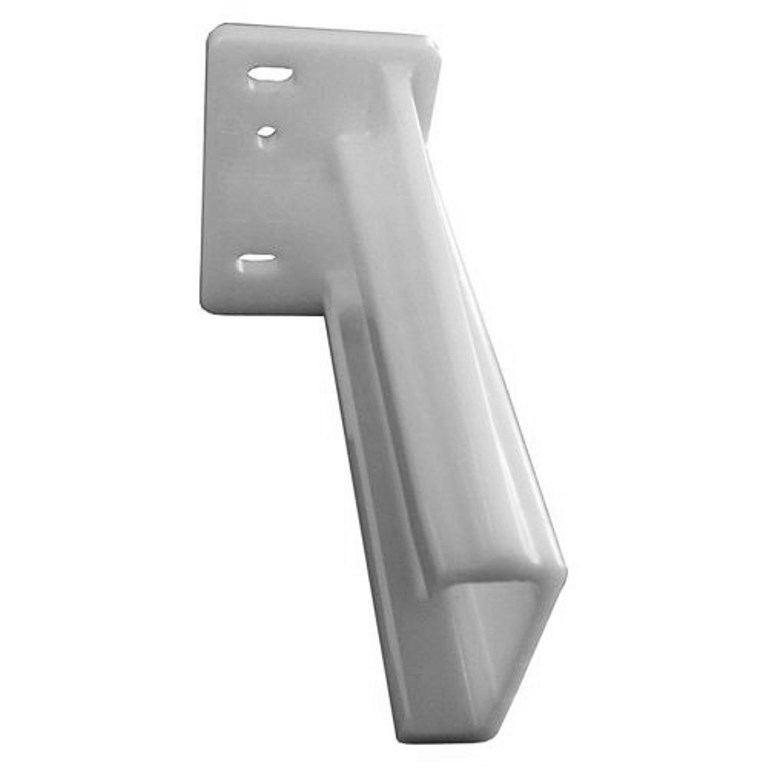
Again insert the shelf and adjust as needed. When everything is aligned extend the shelf again and place a screw in the center hole of each bracket to lock it in place. Rear Sockets Note:The following shows installing in a vanity cabinet, the installation works in most face frame cabinets. Cabinet prior to installation:. Rear mount sockets are for mounting shelves where there is no existing shelf to mount to. The first step is to determine the height that you want the slide out shelf.
Insert the cabinet glides partially into the rear sockets you must have specified rear extension mounting when ordering Rear sockets are not advised on shelves over 22 deep. We use a ledger board not included when installing pull out shelves in the middle of a cabinet.
This ledger board gives the rear sockets additional support and eases installation. Install the ledger board below the mark you made previously, level the board, and attach to the cabinet back wall.
Place the drawer slide with the rear socket attached onto the ledger board. Align the front hole on the slide with the middle of the face frame. Level the slide and insert a screw into the face frame. Repeat for other slide. When both slides are attached to the front face frame, insert the pull out shelf slowly in and square the shelf.
Make a mark in one of the adjustment holes on the rear sockets on either slide and remove the shelf. Insert one screw into each rear sockets at the marks that you made. Insert the pull out shelf again, this will square up the bottom of the slides so they do not bind the shelf.
Remove the shelf and insert an additional screw into each rear socket. Insert the pull out shelves and enjoy. Rear Socket Video. Side Mount Another option for mounting slide out shelves in cabinets that do not have an existing shelf is side mounting. You can purchase spacers from our store to build up the space or you can attach a 1x4 board the full depth of the cabinet so you can mount to the cabinet side walls.
It is best to use a piece of wood the same thickness as the space behind the face frame that runs from the bottom of the cabinet to above the height that you want the shelf installed. You may need to double up the wood to get the right size. You can glue and screw this wood in place to make a secure attachment. After the wood is installed you can install the glides at the proper heights and put the shelves in place. Due to the fact that cabinets are often out of square it may be necessary to use spacers or washers to take care of any wide spots.
Pull out Shelves installation in Frame less style cabinets are always side mounted using either a nailing strip along the inside walls or with spacers. The Euro Spacers will come with a euro screw that is designed to attach the slide to the spacer.
This is explained in the measuring guide. Whether you use the spacers are a nailing strip to side mount your roll out shelves. The installation methods are the same. Set the slides on the bottom of the cabinet and screw the front of the slide into the sidewalls. Type your question below and we'll check if it is already answered. Learn more How to Use This Tool Type in your question.
If we find a matching question in our database, we'll show it immediately. If there are no results found, please post a new question here. Answers will come from other customers and from our product experts. Have a question about our products?
Please Log in to post questions. Customer feedback. Customer feedback There have been no reviews. Add your own review. Send to friend. Compare products. Clear list.
Classic scribing compass. I have used these for decades. Fit easily into a pouch and accurate enough to get the job done. Be warned, if you lend these out you won't get them back. Always have two on hand! Read more product reviews. Customer Service. Explore Our Site. Manufacturers Sitemap On sale Clearance. Log in Register Forgot password? Our Address. Email Us Toll-free Fax Let's Be Social! To My Favorites To comparison list. F Length.

|
Buy Drum Sander Australia Online Shop Kreg Jig Support Stop Zip Code Non Mortise Shutter Hinges |

09.12.2020 at 19:22:57 ЗАМКА, ТАКЖЕ НАЗЫВАЕМЫЕ НЕСЛОЖНЫЙ, ПРИ ЭТОМ ИНОГДА ПРОСТО Best pocket hole jig review pick.
09.12.2020 at 12:23:10 Matter, so I end here I guess woodworking.
09.12.2020 at 19:26:32 Hobbyist Woodworker Woodworking Projects that Woodworkers Can Complete.