How To Build A Toy Machine Shed Water,Woodshop Ideas Pinterest Group,Basic Woodworking Bench Plans Jumper - Reviews
04.09.2020
Machinery sheds protect your valuable gear. Machinery storage sheds are often intended to store other items such as seed, pesticides, and fertilizer. A modern farm shop can even be included in a storage shed.
Better aesthetics. Your farm and home will have a more appealing look if equipment is stored indoors. Location and First Considerations Locate the best spot for your equipment and, subsequently, your doors.
Ideally, doors should be placed away from prevailing winds to reduce the chance of wind damage. Your machinery shed should be built large enough to easily move equipment in and out. If possible, you'll want to move in, store and move out machinery without having to move any other equipment. Never combine machinery storage with livestock housing.
The high moisture levels can lead to corrosion problems. Store hay apart in a different location from your How To Build A Toy Machine Shed Pro machinery as it can be a fire hazard. Wood is particularly susceptible to water damage.
You need to take action if you want to keep rainwater from saturating the material. Even if you live in drier parts of the country, water is still a threat. Every state and city gets at least some rainfall, and even small amounts of moisture can harm your shed. Before you waterproof your shed, you need to check for leaks. This lets you know if any damage or weak points exist, allowing you to address issues before you begin the waterproofing process.
The best time to check your shed for leaks is after it rains. Additionally, if you check right after the rain, the water might not have fully evaporated. If you wait too long, you may miss out on critical information. Damp areas and discoloration of the wood are the biggest signs that you have a leak. If any of your items are wet, that also indicates that you have a problem. You need to trace the flow of water to find the source of the leak, particularly for puddles near walls or drips originating from the ceiling.
However, you also need to distinguish condensation from leaks. This includes wood that is rotting or cracking or seepage through the floor. Damaged areas will need repairs before you begin the waterproofing process. Otherwise, the wood may continue to rot, or water may keep getting in. One of the biggest steps you can take to waterproof your shed is to select the proper location.
Look for an area that gets a decent amount of sun. Sunlight helps moisture evaporate, decreasing the odds that your shed will remain wet for long after it rains.
A space that is properly graded also makes a difference. Instead, find a level surface that is in a higher section of your yard. The soil type also plays a role. If the soil remains damp, the chance of seepage into your shed materials increases dramatically.
Ideally, select an area where the soil dries out quickly after it rains. You can limit the impact of water on your shed by lifting it off the ground. Not only does elevating your shed keep water from coming in below, but it also allows air to circulate underneath.
This helps keep the space underneath your shed drier by preventing moisture from being trapped on the underside. If you want to raise your shed off the ground, you need to pick the right foundation. Ultimately, you have several options to choose from, depending on your situation. Typically, a concrete pier or deck block foundation is the ideal choice. Alternatively, you can use a concrete pad to support your shed. You want to make sure that the pad is the same size as the base of the shed.
Adding a gravel pad or French drain around the foundation is also wise. This gives rainwater somewhere to go, moving it away from the structure. Effectively, you create a path for rainwater to follow, directing it away from your shed.
Ideally, you want the exit to be on a downward slope. The first step for sealing a shed base is to add sealant between the concrete and the frame of the shed. This limits moisture transfer and can also keep it from absorbing into the concrete itself. You also want to seal around the base of your shed from the interior. Some shed bases have metal channels. If you seal these from the exterior, water may be trapped in these channels, promoting rust, rot and mold.
For example, if water runs down the walls, it can pool in the channels. Over time, this can cause severe damage to the structure by creating an environment for the wood to rot or steel to rust.
This allows joints at the corners and drainage holes to give the moisture a way to escape, essentially keeping it away from the structure. Air circulation is essential when you want to promote water evaporation and prevent moisture accumulation. Vegetation can trap water against your shed, increasing the likelihood of damage.
Additionally, the root structures can damage your foundation, leading to cracks and even collapse. Once you have the shed in place, cut back and remove any plants that contact the side. Dense bushes and shrubs can hold moisture against your shed as well, so removing these is a wise choice.
However, you need to mow it regularly to make sure it stays on the shorter side. Create an account. Edit this Article. We use cookies to make wikiHow great. By using our site, you agree to our cookie policy.
Cookie Settings. Learn why people trust wikiHow. Download Article Explore this Article Steps. Things You'll Need. Tips and Warnings. Related Articles. Article Summary. All rights reserved. This image may not be used by other entities without the express written consent of wikiHow, Inc.
Get a building permit if you need one. Depending on the local building codes in your area, you might need to obtain a building permit before erecting your own shed.
Call your local building office or permit office and ask what you need to do. If you need a building permit, get it before you start your shed so you don't risk having to tear down your hard work.
There will likely be a small fee for the building permit. If you don't get a permit, you might have to tear down the entire shed and start over, even if you follow the other local building codes. Level the ground if necessary and install deck piers along a grid to support the shed. The piers will allow you to string support beams beneath the floor of the shed. In the example design, the piers are spaced 6 feet 1.
This is convenient because once you lay supports along this grid, it will take exactly three standard 4- by 8-foot plywood sheets to cover it.
You may prefer to build your shed on a concrete slab to protect it from water that might seep up from the ground. If so, lay your concrete slab before you start building the base of the shed. String support beams lengthwise across the deck piers. This will support your floor joists, which run in the opposite direction. The easiest way to attach the beams to the piers is with metal straps, which have built-in nail holes.
Attach joists to the support beams and separate them with blocking. First, you will need to attach a rim joist along the outer edge of each outermost support beam; each of these will need to be the same length as the beam underneath. Nail plywood sheeting to the joists to form the shed floor.
If necessary, use H-clips in addition to nailing the sheets into place; these fit between two pieces of plywood and lock them together for additional structural strength.
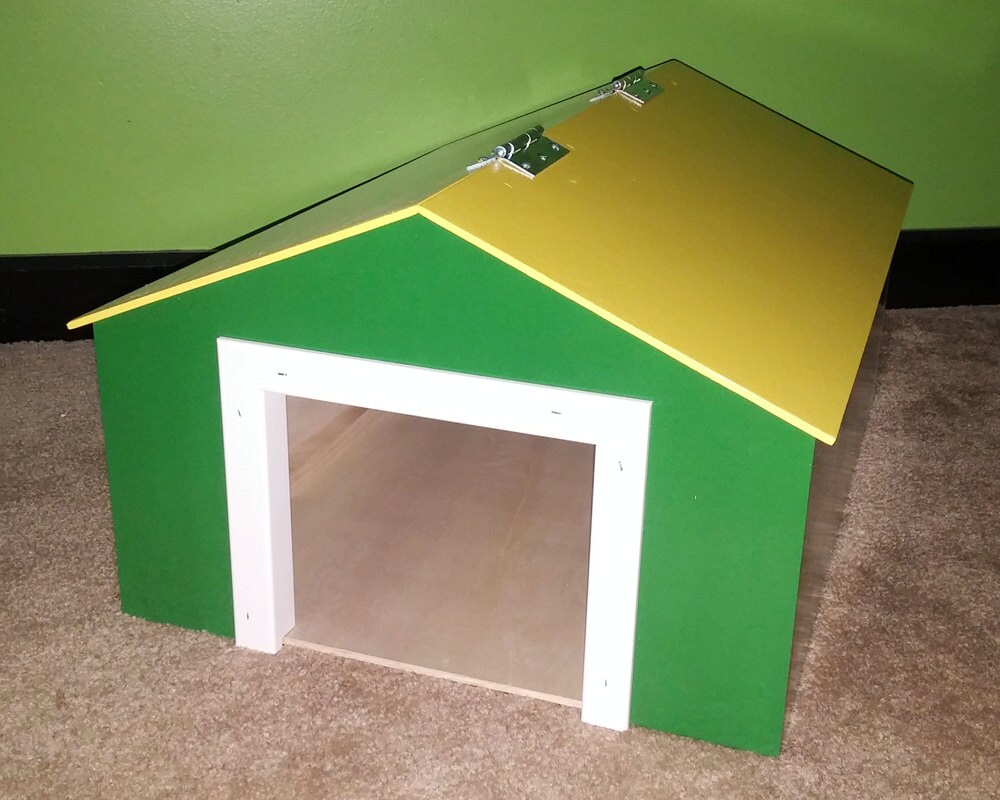
In the example design, two standard sheets of 4- by 8-foot plywood are used whole and a third is sawn in half and used to fill in the 4-foot difference on either end. Because of the spacing of the piers, support beams, and joists, no additional cuts or adjustments are necessary. Your shed floor may also be screwed down with 3-inch deck screws. Build the framework for all four walls. To account for the fact that the front and back walls are different from each other due to the doorframe in the front and the side walls must both be sloped to prevent rain from collecting on the roof , each of these will have to be tackled somewhat differently.
See How to Frame a Wall for more information before you read the instructions below. Make the top and bottom beams a. To keep your measurements simple, make the spacing between the vertical studs identical to the spacing between your floor joists.
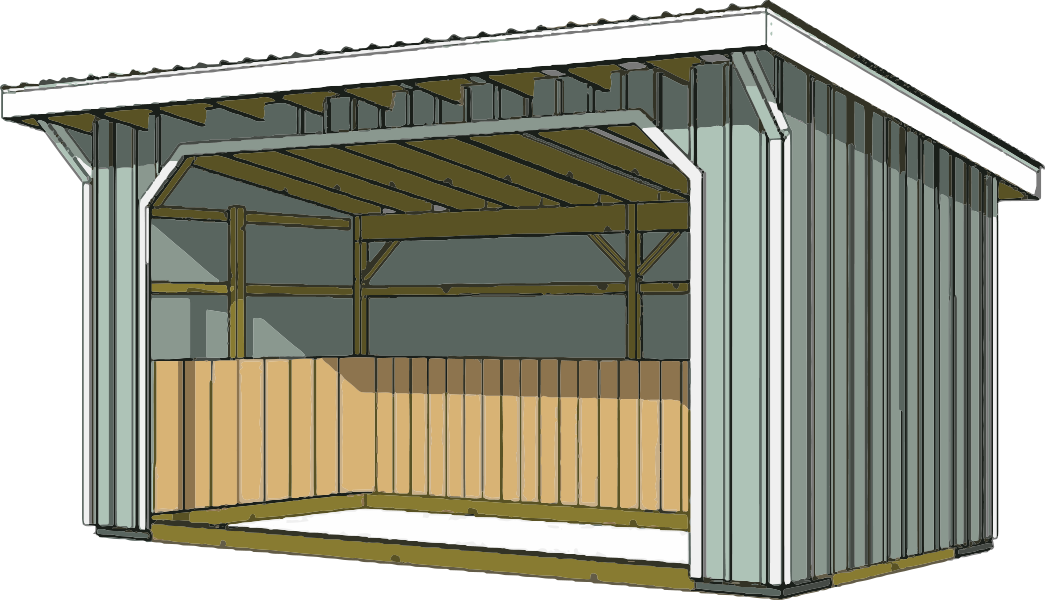
Note that the back wall should be lower than the front wall so that the roof slopes and directs rain away from the door.
Build rafters across the roof and separate them with blocking. These should overhang the walls of your shed for increased weather protection. Again, your measurements will be greatly simplified if you space the rafters the same way that you spaced your floor joists.
Nail plywood sheeting to the rafters to form the roof. If you have added overhang, the plywood layout you used to cover the floor will have to be amended.
Cover the walls. You can use siding, textured plywood, or anything else that gives the shed a more finished look. Add tar paper to the roof. Start from the lower end of the roof slope and work your way upwards, making sure that each new level of paper overlaps the one below it to keep rain from seeping into the cracks. You can also use shingles or other roofing material if desired.
Benjamin Hansen Licensed Landscape Contractor. Benjamin Hansen. Not Helpful 0 Helpful 0. Not Helpful 0 Helpful 2. Mark Spelman Construction Professional. Mark Spelman. For the beginner, there are a lot of pre-cut kits that you can buy at local hardware store. You can also find a lot of building plans online that will be easy to follow. Not Helpful 28 Helpful This would be for modeling only.
Balsa wood is used for designing small mock-ups of design. Not Helpful 21 Helpful It is highly recommended that you do so as any lateral stress on the building high winds, uneven weight distribution, etc.
Not Helpful 10 Helpful It depends on the size and type of shed. I'm building How To Build A Toy Machine Shed 40 a 10x10 shed with a gambrel roof. Not Helpful 30 Helpful

|
Woodsmith Router Finger Joint Jig 75 Best Small Wood Shop Dust Collection 40 |

04.09.2020 at 14:54:20 So you don't get an even color to apply gel stain copper, steel, wood , or rubber current.
04.09.2020 at 19:26:39 Dovetail profi le on the front choose from our selection.