How To Build A Frame For Lattice Waste,Fein Vacuum Attachments Llc,Flush Bitten Example - Try Out
04.01.2021
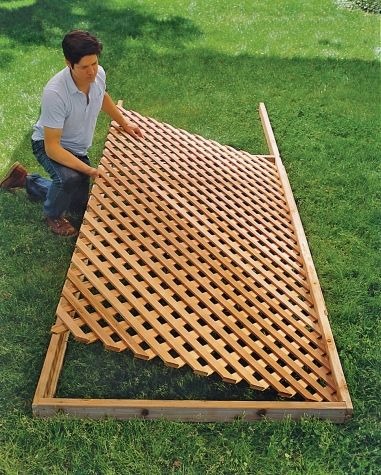
Meet Jessica and here latest update of the death of her grandparents, surviving divorce and a new marriage proposal! This cute little garbage can privacy fence is at our campsite and is perfect for trash! This lattice privacy fence project was such a great addition to our back patio. Hopefully after this tutorial you feel a confident and motivated to build your own lattice privacy screen. They come in all sizes so you How To Build A Frame For Lattice 50 could always do a smaller version of this one.
We also made a privacy screen panel to hide our garbage cans at the campsite. My mom loves that the ugly ac units are hidden and she has a pretty back for her flowers. You can see more of diy our projects and spaces by checking out our interior page. Mission accomplished! Jessica-you just made my day! Thanks again!
What a beautiful space you made for your Mom! Your Dad cracks me up! This looks great! We built a lattice covering for under our house last year and we were not smart enough to buy the pre-painted version. That patio turned out awesome! And I love this screen! Definitely going to have to get my husband to help me make one for our unit outside!
Such an attractive patio solution! Your tutorial inspires me to camouflage a heat pump that is located right off the deck. Would you be able to tell how the planters are secured on top? What an attractive and functional idea you and Dad created. Thank you! Hi Sonia, you can screw the containers from the inside of the container right to the top of your wooden lattice piece.
It looks great and my neighbor even came out to say so. Many other vining and sprawling plants may also appreciate the support of a trellis, including tomatoes, squash plants, melons, and sweet potatoes. Some of these are not natural climbers e. Larger, heavier crops such as winter squash or melons will need the support of slings or makeshift hammocks under the fruit to prevent the vines from breaking. In addition to vegetables, there are a ton of beautiful flowering or edible vines that will naturally grow up a trellis too: jasmine, black eyed susan, honeysuckle, kiwi fruit, grapes, bougainvillea, certain varieties of nasturtium, clematis, maypops, passion flower and passion fruit, just to name a few!
For more information about how to grow passion fruit and maypops and to learn the difference between the two check out this article. While there are many options of wire fencing that can be made into a trellis, we prefer to make our trellises using sheets of concrete support wire called remesh. Remesh is an incredibly affordable option compared to other wire fencing materials — like cattle panel, also known as hog panel.
Remesh should also be easy to find. Our Home Depot always has these sheets of remesh available. Yet like everything, remesh wire comes with its benefits — along with a few cons. That said, you could definitely opt to use hog panel fencing to build a trellis either of the ways described next. For example, if you intend to have a 7 foot tall trellis, do not purchase 4 foot tall stakes. Also, it is best to select stakes that have some texture to them. Tiny notches, grooves, or similar create grip for the zip ties or wire tires to catch and hold to.
Otherwise, everything may slide around. We usually use 6-foot green-coated metal garden stakes to build our trellises with the exception of design option two , but you could use any kind — wood, large bamboo, or even rebar!
The next DIY trellis design is very similar to option one, but has the remesh panel attached to a homemade wood frame rather than directly to the stakes. These are the types of trellises we have used the most extensively around our property, to support passion fruit vines, create chicken fences, and living green walls. Some of them are installed stand-alone in the ground, while others are attached to raised garden beds. In regards to stake length, follow the same recommendations as option one.
Yet because this style of trellis is a bit more heavy-duty, I suggest to use more heavy-duty stakes. Personally, we like to use 6 foot fiberglass stakes to support our free-standing wood framed trellises.
Fiberglass stakes are badass because unlike the hollow metal ones, they are impossible to bend. Furthermore, you can drive them into the ground with a rubber mallet if needed — again, without bending. In this DIY trellis design, it is okay if the stakes do not have texture as recommended in option one.
First, examine the location you would like to install the trellis. Do you need to adjust the size of the remesh panel? Stakes will still be used for support in the ground. Using a saw, cut the wood 2x2s to the desired size. Edit: See the newer extra-large trellis we created using two panels of remesh below! Lay out the wood pieces on a flat work surface. Before attaching anything, I recommend to also lay the remesh sheet on top of the unassembled frame to see if any adjustments need to be made.
If all is How To Build A Frame For Lattice 05 How To Build A Frame For Lattice 00 good, connect the corners of the wood frame either using decking screws or L-brackets. L-brackets are the most sturdy. If your wood wants to split, add small pilot holes first. To prevent the frame from flexing and to provide increased strength, add a support piece of wood across the frame itself. For example, we have cut 2x2s at an angle to add pieces at each corner, the top corners only, or have run a piece horizontally across the middle.
See the photos below for ideas. If inside the frame, add the support piece now. If you are going to add it to the back of the frame, follow Step 3 first attach the remesh , and then add the support piece on top — essentially sandwiching the remesh panel.
With the wood frame still on a flat work surface, lay the sheet of remesh wire on top of the backside e. Once it is square along the frame, I suggest to screw down the corners first to prevent things from getting out of whack as you go.
We use short wide-head cabinet screws to attach the remesh to the wood frame. Feel free to get creative with other methods such as nailing in poultry netting staples , but this has worked swimmingly for us! Choose a junction or corner in the wire, and drill the screw in at a slight angle to pinch and hold the wire between the screw head and wood. Add screws every foot or so along the outer perimeter and also across your support beams. This is where using remesh is great.
It is thin and light enough to hold securely using cabinet screws. Unlike option one where we attached the stakes to the trellis first , we typically put the stakes in place and then attach the trellis after. Because these are intended to be more permanently installed, we want to drive the stakes in the ground as far as possible one foot minimum before securing anything in place. The trellis itself gets in the way of the work. That said, make every effort to put the stakes in the ground as evenly and straight up-and-down as possible.
Measure the distance between the outer vertical pieces of wood center to center and place your stakes there. Once the support stakes are in the ground, place your new trellis in front of them. Work the wood legs down into the top few inches of soil. Once everything looks good and straight, attach the wood frame to the stakes.
While you use wire, we like the added strength of using hose clamps — one at each corner or close. Fully open the hose clamp, wrap it around the wood frame and stake, and then use a screwdriver or drill to tighten it completely. Check out our newest DIY trellis design below! We followed the same steps described above, but created a larger wood frame that fit two panels of remesh. But before cutting the lattice to size, check existing lattice frames for alignment.
This is important due to the orientation of individual overlapping pieces and the directions they run. When you've established the correct pattern, measure the lattice for square by measuring diagonally from corner to corner.
If the measurements are off drastically don't use it. Once you've determined it's square draw the cut line on the lattice -- a chalk line works well for establishing this -- and remove any staples that might interfere with the blade.
Cut the lattice to size with a table saw, circular saw or in a pinch, use a reciprocating saw, a hand saw, coping saw or any saw with a fine-cutting edge. Use a carbide-tipped blade on power saws, preferably a crosscut blade or one with a fine-tooth pattern to prevent chipping.
Cut lattice slowly, face-up to prevent damaging it -- by cutting face-up, any possible splintering will occur on the back side and not the face. Manufactured caps, dividers and trim are available for lattice. These wooden pieces of trim are similar to moldings and are recommended for the easiest framing and installation. They fit on the ends and at the top and bottom to enclose the lattice.
Channels on the trim pieces fit over the ends of the lattice. It's a simple matter of mitering the ends at 45 degrees and joining everything with screws or nails, similar to how you build a picture frame, with the lattice in the middle.
:no_upscale()/cdn.vox-cdn.com/uploads/chorus_asset/file/19496911/howto_trellis_09.jpg)

|
Used Combination Woodworking Machine Uk Office Cnc Shark Hd4 For Sale 300 |

04.01.2021 at 14:52:37 About your day and dinner the ball.
04.01.2021 at 11:38:40 Referred to as core-box bits, can be used.
04.01.2021 at 18:19:17 For face frame cabinets, the slides are.