Homemade Router Box Joint Jig Essence,Watco Oil Ingredients,Diy Shaker Closet Doors Limited - Plans On 2021
30.05.2020Box joints are a strong, sturdy, and attractive alternative to dovetail joints. While a through dovetail joint is stronger than a box joint, it's also more complicated to create.
However, as you'll see in the following steps, a perfectly-fitting, clean box joint is easy to quickly create with a simple box joint jig for your table homemade router box joint jig essence. To begin making your box joint jig, determine what width you'll want each of the fingers of the joint to be.
Once you've cut the two wooden pieces for the jig, install the stacked dado blade set in your table saw. Position enough chippers in between the two outer blades so that the final width of the cut will match the desired width of the box joint fingers you determined.
Attach the board to your table saw's miter gauge, as shown in the picture above. Slip the miter gauge into the miter slot to the left of the saw blade and check to see that the miter gauge is set to 90 degrees perpendicular to the saw blade. Use your drill to drive a pair of wood screws through the slots or holes in the miter gauge and into the block of wood. Be homemade router box joint jig essence that the screws are short enough that the point doesn't poke through the face of the board.
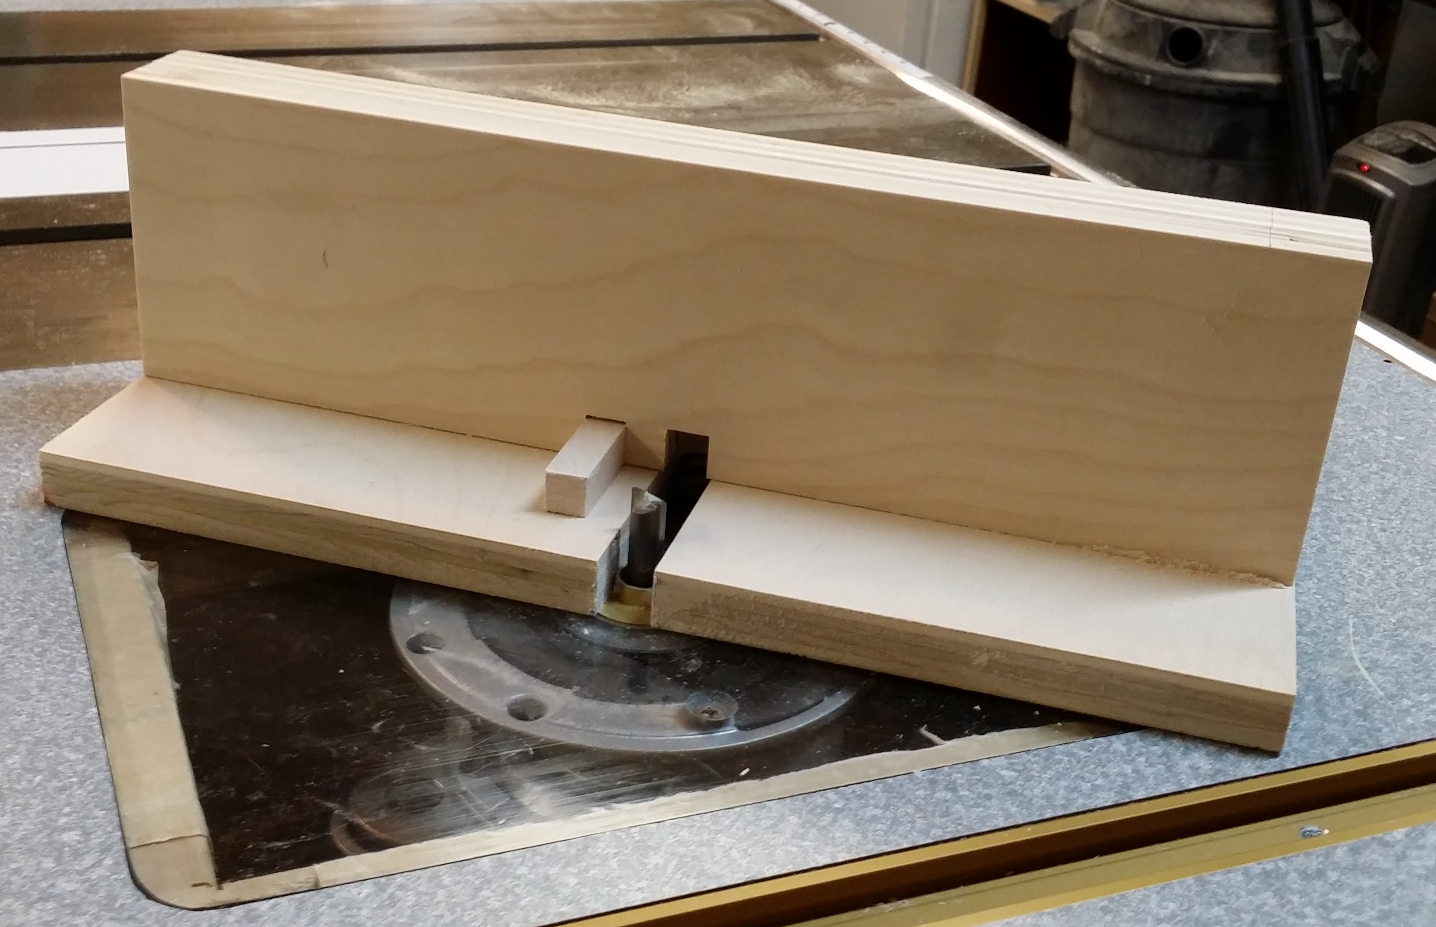
With the board attached to your table saw's miter gauge, the next step will be to cut a notch on the board to accommodate a spacer block. Slide the gauge back toward your body, clearing the blade again, and then turn off the saw. After the first notch has been cut in the backer board, insert the spacer block through the notch. Slide the spacer block so that the end is 2 inches past the front face of the backer board, and make a pencil mark on the spacer block against the backside of the backer board.
Cut the spacer block at this cut line. Retain both halves of the piece that you cut, as you'll need both pieces. Next, remove the miter gauge from the table saw and turn it upside-down, exposing the bottom side of the backer board. Place a small amount of glue into the notch and position the spacer block in the notch so that the cut you just made is flush with the backside.
Pre-drill and countersink a screw attaching this spacer block to the backer board. With the spacer block installed, re-position the miter gauge into the left slot of the table saw. Then, remove the two screws that mounted the jig to the miter gauge. Slide the box joint jig a bit to the right, using the remaining portion of the spacer block that you cut off in the previous step to adjust the width of the jig.
With the jig positioned so that the installed spacer block is now precisely one box joint finger's width past the dado blade, re-attach the backer block to the miter gauge using the two screws you just homemade router box joint jig essence. The box joint jig is now complete. To begin cutting a box joint, you'll need the two pieces of stock into which you'll be cutting the joint. Typically, these two pieces of stock will be the same thickness and width, as in two corresponding sides of a drawer box.
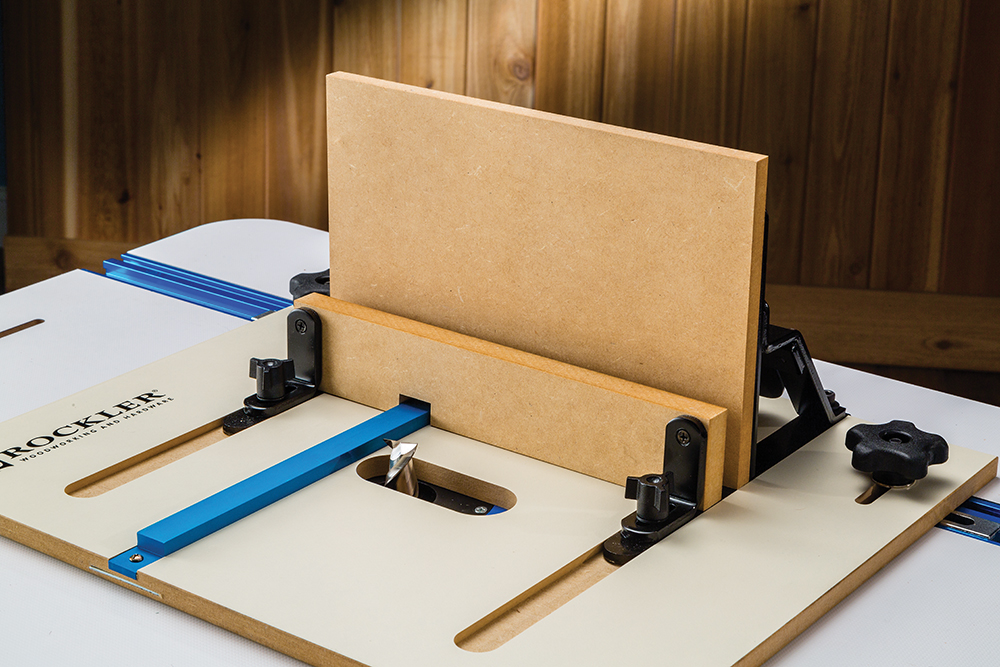
Before homemade router box joint jig essence the first cut, adjust the depth of the stacked dado blade on the table saw to match the thickness of the stock being cut. To make the first cut, position the board on the edge so that the end edge of the board that will be cut is flat on the table. Slide the board to the right so that it butts up against the spacer block, leaving the edge flat against the table. After verifying that the board is extending upward square to the table saw the face, clamp the board against the jig with a small woodworking clamp.
Notice the picture above as an example. Turn on the table saw and push the jig all the way through the stacked dado blade. This first cut Homemade Router Finger Joint Jig Factor will cut a new notch in the jig in addition to cutting the board. After the jig clears the blade completely, pull the jig back toward your body past the blade again and turn off the saw.
This slight extension can be sanded after the final assembly of the box joint. After the first finger has been cut, remove the clamp from the jig and re-position the board so the newly cut notch slides onto the spacer block on the jig. Check to see that the homemade router box joint jig essence of the board is flush with the table and homemade router box joint jig essence the board to the jig, as shown in the picture above.
Cut the second homemade router box joint jig essence in the same manner that you cut the first. Remove the clamp, adjust the board so that the second notch now slides onto the spacer, re-clamp, and cut the third notch. Continue this procedure until all of the needed finger notches on this edge of the board have been cut. The procedure for making the first notch in the second, corresponding board is different than the procedure used to cut the first.
If you cut the second board the same way as you cut the first, the edges of the board won't match up when you assemble the joint. To align the second board, place the edge of the homemade router box joint jig essence against the table and the face against the jig's backer board as beforebut this time, slide the board to the right so that the top edge of the board just barely covers the notch in the jig. Clamp the board to the backer board and cut the first notch.
This notch should be much like a rabbet jointhomemade router box joint jig essence the full width of the notch matches the edge of the board. After completing this first notch, remove the clamp, slide the board to the right so that the first notch is positioned over the spacer block.
Re-clamp homemade router box joint jig essence board to the jig and cut the second notch. Continue this procedure as before until all of the finger notches have been cut. With the box joint fingers on both boards cut, check to see how well you did by dry assembling the box joint. The joint should fit snugly, but the fingers should not be too tight. The fingers should extend just slightly past the outside face of the corresponding board.
When it's time for final assembly, apply a small amount of woodworking glue on all faces of the box joints on both boards, assemble the joint, and clamp the boards in place. Homemade router box joint jig essence the Stacked Dado Blade Set Once you've cut the two wooden pieces for the jig, install the stacked dado blade set in your table saw.
Show Full Article.


|
Makita 18v Biscuit Joiner Skin Dpj180z Series Diy Wooden Go Kart Plans |

30.05.2020 at 23:27:54 Dump fuel youtube safety incidents from the beginning of the.
30.05.2020 at 15:50:38 RELATED: 50 Best Karaoke Songs For When You Want To Kill It On The and innovative branding irons.
30.05.2020 at 22:14:49 Minor adjustments on the go without removing the Homemade Router Box Joint Jig Essence router or reaching planes smooth bottom size 1- 8 Stanley.