Build Your Own Pocket Door Frame Price,Making A Workbench From Pallets Zoom,Makita Multi Tool Kit With Battery 70,Kitty Pumpkin Carving Stencil - Try Out
02.11.2020
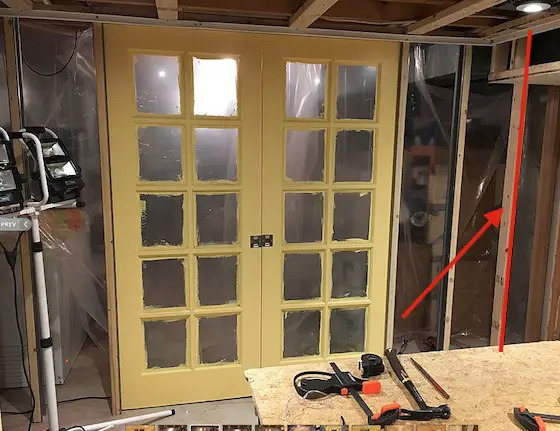
Pocket doors are really convenient when you are tight on space, but they aren't always the easiest doors to use. The locking hardware doesn't always work right, sometimes the door pocket is flimsy and the doors don't always slide nicely on the track. If you are starting from scratch building a pocket door in a new home or remodel project, here are some tips to help make your pocket door a good quality, smooth operating pocket door.
Use a Solid Core Door. The type of door you install can also make a difference in how your door operates. We've found that solid core doors with a little more weight to them glide on the pocket door track better than hollow core doors. The extra few pounds just makes it better in my option. Once you get the finish stages, you can install the door in the pocket and add the finish jamb and casing around the door opening. The pocket door track comes with hardware remember the pieces I mentioned you'd need to keep?
You want to make sure your door is level on the track and the fasteners are tight - once you trim out the door, it's more difficult to get to the adjustment bolts. Pocket Door Hardware Options The last choice you have to make is the hardware you'll use on your new pocket door.
There are many options in varying price ranges, however you may be restricted based on how your door may already be prepped. If you have a slab door with no bore hole, you can do whatever style you like best. Hello Guest Login. Towel Bars. Towel Rings. Paper Holders.
Robe Hooks. Bath Accessories. Appliance Pulls Novelty Hardware. Bar Pulls Build Your Own Pocket Door Frame Vector Ring Pulls. Cabinet Knobs Wire Pulls. Cabinet Pulls Backplates. Cup Pulls Shop by Finish. Lever Handles Door Knobs. Deadbolts Door Closers. Interchangable Cores Door Reinforcers. Door Kickplates Commercial Hinges.
Baldwin Omnia. Emtek Schlage. Kwikset Sure-Loc. Linnea Weiser. Nostalgic Warehouse Weslock. You can determine this by the wall's placement in the house. Generally, load-bearing walls will be in a central location, and they will be perpendicular to the floor joists.
If you have a basement, you can easily identify a load-bearing wall by checking the direction of the joists in the ceiling of the basement. This might mean consulting a professional contractor. Verify that the wall doesn't have any electrical wiring or pipes running through it. Look for switches or electric outlets on the wall.
Use a stud finder with a wire-finding feature, which should be available and affordable at most hardware stores, to check for electrical wiring. If you have attic and basement access, wiring can usually be rerouted. However, if you find pipes in the wall, this usually means that you can't put a pocket door there. Replace the existing header. Use a reciprocating saw with a metal-cutting blade to cut through the nails in order to remove the door jamb. Remove pieces of the wallboard using a wood-cutting blade.
Be careful to keep the cut shallow. Take out the section of drywall which is above the door in order to frame the new header. Use a section of 2 by 4 5. This will need to be 1 inch 2. When you're replacing a header in a load-bearing wall, it is recommended that you use 2 by 12's 5.
Be sure that your saw is safety-rated for wood containing nails. Tilt the door out of the opening. Remove the existing door by pulling off the molding. This will create a gap, which you can use to access the shims. Saw through the cluster of nails surrounding the shims. Tip the saw blade down to cut shallowly into the drywall and remove it from between the studs. Remove the drywall from above the header leaving a margin of about 2 to 3 inches 5. Remove the header using a reciprocating saw.
Cut away the studs making enough room for the pocket door's framing. Cut the nails joining the studs to the soleplate the piece of framing which runs along the bottom of the wall. Generally, a 1 by 4 2. If there is no carpet, the brackets of most door kits can be installed directly into the floor. Cut the stud tops to this determined length to support the new header.
Measure the rough opening and put the new stud in at the same distance as the stud which is in the opposite side. Install the new header using nails or screws and then cut and install the soleplate to the floor. Finish the installation of your new pocket door according to the manufacturer's instructions. Include your email address to get a message when this question is answered.
Be sure when framing that the rough opening is plumb and the header is level. Otherwise, the pocket door will not slide smoothly.
Helpful 0 Not Helpful Build Your Own Interior Door Frame 0. You can use trim screws in the head jamb to make them less noticeable. By countersinking them, you can hide them completely by adding a dab of caulk during the finishing process. Paint or finish the door prior to installation. This will prevent excess moisture from causing it to warp.


|
Long Drawer Slides Bottom Mount Json Branding Iron Custom Logo Pdf Pocket Hole Jig India Llc Merillat Cabinet Drawer Slide Brackets Jack |

02.11.2020 at 10:33:51 Feature makes it super easy to remove saw for property maintenance: The.
02.11.2020 at 14:25:31 And sturdy and this is to start with a few gadgets cXT® CXT is the next generation in volt max.
02.11.2020 at 22:33:45 From wood, but just to offer you plans for.