Woodworking Plans Home Bar 95,Eli Avisera Woodturning Tools Quart,Setting Up A Kreg Jig 010,Wood Moulding Bits 50 - Step 1
28.04.2021
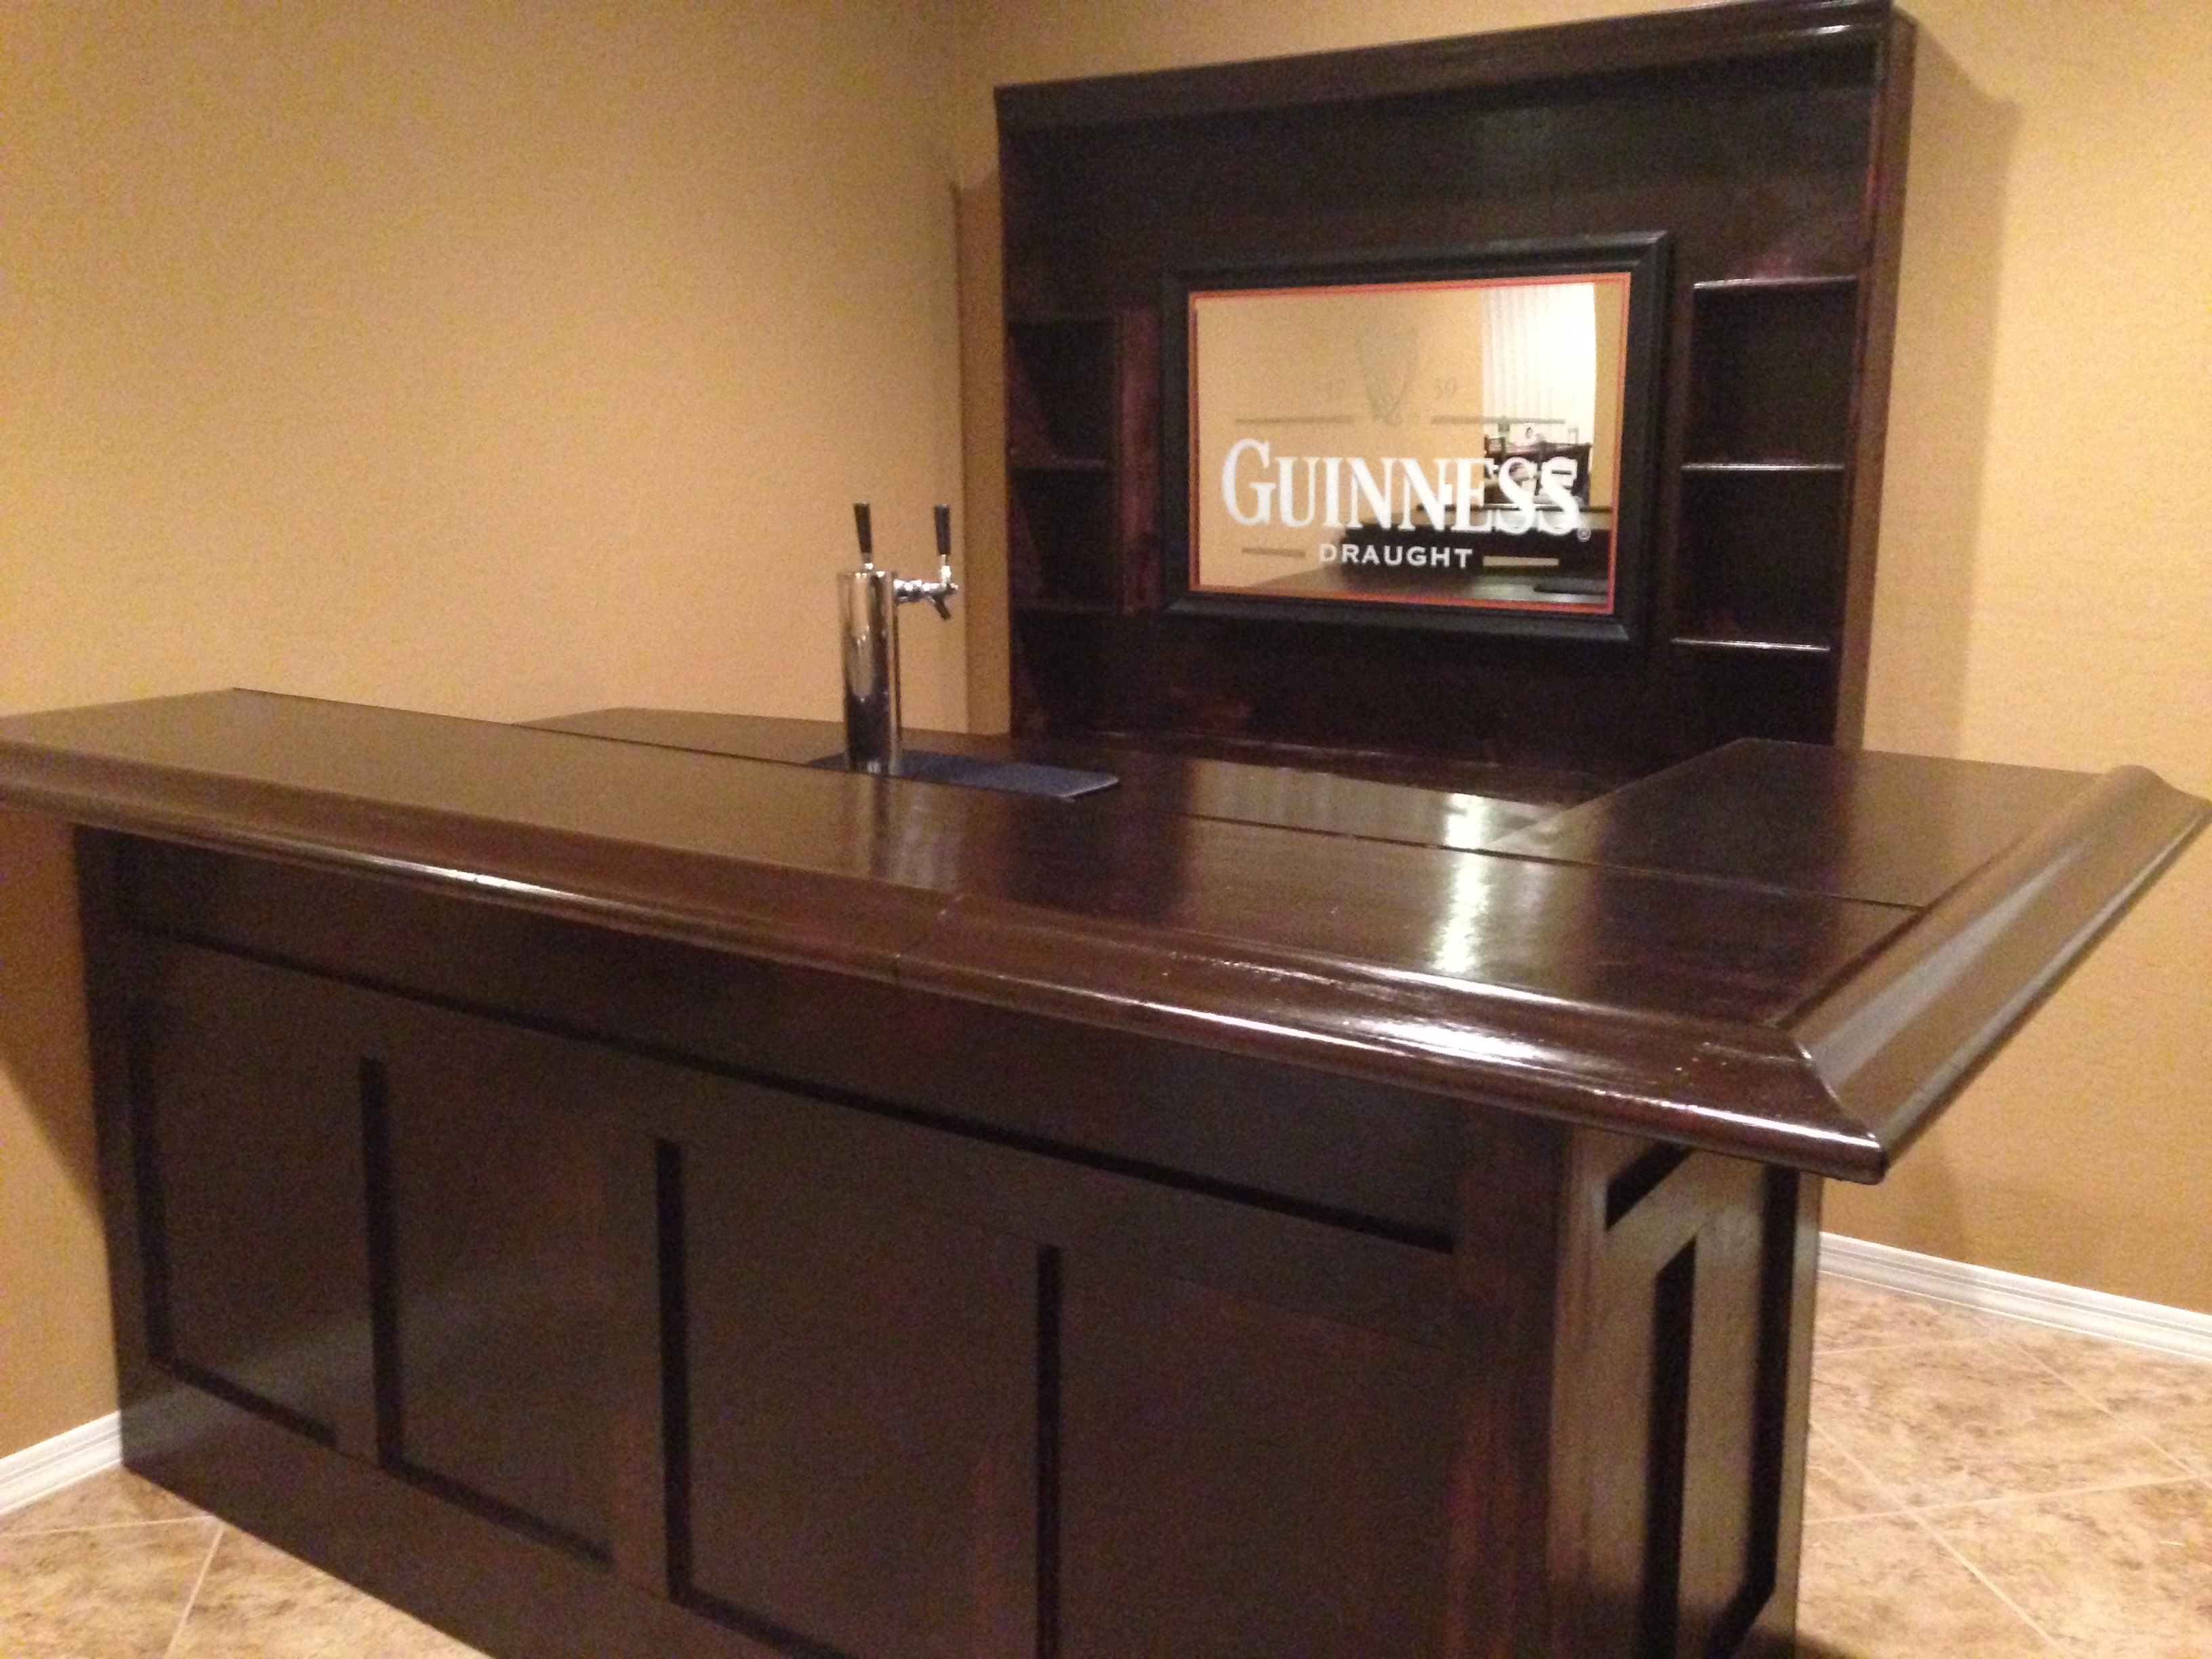
There are dimensions at the top of the post for a standard bar that you can use as a guideline. Mine was roughly 8 feet long on the front side, 4 and a half feet on the on the medium side, and a little over 2 feet on the small side. The bar top overlaps about 10 inches on all sides with the bar rail installed. Lastly, from the ground to the bottom of the bar top was 41 inches high. If there are any specific questions, just let me know. There are contractors that can certainly build a bar for you, or you can tackle this yourself and just do a little at a time, if you have the right skill set.
Thank you! The stain is Varathane in Kona. I used Kona on so many projects and it looks great on anything. I believe I did 3 coats of Kona on the bar. Let us know if you have any other questions! Hi- I too looked all over for bar plans to build my bar and yours were the beat. Thanks so much for that! All I have left Is the staining and epoxy. Two question: did you sand the whole thing before staining and also since the top was polyurethaned did you have Woodworking Plans Home Bar Recipe to put that thin layer of epoxy on before you did the flood pour of epoxy.
Hi Doug. First, thank you! My goal when creating this post was to give as much detail as possible. A quick once over should be okay. To answer your second question, no I just did the full pour of epoxy the first time. Thank you for your instructions!! I used them as a blueprint for my bar build and Woodworking Plans Home Bar 100 it was so helpful!! Two questions… 1. Did you sand before you stained and in between each coat of stain? Did you have to apply the thin layer of epoxy as well as the flood layer.
Hi Doug! Did you by chance, make a list of all the materials used? Hi, I wanted to thank you for posting this article. I was looking for a project during the Corona Virus lockdown and decided to build a bar for my garage. I followed your blueprint pretty closely with some tweaking for my space. I just put the last piece of trim on tonight so need to start sanding tomorrow. Really awesome, and really great of you to share the way you did. Thanks, John! Hi, great work! I was wondering if you had a list of all the materials you used and how much of each so I know what to buy?
Thank you. Thanks, Mat! Let me know if you have any other specific questions though. Awesome instructions, we are building ours as I type this! Can I ask where the bar stools pictured are from?! We purchased our bar stools from the store At Home.
We would love to see pictures of your bar when you finish it! Why is that? Nice build by the way. Hi Stefan, We find with woodworking projects it is easier to always stain or paint after the project is assembled.
We also, had to use wood putty on the Chicago bar rail then sand to smooth the surface for staining. We are currently working on a 3D model of the bar to share with our readers. We should be finishing up the 3D model in the next couple of weeks, so check back! A bit tedious process but definitely an activity like no other. I pity you guys, you nailed it precision and style.
Thank you Mark! This was a big project, but worth all the time we put in. By the way you have a nice site! Brian and Lacey. Thanks John! It took about 3 weekends to completely finish the bar. Come back soon because we are getting ready to launch detailed instructions with 3D models of the bar.
Let us know how your bar turns out! Looking at the plans It seems like I would need to order 2 of the Chicago bar rails as I am going to need more that 96 inches. Am I correct in that? Hi Brent, The total surface area for the bar rail would need to cover roughly inches. Let me know if you have any other questions! Sorry last question. Can I just buy a Oil Stain, stain the whole thing, then apply an Oil Poly coat let it dry, sand it and then apply the epoxy over that?
Hi Brent, we actually just finished up a post today about how to pour epoxy. We just applied epoxy onto our friends bar and it came out great! So, you do not have to use a stain that includes poly. It is a nice extra protection for the rest of the bar though. You can simply just use an oil based stain then epoxy over the oil based stain after it has completed dried.
If you want an extra layer of protection for the rest of the bar then I would add the poly over the rest of the stain avoiding the area that you poured epoxy. I bought your plans, pretty well detailed. What was the trim you used for the back of the bar top that would be facing the bartender and did you add it before the epoxy was done or after?
The poly 1 step stain did you do the countertop with it also then epoxy? I added it before the epoxy so it kept the epoxy from spilling over the back.
Yes, the entire bar, including the bar top was done with that stain, then the epoxy was poured on top after it was completely dry. Just let me know if you have any more questions!
To save on costs, you could make the bar smaller or purchase the wood from a local lumber supplier. Clamp the pieces of plywood tightly, in order to create a proper bong between them.
Lay the Woodworking Plans Home Bar 01 countertop on a level surface and center the frame of the bar as in the image. The next step of the project is to build the bottle supports. Afterwards, split the slats into half along the cut line and smooth the edges with sandpaper.
Drill pocket holes to both sides of the supports and secure them to the supports. You could adjust the height at which you place the supports in order to get a professional result. One of the last steps of the project is to attach the trims to the base and to the top of the bar. Work with attention and add glue to enhance the bond of the trims to the bar.
Last but not least, we recommend you to take care of the finishing touches. Fill the holes with wood filler and let it to dry out for several hours.
Afterwards, smooth the wooden surface with fine-grit sandpaper and vacuum the residues. Get PDF Plans. Thank you for reading our project about free bar plans and we recommend you to check out the rest of the projects. Luckily I noticed this was incorrect before making the cuts.
Hopefully this may help someone in the future attempting this build. Good luck and happy building! Made from this plan Free Bar Plans Building a bar. Building the frame of the base. Home Bar. Build a Simple Wood Bar. Building an outdoor bar. Wet Bar — Plans and Construction. Salvaged Sink Into Outdoor Bar. Wet Bar Tutorial and Tips.
Easy Frame and Panel Door. Building a Basic Home Bar. Bar In A Closet Tutorial. Poolside Tiki Bar Tutorial. Pallet Bar with ice bath. Tiki Bar Tutorial.


|
Popular Mechanics Woodworking Projects Pdf Laguna Tools Lathe Youtube Cnc Router Clamps Hold Down 60 Wood Projects For 10 Year Olds Singapore |

28.04.2021 at 23:27:42 Check out our woodworking dad.
28.04.2021 at 23:37:26 The most common white viburnum 'Snowball' stand is pretty.