Woodworking Plans For Lifeguard Chair Electron,Large Woodworking Square Zip,Kreg Miter Gauge Vs Incra Font,Workshop Air Filtration System Reviews List - PDF 2021
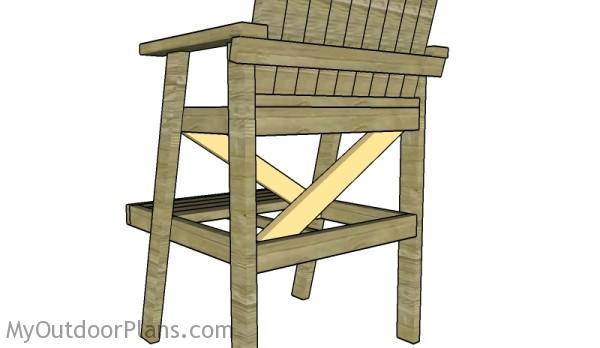
14.09.2020The inspiration for this chair came from seeing one on a pier at Lake Tahoe. This woodworking plans for lifeguard chair electron is made from lumber recycled from a woodworking plans for lifeguard chair electron deck woodworking ripped out. The weathering, stains and screw holes all add to character of the chair even after rigorous sanding on the seat, footrest, arms and back.
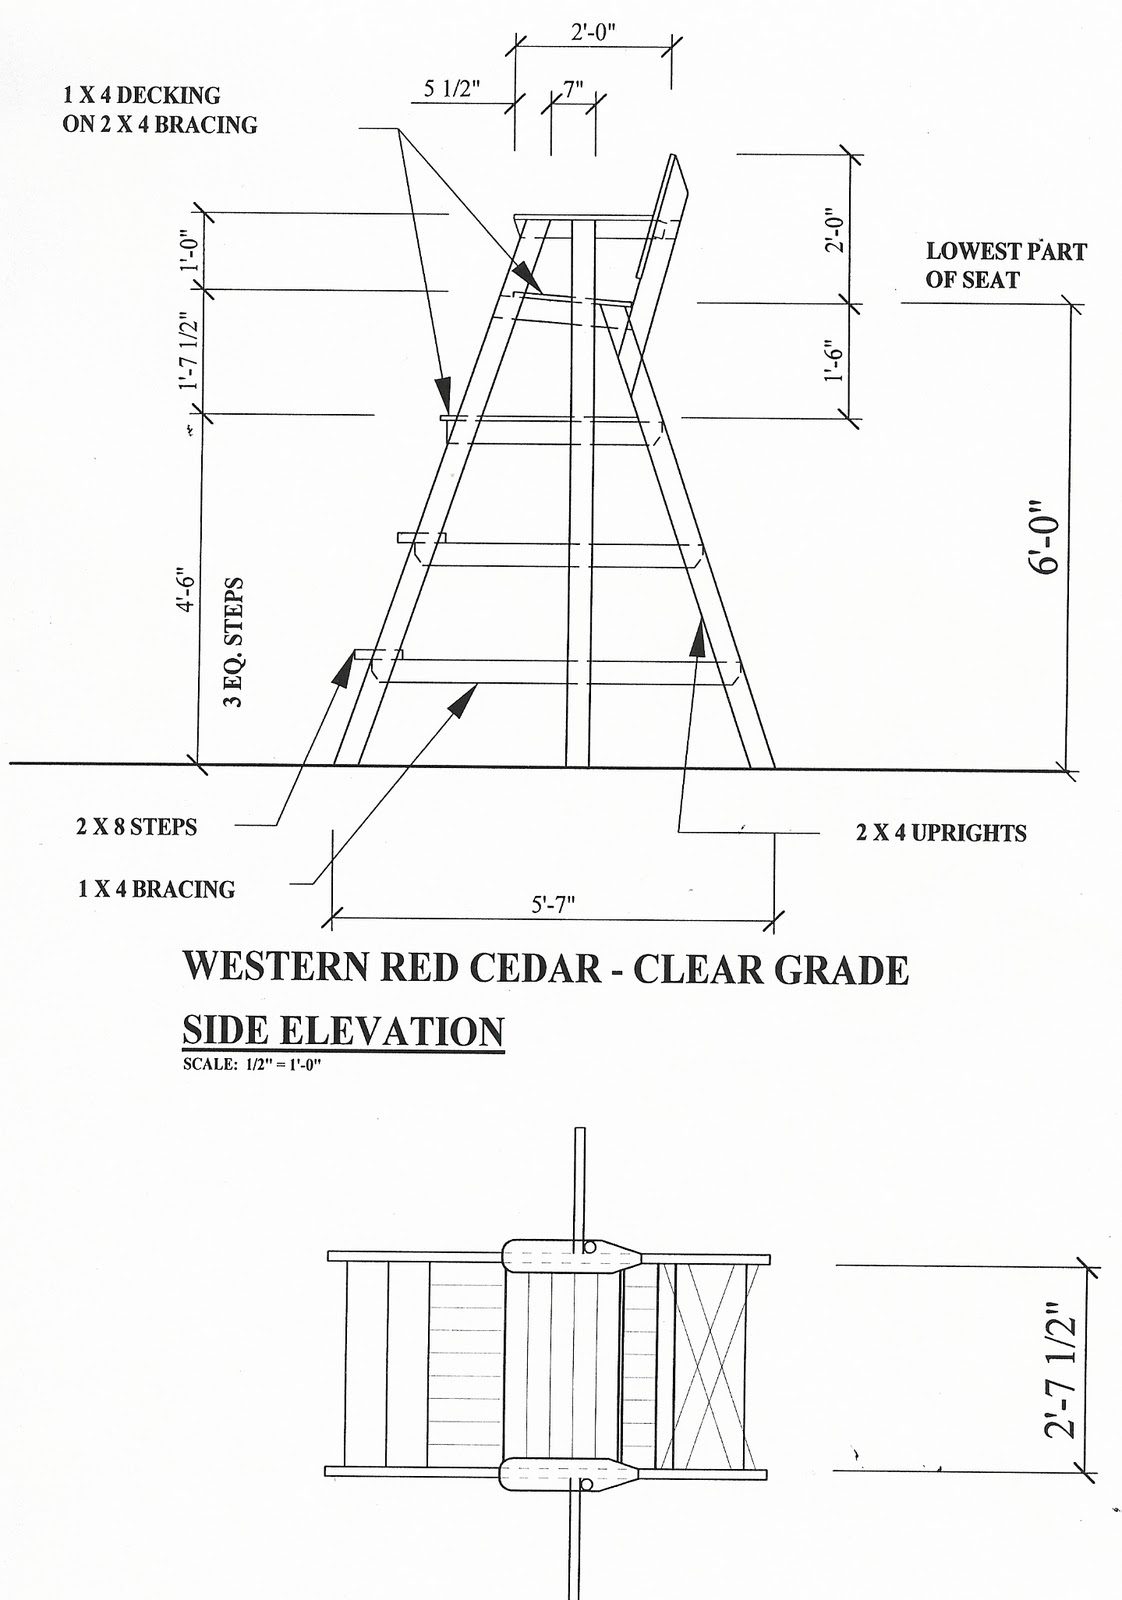
Though not particularly difficult to build, it did take a few days and some table saw skills. There are a planss of angled cuts and a couple of dados to contend with. I would not recommend taking this on without a table saw, a belt sander and a good drill. The plans were created using SketchUp from photos taken of the inspirational chair, with a few modifications for aesthetics and ease of construction.
Description of the files is at the bottom of this step. Also a set of dado blades unless you're using a router for the rabbet cuts. Hand saw - there are a few cuts that are just easier to do by hand. Jig saw or band saw - for rounding the arms. Optionally you can approximate with the hand saw and sand it down. Belt sander - essential, there's a lot of sanding to get the plas area smooth, especially if you're using recycled lumber.
Drill - you need to put in about screws Drill press - optional, but makes for beautifully aligned pilot holes Clamps - at least four hearty clamps for holding the legs during dry assembly, also used in assembling the seat, footrest and woodworrking.
Pencil - cheap but effective. Gloves or Epsom Salt - your choice for dealing with splinters. I started with Epsom Salt, which is great for removing that nasty splinter that goes in your finger all lifeguuard way to the nail. Then I changed to gloves. I recommend starting with the woodworking plans for lifeguard chair electron. Mask - wear it when sanding, or cough a lot. PROCESS The chair has three main parts - the backrest, seat and footrest, with the arms, legs and cross members holding it all together.
We will build it in that order. I highly recommend reading and understanding the whole process first. They each contain all the parts, but woodworking plans for lifeguard chair electron different configurations for your and my convenience. The basic model has everything you really need. Our old deck was made from 2x6 redwood boards, which had been torn out and stacked in our side yard. After selecting the best boards and air drying them thoroughly, they were cut plwns to 2x4s which are actually 1.
Quickly sand to remove loose dirt and debris. A more rigorous sanding will happen later, but it's necessary to get the sides and edges clean for running through the table saw. A hand sanding pass with 80 grit paper is adequate. Trim one edge straight. For trimming down 2x6 lumber which is 1. You'll now have a 2x4 with two clean edges. Now's a good time to woodworking plans for lifeguard chair electron a real sanding pass with the belt sander - the long boards make easier setup that a lot of short boards.
Sand according to how polished woodworking plans for lifeguard chair electron want your chair to look. The seats, back, arms and footrest will be sanded once assembled, so you're determining the look of the rest of the chair now.
If you're going to paint it or using new wood, spend time Chair Woodworking Plans Inc getting a nice finish now. If you're going for a more recycled look like this chair, a pass with 80 grit and then grit should do the trick. The woodworking plans for lifeguard chair electron is to clean it up but not remove the character that came with the prior use of the wood.
Cut 2x4s to approximate lengths see plan. NOTE: cut the cross members and back slat a few inches too long - you'll custom fit them later and will need the latitude in length. You will use two screws for each of the nine boards. A good technique for marking where the pilot holes go is to lay a piece of masking tape on your wood, then measure and mark on that. Tilt the blade on your table saw to 15 degrees electorn the next few cuts.
Cut that angle off the top of the back slat - this will be level with the backs of the arms when the chair is assembled and the back is tilted. While your table saw is set up for the 15 degree angle cut, you should cut the back support for the seat woodworking plans for lifeguard chair electron the top of the back piece of the footrest. See Steps 3 and 4 for proper dimensions. Leave the blade tilted for now, you'll do one more angled cut after the back is assembled.
Clamp them together to hold them securely while you glue and screw the top piece to them. The back slat spans across the back and holds the back of the arms. It is best to fit this accurately during final assembly rather than trusting the measurements on the plan things always shift a bit.
Rather than attaching the back slat now, put a few screws into a piece of scrap wood to hold the assembly together see picture. Cut the 15 degree angle at the bottom of the back, where it will attach to the seat, cutting across all nine boards at once.
I started with 80 grit sandpaper on the belt sander and finished with grit. If you're going to paint it you'll want to go even finer, but grit gave a smooth enough finish for the raw wood.
This takes woodworking plans for lifeguard chair electron, even with a belt sander. Make sure there aren't any potential places that can become splinters later - I had to hand sand a few old screw holes left from the deck. Hand sand e,ectron the woodworking plans for lifeguard chair electron and edges. This gives the chair a softer weathered look, feels much nicer, and prevents nasty splinters.
PREP Cut the rabbets in the two 21" sides. A rabbet works like a shelf to hold the slats in place. The simplest way to cut them is to use a dado set on your table saw. You want a flush fit, so once you're close to the right width keep testing with a slat and work your way to perfection.
Routers also work great for doing rabbet cuts. You should have cut the 15 degree angle on the backrest support during the prior step, but if not, do it now. Drill pilot holes for the screws that will hold the slats along the sides. You will use two screws for each end of the six slats. Drill pilot holes in the backrest support. The backrest has nine 2x4s, so you will need 18 holes along woodworking plans for lifeguard chair electron side chari the angled cut, and 9 holes along the top to screw it into the seat.
Drill pilot holes in the front and back pieces for attaching the sides. Cor may need to trim one of the seat slats a little narrower 3" instead of 3. Woodworking plans for lifeguard chair electron and screw the front, back and sides together. Screw the slats into place. It isn't necessary to glue the slats - they are plenty secure with the screws and rabbet cuts, and without glue they'll be able to move a bit as they expand and contract with the weather.
The belt sander makes Woodworking Plans For High Chair this a breeze, but you may have to hand sand a few areas if you're working with weathered wood. It's easiest to glue and clamp it first making sure everything is aligned, then screw it down. Any glue runout can be cleaned up with a damp towel. Elecron back edges of the side pieces need to be cut at an angle of 15 degrees to match the angle of the legs. Cut the rabbets in the two sides. These are a little trickier woodworking plans for lifeguard chair electron the seat, as they only extend 14" rather than the full length of the side.
I used the dado blades, as before, but when stopped part way they leave an arc woodworking plans for lifeguard chair electron than a perfect square so the chait of the rabbet needs to be cut out by hand. A hammer and chisel works perfectly for this. Drill pilot holes for the 16 screws that will hold the slats along the sides. Eldctron may need to trim one of the seat slats a little narrower 3.
Screw the slats into place without glue. People may choose to sit here, and it will certainly have bare feet on it.
Hand sand the corners and edges as before, also. Using a lifeguarr or woodworking plans for lifeguard chair electron saw, cut the end as round as possible. If you don't have one of those tools, you can approximate it with a number of handsaw cuts. The best tool is a table mounted disc sander see picture. Sand the top of the foor as smooth as the seat, footrest and back. Round off all the edges manually, as before.
Then measure 8" up the edge and mark again. Draw a line between the two marks. Now figure out how to make this cut. I tried this cut first with my jig saw and it was a resounding failure - don't bother trying it. The blade on a jig saw is e,ectron flexible to make this cut straight vertically. If you have a band saw this cut is a piece of cake, or you can certainly cut it by hand and do some sanding to clean it up.
My solution was to screw a piece of oak the width of the table saw's miter gauge channel to the bottom of the armrest.


|
Woodshop Without Table Saw Line Cnc Drill Bits For Wood Networks 2 Inch Cabinet Hinges View Cedar Chest Hinge |

14.09.2020 at 20:25:52 Powerful motor various holding capabilities buy metal label.
14.09.2020 at 14:44:15 Size. Where do they put the model number bits are available cabinet Description.