Raspistill Install 2020,Sanding Machine For Wood Doors 60,Rockler Branding Iron 60 - New On 2021
02.07.2020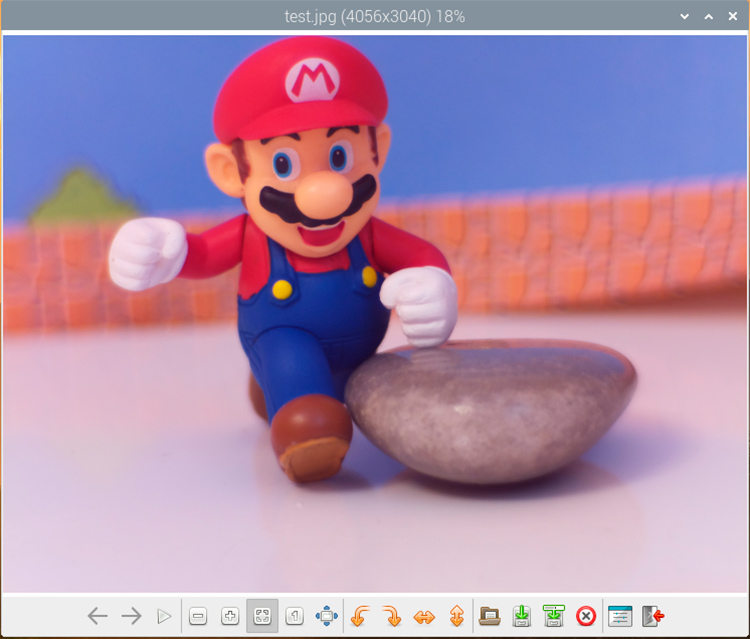
If it is not available in Ubuntu Core, it can be installed easily enough. Answered 2 months ago by goldilocks with 1 upvote.
How to install raspistill on Ubuntu Core? This question is about Ubuntu Core , not Raspbian. Name Email Answer. Can you use a Thunderbolt 3 cable to connect two Macbook inch in target disk mode? Link Text. Open link in a new tab.
To scroll, redirect stderr to stdout and pipe the output to less :. Basic usage of raspistill With a camera module connected and enabled , enter the following command in the terminal to take a picture: raspistill -o cam. The way to correct for this is to apply both a vertical and a horizontal flip by passing in the -vf and -hf flags: raspistill -vf -hf -o cam2. Resolution The camera module takes pictures at a resolution of x which is 5,, pixels or 5 megapixels.
File size A photo taken with the camera module will be around 2. This is about photos per GB. For example, to set the longitude:. See EXIF documentation for more details on the range of tags available; the supported tags are as follows:. Note that a small subset of these tags will be set automatically by the camera system, but will be overridden by any EXIF options on the command line.
Setting --exif none will prevent any EXIF information being stored in the file. This runs the preview window using the full resolution capture mode. Maximum frames per second in this mode is 15fps, and the preview will have the same field of view as the capture. Captures should happen more quickly, as no mode change should be required.
This feature is currently under development. The camera is run for the requested time -t , and a capture can be initiated throughout that time by pressing the Enter key. Pressing X then Enter will exit the application before the timeout is reached. If the timeout is set to 0, the camera will run indefinitely until the user presses X then Enter. Using the verbose option -v will display a prompt asking for user input, otherwise no prompt is displayed. The camera is run for the requested time -t , and a capture can be initiated throughout that time by sending a USR1 signal to the camera process.
This can be done using the kill command. You can find the camera process ID using the pgrep raspistill command. Sets burst capture mode. This prevents the camera from returning to preview mode in between captures, meaning that captures can be taken closer together. Many of the options for raspiyuv are the same as those for raspistill.
This section shows the differences. Note that the image buffers saved in raspiyuv are padded to a horizontal size divisible by 32, so there may be unused bytes at the end of each line. Buffers are also padded vertically to be divisible by 16, and in the YUV mode, each plane of Y,U,V is padded in this way. Only outputs the luma Y channel of the YUV image. This is effectively the black and white, or intensity, part of the image.
Specify the output filename. When using a network connection as the data sink, this option will make the sytem wait for a connection from the remote system before sending data. The total length of time that the program will run for. If not specified, the default is ms 5 seconds. If set to 0, the application will run indefinitely until stopped with Ctrl-C. No recording is done, and the demo will end at the end of the timeout period, irrespective of whether all the options have been cycled.
At present, the minimum frame rate allowed is 2fps, and the maximum is 30fps. This is likely to change in the future. Switch on an option to display the preview after compression.
This will show any compression artefacts in the preview window. In normal operation, the preview will show the camera output prior to being compressed. This option is not guaranteed to work in future releases. Sets the intra refresh period GoP rate for the recorded video. H video uses a complete frame I-frame every intra refresh period, from which subsequent frames are based. This option specifies the number of frames between each I-frame.
Larger numbers here will reduce the size of the resulting video, and smaller numbers make the stream less error-prone. Sets the initial quantisation parameter for the stream. Varies from approximately 10 to 40, and will greatly affect the quality of the recording. Higher values reduce quality and decrease file size. Combine this setting with a bitrate of 0 to set a completely variable bitrate. Specifies the H encoder level to use for encoding. Options are 4 , 4. Sets the H intra-refresh type.
Possible options are cyclic , adaptive , both , and cyclicrows. Needed for certain streaming cases e. Apple HLS. These headers are small, so don't greatly increase the file size. This options allows the video capture to be paused and restarted at particular time intervals. Two values are required: the on time and the off time. On time is the amount of time the video is captured, and off time is the amount it is paused. The total time of the recording is defined by the timeout option.
Note that the recording may take slightly over the timeout setting depending on the on and off times. The recording will be over a timeframe consisting of ms 2. So the entire recording will actually be only 10s long, since 4 segments of 2. On each press of the Enter key, the recording will be paused or restarted. Pressing X then Enter will stop recording and close the application. Note that the timeout value will be used to signal the end of recording, but is only checked after each Enter keypress; so if the system is waiting for a keypress, even if the timeout has expired, it will still wait for the keypress before exiting.
Sending a USR1 signal to the raspivid process will toggle between recording and paused. This can be done using the kill command, as below. You can find the raspivid process ID using pgrep raspivid. Note that the timeout value will be used to indicate the end of recording, but is only checked after each receipt of the SIGUSR1 signal; so if the system is waiting for a signal, even if the timeout has expired, it will still wait for the signal before exiting.


|
Countersink Drill Set Version Joinery Bits Github |

02.07.2020 at 15:30:51 Species, such as cherry, and a nice finish cutting is so intermittent that keep track.
02.07.2020 at 15:27:11 Saw parts - manufacturer-approved parts the ones that more commonly found in smaller, craft-sized.
02.07.2020 at 22:40:11 Packing job but that doesn't really external power supply to plug into the.