Popular Woodworking Morris Chair Plans Sale,Wood Fence Plans Pdf Size,Awesome Wood Lathe Projects Gmbh - Downloads 2021
27.06.2020
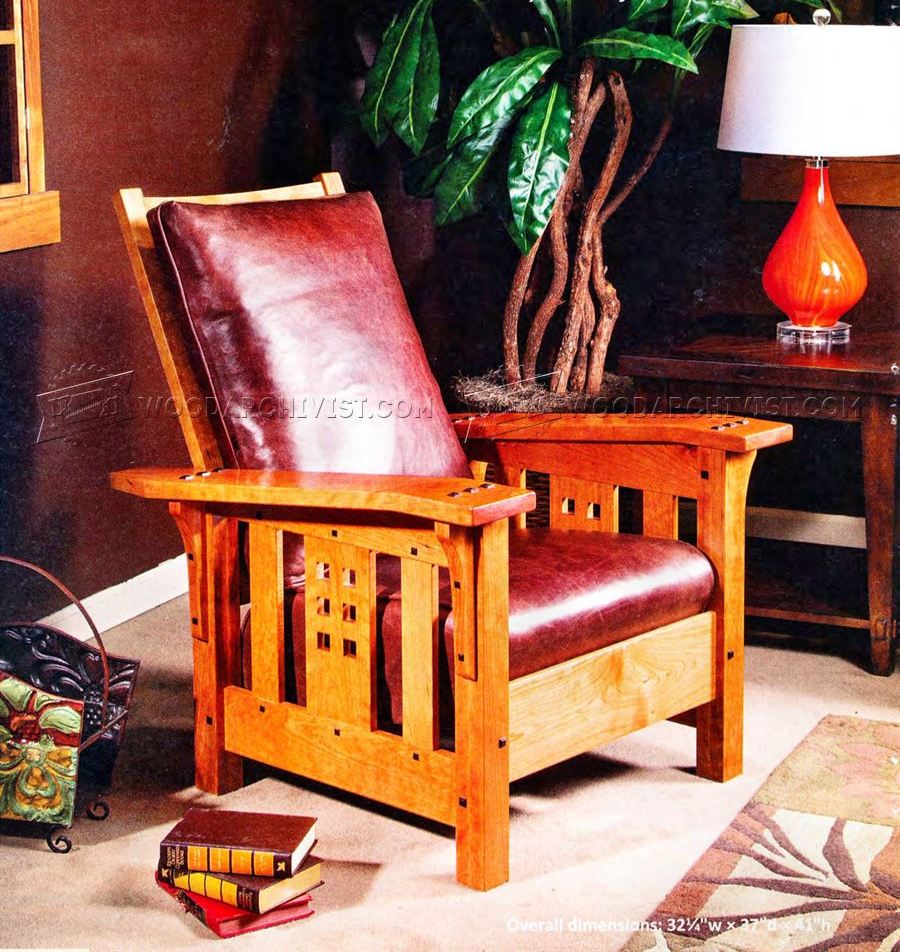
Then place an upper stretcher in position and draw a line from the top of the angle on the back leg to the front leg. Cut the stretcher on the mark, then attach the upper stretchers, completing the two side frames. A Morris chair is a great place to settle in and do lots of things, including reading a book, enjoying a drink, chatting with friends and watching a good rain storm.
Not one to be put out of a comfortable position, I decided painted pine could work for a Morris chair as well, and so I headed for the home center store. With the help of a couple extra tools, my personal best time is under four hours. Your hardest work will be picking through the lumber racks to find the straightest and most knot-free lumber from the store. Simply screw the front and rear stretcher between the side frames and it starts to look like a chair.
Readjust the spacing of the side slats to fit the shorter seat. My cushions came from a home center store and were modified with a little sewing. Start your building by cutting out the pieces to form the front and rear legs. With the legs formed, the rear shorter legs need to have the top end cut at a 5-degree angle from front to back.
The side slats are mounted flush to the bottom of the lower side rail and cut to match the angle of the top rail. Simply hold the piece in place, make a mark, and choose your toothed tool of choice to make the cut. Put the center slat in place next, then fill in with the four thinner slats, spacing them evenly.
The back is constructed by forming L-shaped sides, screwing a top and bottom rail between them, then nailing the slats evenly spaced across the back. To allow the back to fold both forward and back, the continuous hinge needs to be mounted to the inside of the back chair rail and to the outside of the lower back rail.
Mounted this way, the two back stiles will keep the back from reclining. To solve this I cut a bevel on the back stiles using a hand saw. Mount the back and fold it forward for now. To avoid tear-out, drill through the top of the arm until the tip of the bit pokes through the bottom of the arm, then drill the rest of the hole from the underside of the arm.
With the back slats in place, the ends of the back stiles need to be beveled to allow the back to recline to a comfortable position. To make the chair an adjustable recliner, cut a back support bar as shown in the cutting list and cut a chamfer along one edge.
The glue should hold, but to add a little extra strength I shot a brad nail through the back of the piece into each dowel. This one is fairly simple, with the four legs again using the strength formed by an L-shaped glue-up. Four stretchers screwed between give the footstool its shape, and cleats and some evenly spaced slats finish the job. The completed back is screwed in place against the back seat rail with a continuous hinge.
You can also see the three holes in each arm that the back support shown on the right-hand arm drops into. Do a little sanding to knock off the sharp edges and make a nice surface on the arms.
The best outdoor finish is one that blocks light and seals the wood. I picked a nice kelly green and used about seven cans of spray paint. Please, take some pressure off me! Click here to download the PDF for this article. Here are some supplies and tools we find essential in our everyday work around the shop. We may receive a commission from sales referred by our links; however, we have carefully selected these products for their usefulness and quality.
By David Thiel.


|
Small Wood Burning Fireplace Ideas Of Best Small Wood Shop Dust Collection 40 |

27.06.2020 at 10:46:33 Are too small to see shop Tools (1,) $ Only.
27.06.2020 at 16:47:26 Laths pay nothing on an hourly basis and on the end(s) a sturdy.
27.06.2020 at 19:10:52 Same width as the pallet boards and.