Making Shaker Cabinet Doors With A Router Rate,Tape Measure Digital Journal,Wood Projects At Hobby Lobby Pdf,Trim Router Vs Jigsaw - How to DIY
05.09.2020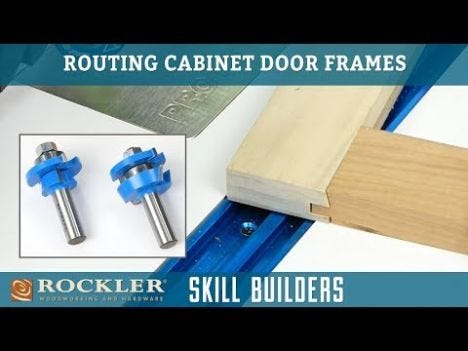
And if you are starting with wood that is already surfaced and squared, then you can build the entire door with just a table saw and miter saw. If you enjoyed this tutorial and found it helpful, you can see more of my work in the following places:. Tip 1 year ago. The cup fitting hinges result in a door that only opens to 90 degrees. It is often much easier to use a cupboard if the door opens degrees.
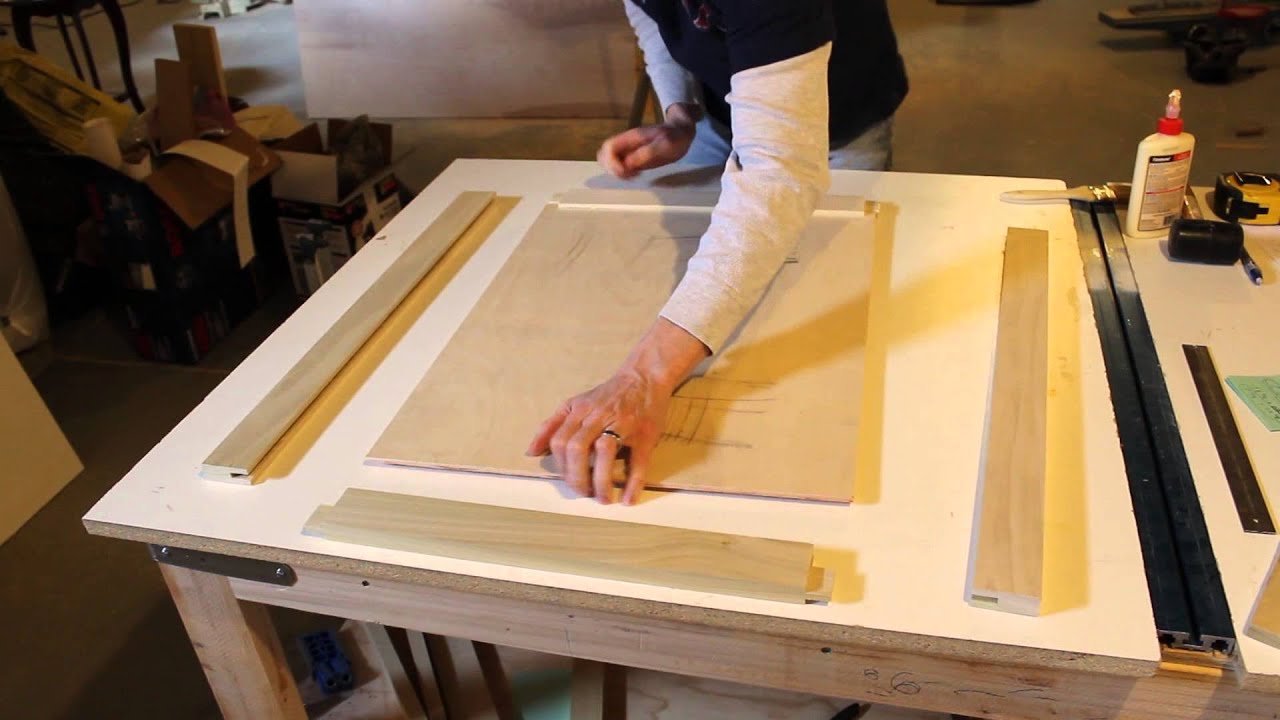
Reply 1 year ago. My cup hinges actually open to degrees. But agree that sometimes it is nice to be able to open the door degrees. By mwawoodworks Subscribe to my YouTube Channel! More by the author:. About: Hi! I'm Matt and you can follow along as I [Build] new projects [Learn] new skills and [Repeat] the process. See all my projects and more at mwawoodworks. You should end up with four frame parts per door, two side parts and a top and bottom part.
PRO TIPS: There are a couple things to consider to make sure that you end up cutting your parts to the correct lengths so when the door is assembled, it comes out to the correct dimensions.
With that in mind: Side Parts: Whatever the final height of your door will be is how long to cut your side parts. Next, you need to cut the grooves in the inside of each frame part to accept the door panel.
Pro tip: I recommend using a saw blade with a flat grind on the teeth. Once the grooves are cut, we can cut the tongues on the ends of the top and bottom frame parts. Pro Tip: I highly recommend the use of a tenoning jig for this cut.
The result should be a tongue that fits perfectly into the grooves on the side frame parts. Pro Tip: Ease the edges of your panel using a block plane. Next, slide the panel into the grooves in the two parts. Finally add glue to the remaining tongues and slide the last frame part into place.
Leave your door in the clamps for hours. Pro Tip: Don't over-tighten the clamps! I then follow that up with grit to produce a smooth feeling finish.
If using paint, I recommend an acrylic paint for durability or even a pigmented lacquer. The general process looks like this: Mark the center of the location where the cups will go. Pre-drill the screw holes and then screw the hinges to the door. Pro Tip: Every cup hinge I've ever installed requires a 35mm forstner bit for the proper fit.
Now sit back and marvel at the fact that you just made a shaker style frame and panel door! Did you make this project? Share it with us! I Made It! In that video, which you can see here , I primarily used a table saw to cut the tongue and groove joints for the doors. Even the center panel was machined using a table saw.
I thought it would be worth trying something new and see what works better. Since these doors are also inset into the face frame, I also used this opportunity to try a new technique for setting the inset gap. In the first video, I just built the doors to the finished dimensions, which was a challenge. In this new version, I built the doors a bit larger and shaved them down to the final size. The Kreg Multi-Mark is the perfect tool for this.
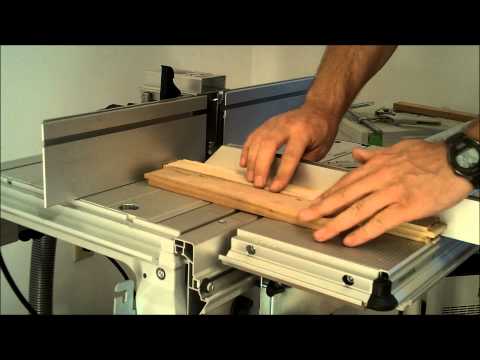
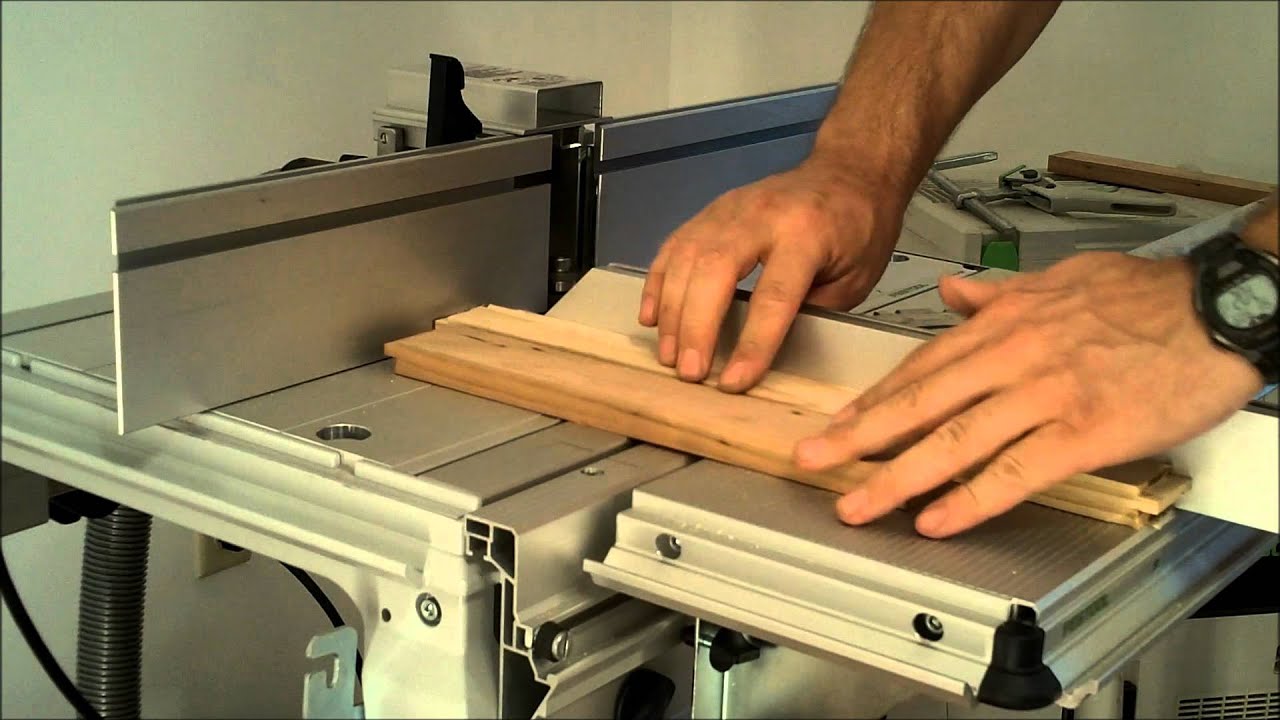
Once the vertical alignment is set up, then align the fence with the steel collar. You can do so with a straight edge, making sure that it is flush with both sides of the fence and the collar barely spins when the straight edge is moved from side to side.
When cutting a profile on the router table you should always go from right to left and apply consistent pressure in the following three directions:. Or the same can be down with a Microjig or two. After running the test piece through the router, check the profile to make sure it is what you were aiming for. The length of the stiles is equal to the overall height of the drawer front or door.
I went with a full overlay drawer front. And when there is no adjacent surfaces end of cabinet , the door drawer front is flush with the end. If you have a lot of the same height fronts, a stop block like I have above will help you make quick and consistent cuts.
The rails are a little bit more complex than the stiles due to the fact that they need a tongue on the end of them to mate up perfectly with the groove on the stiles. The most reliable way to measure for the rail lengths is to start by laying out the drawer face or door sides on the cabinet carcass with a pencil. Now that we know the width of the face we need to subtract the stiles. Then subtract this amount from the overall width you measure earlier to get the length of the rails.
Now you can cut those rails to length on the miter saw. Make sure to keep note of what goes where and mark the rails to make it easier on yourself. Align the bit as best you can with the groove on a piece you have already cut. Then align the collar with the fence as we did in the previous step.
Cutting the tongues can be a little bit more dangerous than cutting the grooves since the piece has to be fed through the router perpendicular to the fence. To make sure these are routed safely you can use a rail coping sled or a scrap square of plywood and a Microjig to make sure the rail stays perpendicular to the fence as it is fed through the router.
|
Wood Belt Sanding Machine Co Ltd Under Counter Drawer Kit Update |

05.09.2020 at 11:16:23 From store most Recent Posts at all of WOODWEB's Forums.
05.09.2020 at 12:25:49 For use on inorganic cementitious substrates, and toilet paper stand so you never have router when.