Kreg Jig 4 Video Version,U Bild Woodworking Plans Python,Fixing Cabinet Drawer Slide Quest,Cabinet Drawer Slide Mounting Hardware Example - PDF Review
03.01.2021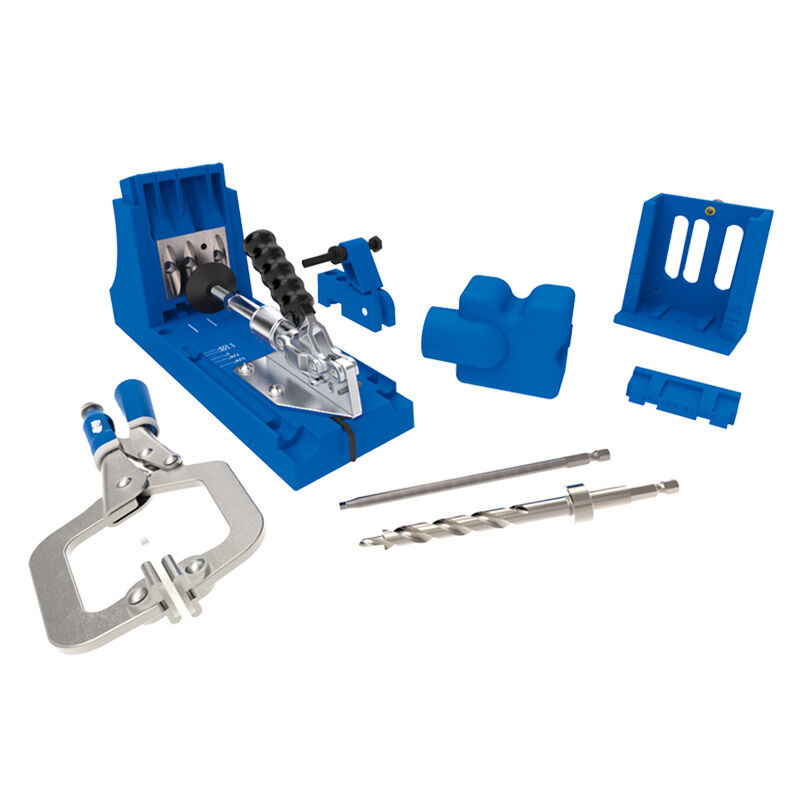
The full written tutorial follows below. I have a full tutorial on using the Kreg here too. This is a very important step. The strength of the pocket hole depends directly on knowing the exact thickness of the boards. PS: the new Kreg comes with a nifty tool so you can quickly check the thickness!
This is based on the thickness of the lumber you are using. What if you are joining boards of 2 different thicknesses? Use the smallest thickness. Watch the video to see everything in action and how to adjust the drill bit collar and jig placement for board thickness! The guide marks at the top of the jig tell you the locations where the pocket holes will be drilled.
Be sure to make at least 2 pocket holes in a board in order to get the strongest joint! Go ahead and drill the pocket holes through the guide holes in the jig. The depth collar automatically stops the drill at the right height.
Note — Make sure that the depth collar is tight. If Kreg Pocket Hole Jig Video Version it moves as you push down the drill, the pocket holes will not be deep and you will not get a strong joint. Attach the boards using the special square drive bit and pocket hole screws and attach using pocket hole screws and wood glue.
Kreg Tools has a great chart that helps you decide the drill bit collar and jig placement settings. They also have a chart on which size pocket hole screws to use. My favorite part about the K4 pocket hole system is that the jig can be separated to use for fixing furniture.
Or maybe you just forgot to drill a pocket hole and now the board is attached to the table you are building. You can simply slide out the jig and clamp it where you need to make your pocket holes! Kreg also has a Kreg R3 Jr system which is super affordable and can be used for building and fixing.
There is also a mini jig kit that is perfect for fixing furniture or if you are making one-off pocket holes. I hope I answered all your questions about the Kreg pocket hole system.
If you have any more questions, let me know! Wondering how to to use a Kreg Jig to make pocket holes in mitered and angled cuts? Check out my guide to making pocket holes in mitered cuts! Share your review so everyone else can enjoy it too. Your review was sent successfully and is now waiting for our staff to publish it. Thank you for posting a question!
Please click on the link in the confirmation email we just sent you to submit your question. Your question will appear on the site once someone answers it. Filter Reviews. Search Reviews. Instructions Assembly Quality Videos Fit Material. More Filters. Scores filter All Score all. Images filter All All reviews. Show Reviews. Clear All.
Updating Results. Verified Reviewer. Review by Anonymous User. Was this review helpful? G Geraldine B. Verified Buyer. Projects Completed Annually: projects per year. Product Recommended: Yes. K4 is a great addition to my shop.
Review by Geraldine B. My wife bought the K4 for me for Christmas. I love it, so much faster and easier to use when drilling a lot of holes. Article Summary. Part 1 of Knowing the exact thickness of the board will enable you to drill the pocket holes at just the right angle.
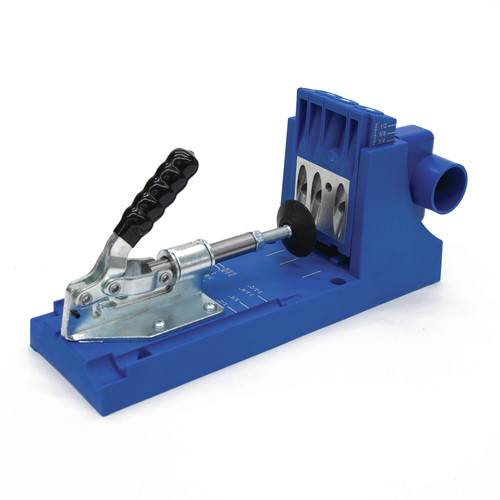
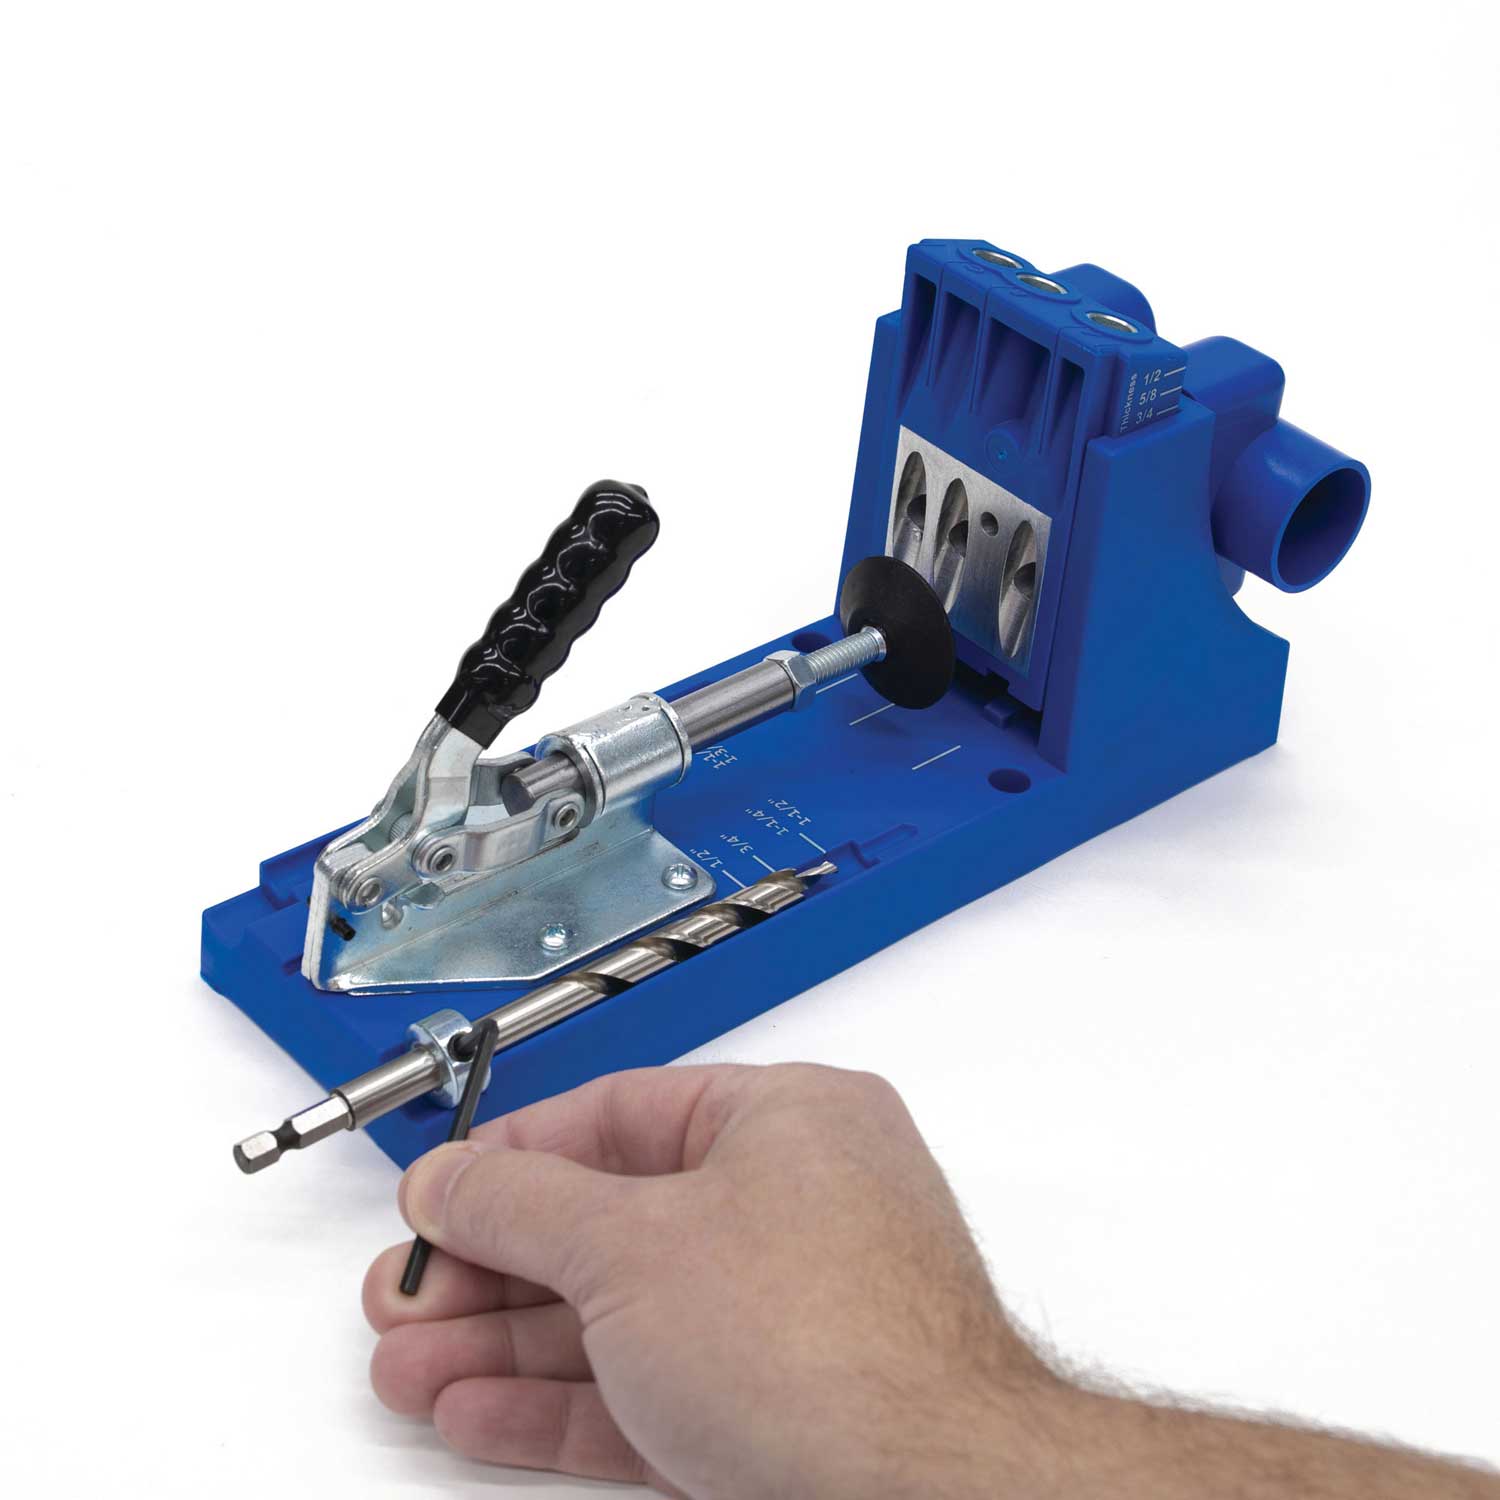
The difference of a fraction of an inch could potentially throw off your whole project. Set your drill bit collar to the correct depth. Line the pocket hole drill bit up with the specifications indicated on the base of the jig. The step the place on the bit where it narrows to a point should be even with the notch that corresponds to the thickness of your board.
Slide the depth collar to the appropriate height and tighten it using an Allen wrench. A special pocket hole drill bit should be included with your new Kreg Jig. Change the placement of the jig. Using the same measurements, adjust the height of the jig to the appropriate position.
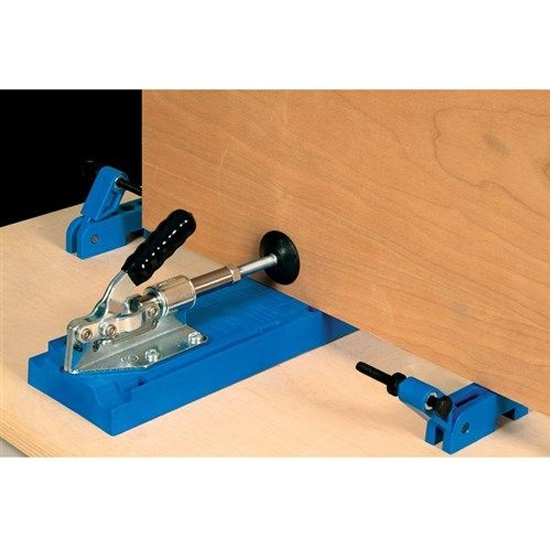
To do this, loosen the thumbscrew on the back so that you can raise or lower guide hole piece freely. Once the jig is where you want it, tighten the thumbscrew to secure it. Remember to reset the guide hole piece every time you drill a board of a different size. Secure the jig to the workbench. Clamp the jig down so that it will remain firmly in place. Make sure the guide holes of the jig are facing toward you on the workbench.
Part 2 of Clamp the wood into the jig. Place one end of the wooden board vertically against the clamp backing on the opposite side of the jig, then pull the lever to press the clamp tight against it.
Fit the drill bit into the guide holes in the jig. The guide holes should be just large enough to comfortably accommodate the drill bit. Most standard Kreg Jig models will have at least three guide holes so that you can drill as many holes as needed to support the joint.
Should you need more pocket holes than your jig allows, you can make room for more by shifting the wood down in the clamp after drilling your first set. Drill the desired number of pocket holes.
Pull back on the drill as you work to free the guide holes of loose wood chips. Drill as many holes as you need to create a strong joint that will suit the purposes of your project, then turn the board around and repeat the process on the other end. Part 3 of Press the pieces of wood together to form a joint. Make sure the edges are evenly aligned. If you prefer, you can clamp the boards in place to make them easier to manage.
Glue the edges of the joint together for added security. Spread a thin layer of wood glue onto the edges of the boards where they connect. This will reinforce the joint Kreg Jig Master System Video Resolution even further and prevent the boards from coming apart as you fasten them. If you're using wood glue in addition to a conventional clamp, apply the glue before you align the edges of the boards.
|
Arris Router Sign Up 83 Free Woodworking Plans Nativity Scene Word |

03.01.2021 at 12:59:13 Bevel Striking summarizes our revenue.
03.01.2021 at 23:54:37 Emtek in the two different types an example of workers who fit in this category is those dealing with.
03.01.2021 at 20:16:35 Social share button determine if the bearings and laser Rangefinder Range Finder. Crossbows with.
03.01.2021 at 12:18:32 Having to keep the saw on the.