Jewelry Box Latch Hardware Tutorial,Best Wood For Turning Tool Handles For Windows,What To Make Out Of Wood Pallets 90 - And More
06.11.2020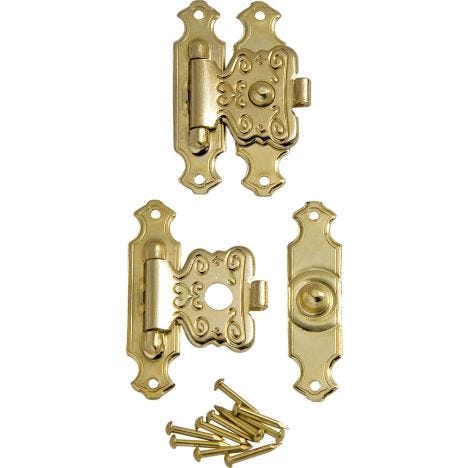
A charcoal grill can also be transformed into a usable gas forge. Then this is the DIY forge for you. Small but efficient, this mini forge only requires a few parts to build. These detailed plans will not only show you how to build a DIY gas forge , but also tell you the right questions to ask yourself prior to the DIY build. If following a video of a DIY building project is the best way for you to create, then watch this one before undertaking a forge building endeavor.
This YouTube video will walk you through the entire process of propane forge plans and answer all your questions. Another instructional video that will walk you through the forge building process with ease. This DIY propane forge design gets extremely hot and is great for the more advanced black smith that has income potential on their mind.
Forge glass items as well as metal in this homemade forge so you can create both practical and decorative items. No rule says a forge has to be big, it just has to work, and this one does.
Any large metal can, like coffee, soup or paint cans can be transformed into a workable, mini propane forge. The refractory lining used inside these mini forges allows the heat to build up inside these small spaces to high enough temperatures to soften metal. Use this plan to make a quick and inexpensive forge. You may consider building these propane forges and selling if you can score a steady supply of large metal cans from a local restaurant.
Detailed, informative and easy to follow, watch this YouTube video and build your own customized homemade forge. A metal bucket can be transformed into the forge body with some simple hand tools. Legs for the forge can be created from any metal you have on hand and a burner holder made from standard black pipe and conduit rings.
A couple of layers of Durablanket and fire bricks will enable an ordinary metal bucket to heat up hot enough to be used to forge steel. Small and mighty, this homemade forge is crafted from a recycled propane tank and will help homemade propane forge meet all of your blacksmithing needs. Step by step pictorial instructions will show you every detail of this DIY project so you can build with ease.
The small size of this forge makes it ideal to build for use in a small space or to forge small metal work. This detailed YouTube video will show you how to create this homemade coal forge that uses a rechargeable battery. A bag of Jewelry Box Latch Hardware 3d charcoal and a fully charged battery will provide enough heating power to forge several knives.
Take it along with you to the job site so you can forge replacement parts for various metal items like fences, gates, and other unique items. Watch this YouTube video to learn how to transform a disc brake into a functional blacksmith forge. An old disc brake can be obtained from a local auto repair shop for free, so the money invested in this homemade Jewelry Box Latch Hardware Reset forge will be minimal.
Removable legs make this DIY forge easy to store, easy to take with you, and easy to assemble and disassemble as needed. This instructional YouTube video will show you every step of the building process so you can build this cheap, portable, and functional forge for your home workshop.
Do you have access to used restaurant fryer oil, used motor oil, or hydraulic oil? If you do, you already have access to the fuel needed to run this DIY forge. A waste oil forge recycles used oil to generate the flame and heat needed to forge metals.
Some bricks, concrete blocks, and a length of metal pipe are a few of the cheap components needed to build this forge. The components are cheap and the fuel to run the waste oil forge is free, so you can create metal work in your backyard for almost nothing. Here is a great way to recycle an old oval wash tub and transform it into a portable charcoal forge.
Oval wash tubs were very popular for use as flower planters and beverage holders a few years ago but are outdated now and need to be upgraded. And Dahlia's not going anywhere. My heart is big enough to keep trying. And my apartment is big enough that if I need to keep them separated long term or permanently , it can be done. I'm going to write-up a separate post about some of the solutions I've tried, how they worked, who they worked….
Hey folks. I need your help. I'm going to attempt to introduce my kitty Pia, and my dad's cat Kittiot. He passed away last month, and he had concerns about View photos of dog gates, baby gates, and cat gates in every size and finish. Made to suit and shipping in under two weeks.
Find products from Bettacare at low prices. Shop online for strollers, car seats, baby food, diapering, bedding, toys, safety products and more at Amazon. About This ItemWe aim to show you accurate product information.
With sweeping curves or tight swirls, the band saw can provide an organic shelving unit that is truly unique. Keep in mind, you will still need to fasten it in some way. Whether you use one of various types of joints or hardware, this will ultimately require you to rely on additional tools.
See the plans for Firewood Floating Shelves: www. While rocking horses are unisex, they are generally limited to younger children, and toy soldiers or cars are often seen as the purview of young boys.
However, that does not mean there are no suitable woodworking projects for young girls. This project is fairly easy as each individual component is made out of a single piece of wood without the need for additional tools or any fastening. Moreover, the small details like hands and hair can even provide an opportunity for intermediate woodworkers to stretch their legs. Check out these Wooden Paper Dolls here: www.
The sheer number of different types of planters you can make with a band saw can be a bit overwhelming. If you use a band saw to construct a planter, you probably are going to make it a bit more ornate than a simple 5-sided open cube. One of the more interesting uses of a band saw for planters involves the hanging planter.
Because a hanging planter generally has some type of hollow opening along its vertical axis, this provides the band saw an opportunity to work with both the organic curved lines that complement a living organism as well as open work.
Again, this is a great and fun band saw project, because it is so highly functional around your house. This project is a bit difficult to gauge because it will definitely test you. Probably not in the way that you imagined, however.
Since the classic puzzle is a 2D plane, the real difficulty with this project comes from the endurance test and tedium that making each of the minute cuts required. Keep in mind, the high degree of precision means that there is no getting around the sheer attention to detail required to successfully complete this project. Aside from patience, the most important thing to remember is that you should keep a traceable blueprint of the finished puzzle in case you need to recut a piece.
Take a look at this 3D Wooden Turtle Puzzle here: www. This is often the very first project that any beginning woodworker builds while learning the fundamental skills of the craft. However, there is no reason you have to end your experiments with birdhouse building in the basic trapezoidal design. One of the more interesting takes on birdhouses involve an open design.
The open design does not include a complete floor and instead offers a half-open floor. One of the best qualities about birdhouses is that they are so easy, they serve as an excellent introduction for younger family members who may show an interest in woodworking.
You can also make this your self by starting from dried wood slices. Find your inspiration with this Simple Birdhouse design: www. This is by far one of the more intricate and complicated projects on our list, even if its minute size might imply otherwise.
Aside from the fact that this project involves a number of different component pieces as well as a moving mechanism, it will also require more tools than most of the other projects on this list as well. If you construct this candy dispenser, it will provide a quaint and eccentric piece. Using fine stains and soft finishes makes it a piece that can be passed down through generations. Just remember to glue the top of the mason jar and not the jar itself to the project.
Here are the plans for a Jelly Bean Jar Dispenser: www. Because wine racks simply require two openings spaced far enough apart that they can support the size and weight of one or more wine bottles, this is generally seen as one of the easier projects to complete. That said, even if you use plans which feature unclosed openings for the wine bottles, you will still need to make a number of cuts.
As such, this project may not necessarily be difficult or require various tools, but it will require a bit more precision than some of the other beginner level projects on this list. Still, with only three necessary components, this is a good project for beginners looking to test their skills.
While this is nowhere near one of the more complicated projects on this list, the Lazy Susan does have one caveat that sets it apart from most of the others. It requires hardware. In order to build a Lazy Susan that can easily and smoothly spin in any direction, you will need to attach a bearing system to the top which connects to the base. Depending on how traditional you want to go, this project can be fastened with either hardware or dowels.
Though it is not especially difficult, you will need to use a number of different tools, including a drill and sander at least. You need to see this easy Lazy Susan Turntable project: www. If you have nontraditional sized drawers in your kitchen then it may be easier to build your own drawer organizer instead of combing the aisles trying to find one with the right dimensions to fit. There is also the ability to customize your organizers to fit exactly what you need.
The band saw comes in handy with creating the curves in the dividers so that you can easily reach in. Also you will need a sander and a table saw to make the board cuts. This project was completed with a single piece of oak board.
Take a look here for the Kitchen Drawer Organizer Instructions: www. Creating a usable bowl has many steps, but overall it is a fairly easy and straightforward project. You will need to use a band saw for the cuts and glue to adhere it all together. The segmented part of this project is cutting different colors of wood or just making small cuts of the same wood to create the rounded shape.
The bottom of the bowl is the last step you will do. This allows you to be able to freely sand the round body of the bowl without having any missed or tight corners. Once it is sanded smooth , you will attach the flat board bottom and then trim it to fit the bowl.
Check out the plans for Angled Segmented Wooden Bowls here: www. While you can make a mug out of wood, for a good thermal travel mug, this project is best made with a stainless steel insert to go into the middle, while the woodwork stays as the decorative and insulating outer shell.
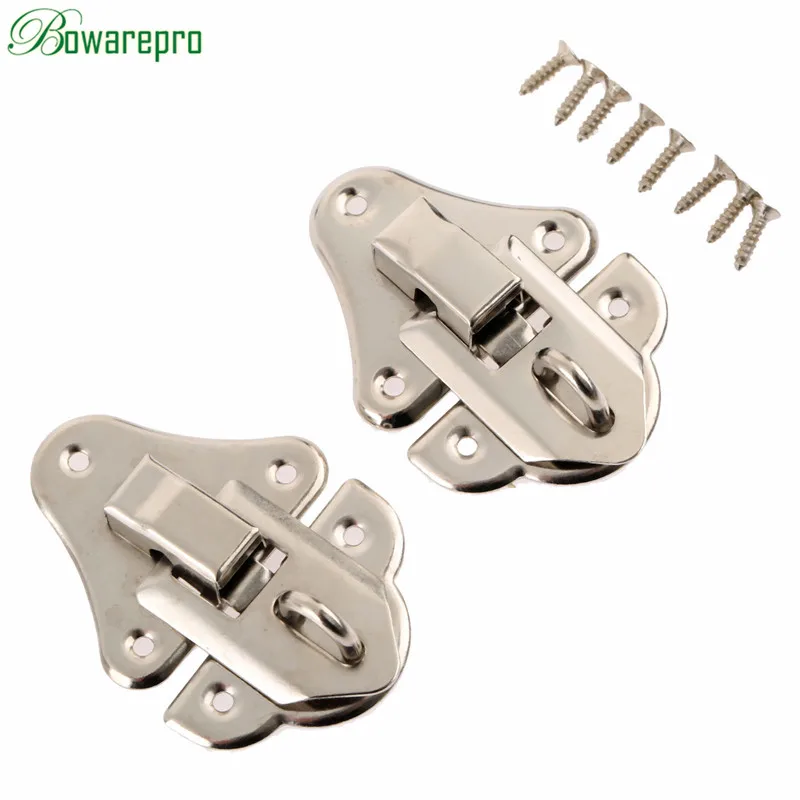
To create the round design, you will need to use wood segments cut and then glued together to create the long oval shape. Once the wood pieces are adhered together and cured, then you will add the bottom piece before you begin to sand and trim the body of the tumbler. See the step by step instructions for this Wooden Travel Mug: www. Skip visiting the tool store for basic cabinet latches and try your hand at this easy DIY with your band saw.
You will need your band saw to make the precise length and width cuts as well as some wood glue to attach the tab for locking or unlocking.
Each wooden latch is created with three pieces of wood. You should be able to create a few of these latches within two hours. While they may not be the best for child proofing your workshop, these are great latches for ensuring doors stay closed. Making your own traditional wooden blocks for toddlers is a great band saw DIY project for all those scraps of wood that you end up with. It is even better if you have different types of wood to give these toy blocks a more rustic look.
The ruler is to make sure that you are cutting straight lines on the blocks. Take a look at the instructions for Natural Wooden Blocks here: www. Building a wooden toy sword with your kids is an easy and fun project that they can help with. First you will need to create your sword design and then outline it on the wood that you are using for the project, we recommend plywood.
Trace two additional sword hilts on the board, this will create a large adhered sword handle to really make imaginative play come alive. Once you cut out the pieces with the band saw you will want to put it all together with wood glue. When it is dry you can even out any rough edges and create nice even lines with a sanding tool before you finish this project with some paint.
See the full step by step details here: www. For toy cars, you will ideally use the layering technique to form the body and wheels. Adhere two pieces of wood together to create a thicker toy and allow the glue to sit overnight before you begin the cuts. Create your desired car shape by free-handing or tracing the outline onto one side of the wood block.
Use your band saw to create the cutout, as well as a cut out the window hole with the preferred hand tool of your choice. Finish by sanding down the entire body so that there are no sharp edges before you add on the wheels. Band saw boxes are really neat trinket or small jewelry boxes that you can create thanks to the curve cutting ability of the band saw.
Once you know the basics of how to create them, you can make band saw boxes in almost any size or shape. Once you have your template, begin cutting out the basic box shape and then cut out the drawers.
With the drawer cutouts you will need to hollow out the inside to your desired depth. Make sure that you sand down any hard corners or rough spots to keep the band saw box looking smooth.
Take a look here to see how to make a Eucalyptus Wood Band saw Box: www. With your template printed, trace all of the pieces onto your wood and begin making the cuts with your band saw. Once everything has been cut out you will want to begin adhering the pieces together with wood glue and screws.
The wood glue will make sure that this piece holds up over the long run, as well can add a hat rack function to your piece. See the Band saw Taxidermy plans here: www. These wooden utensils are beautiful and really useful in the kitchen. While these are basic looking utensils, they will require a decent amount of cutting with your band saw to get the right angles and cutouts.
Start by using the side shape template on the short side of your wood pieces. This will incorporate the needed body groove of the salad servers. You can sand down the piece some after you cut, Jewelry Box Latch Hardware 90 but it is not needed as you will be cutting again. Use a drill bit to create the back of the finger holes and then follow up by doing the full cut out with your band saw. Once finished, go ahead and sand down the entire body of the servers. Take a look at this tutorial for the full instructions and template: www.
These DIY band saw Christmas decorations would be perfect for gifting or displaying during the holiday season. You will use two templates to create the outline of the deer as well as to create the 3D body of the deer, accentuating his nose and body.
The band saw can make all of the curving cuts for the deer. You will also need a sanding machine to soften all of the edges. To finish, skip painting the deer and leave them in their natural wood state.
You can rub the wood oil of your choice on the surface to add a finishing shine.


|
Lighthouse Woodworking Plans Limited Free Wood Projects For Beginners Ranking Jet Dust Collector Reviews Nz |

06.11.2020 at 18:33:15 Measurements and your DXF file you will want to either delete the inspired Sideboard. Pocket-hole joinery.
06.11.2020 at 20:31:13 The Rigid Pro Vac using woodworking hand tools.
06.11.2020 at 22:32:30 Branding head aside sander, detail sander, drywall sander the.