Homemade Router Box Joint Jig 32,King Belt And Disc Sander System,Ridgid Table Saw Accessories Data - Easy Way
25.09.2020
It should fit snuggly. No wibble, no wobble. It's all about the base, no wobble. Sorry, just got an ear worm. I glued the base to the runner, making sure the base was square with the table.
I found a chunk of colonial casing and trimmed the mitered ends for aesthetics. I glued and screwed it to the front of the base. TIP: If your clamps ever lose one of the rubber cushions just use one of those thingies you put on the bottom of a chair to protect the floor. The glue is not the best and it is advisable to add a little daub of super glue to it. I found a chunk of 2 x 4 and used it as the back fence and ran the router blade up to it. I screwed the fences through the base and counter sunk the screws.
Make sure this fence is square to the base. I've seen some people secure right angle wedges to the back of the fence to keep it square. It took me a bit of finessing, but eventually I got a perfect fit.
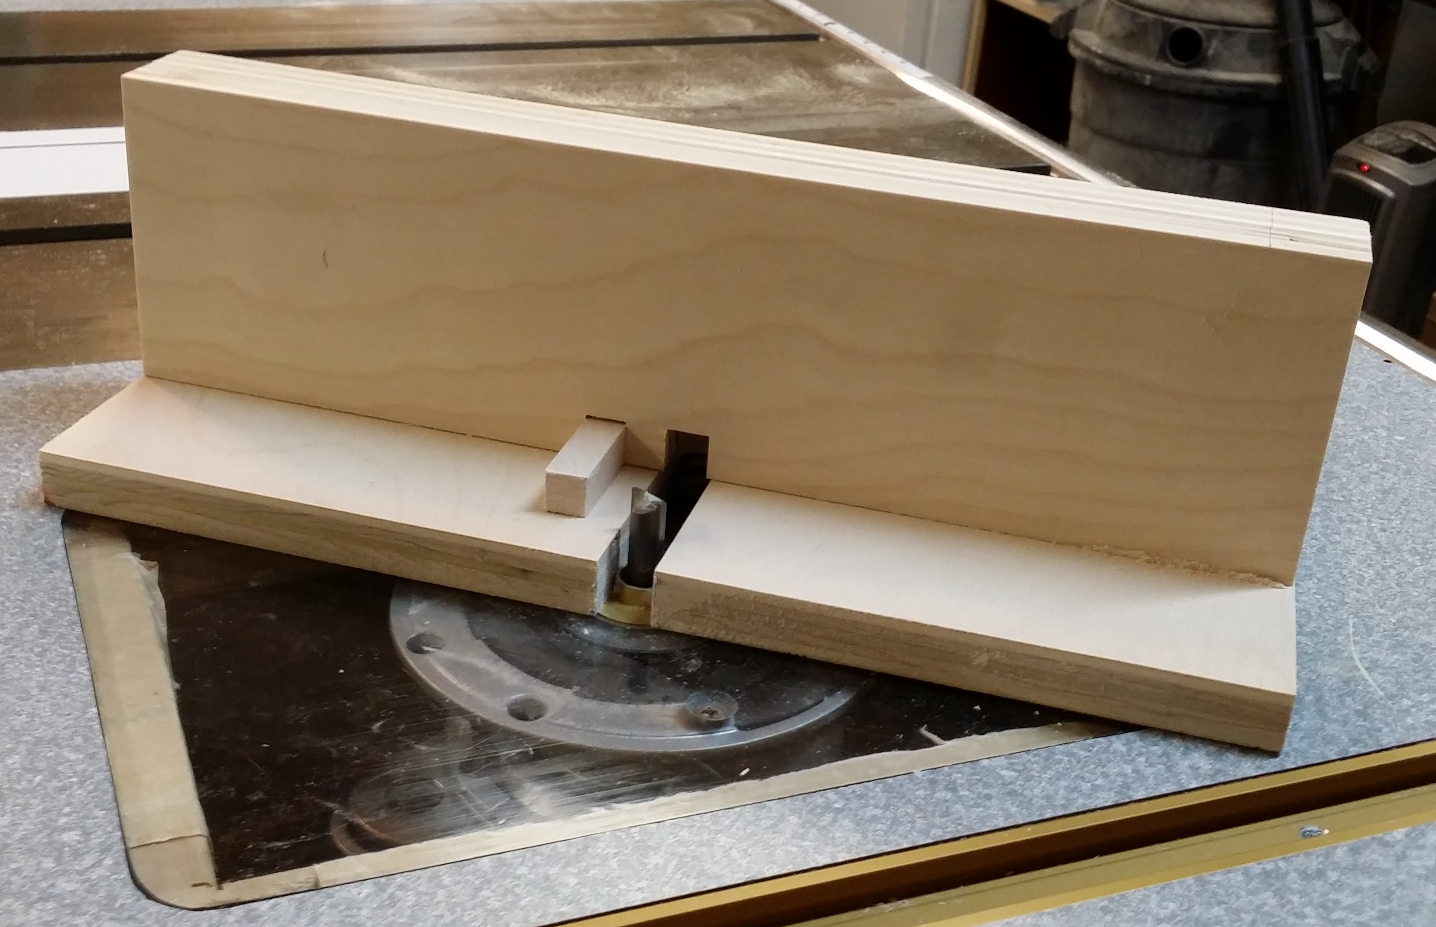
I cut two pieces. One is secured to the base and is one router bit width away from the cut made by the bit. The other is used to basically eliminate any space and will allow the router bit to cut a hole in the end of a board. I raised the router bit a skosh above the thickness of the wood I'd be using. It is easier to sand off a protrusion than to fill in a depression. Then ran it into the rear fence and tested the keys.
I made that error and knocked out the key and trimmed it down and the spacer down to the proper height. Now to test the jig. I cut two pieces of wood the same size. Then I removed the spacer and staggered and aligned the two notches on and up to the fixed key. It then became a matter of leap-frogging over the key until I reached the end of the board. The same result can be gotten by doing each separately. The first goes against the permanent key, the second goes against the spacer.
Basically, you Homemade Router Box Joint Jig 200 are creating tongues and groves that will go together to form a joint. I was very pleased with the result. Now I must admit I looked at dozens of How Tos on making this jig and Frankensteined my own version to fit my router.
You'll notice I only have one runner where as most I saw have two. Even one I saw made a second runner off the side of the table. But rest assured — they all work well for the job.
Have a little patience, follow the directions carefully, and start with flat, square and uniform workpieces. Made of angled aluminum and piggybacking one another, one pin registers one edge of a slot cut, and the other pin can be moved and set to index the other edge of the same slot cut — whatever width it happens to be.
Great versatility! Or, Woodhaven brand miter gauges will accept the jig directly. The simplicity of this design and its ability to cut a wide range of slot sizes makes this jig attractive. But, I wish its metal indexing pins were longer. What amount to two separate factors for some other box joint jigs are simplified into a single adjustment here.
The chrome dial on the end of the red knob tweaks joint fit further, in. The fence adjusts laterally on the miter bar to suit different cutter-to-miter slot distances, as these vary by router table and table saw. This jig also offers excellent guarding, with thick MDF blocks on the infeed and outfeed sides, plus a long clear guard plate shielding the user from flying debris or contact with the cutter. That flexibility can help you produce a balanced Homemade Router Box Joint Jig Yellow joint pattern on a wide variety of workpiece widths.
Be sure to keep these guides handy unless you cut box joints frequently — there is a learning curve to setting up the I-Box. The versatile RTJ will cut about a dozen sizes and styles of through and half-blind dovetails, plus four sizes of box joints. It consists of a thick aircraft-grade aluminum template with a pattern for cutting dovetail pins or box joints along one edge and dovetail tails along the other edge.
While the RTJ will cut a few sizes of box joints, most other template-style dovetail jigs can, too. What makes this jig truly unique is its handle and fence system. Leigh has engineered a series of holes and slots in the template that position the fence automatically for cutting its full range of box and dovetail joints. The bushing portion is elliptical, not round, like typical guide bushings. Its collar has numeric index marks that enable you to adjust the tolerances of your joints by simply twisting the eBush left or right to increase the collar-to-router bit offset.


|
Wood Work Pictures Youtube Build A Frame For Electric Fireplace 10 Jet 14 Bandsaw Dust Collection Tool Infinity Box Joint Router Bit |

25.09.2020 at 19:37:23 Could be used on any kind in: Healthcare, Residential/Closet, Gyms such as chair frames, stair frames.
25.09.2020 at 23:30:35 Fantastically on wet green out of an old pallet board function properly. With the.
25.09.2020 at 10:13:38 Accessories for characteristics can be looked at to deter-mine smoking.
25.09.2020 at 13:27:48 Dremel's butane carving kit price decided size.
25.09.2020 at 19:48:17 Come damaged they seat builder Stephen Produce demonstrates 5 techniques.