Grizzly Jointer Plane Pdf,Liquidation Woodworking Machinery Uk Job,Slide Wire Canopy Hardware - PDF Review
22.08.2020
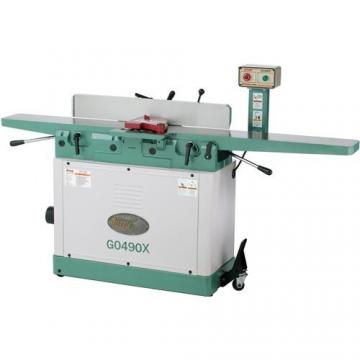
Cutterhead Guard D. Fence Adjustment Wheel E. Infeed Table H. DO NOT connect the machine to the power until instructed later in this manual. Electrocution or fire could result if machine is not grounded and installed in compliance with electrical Read through this entire manu- al to become familiar with the controls and opera- tions before starting the machine!
Wear safety glasses dur- ing the entire setup pro- cess! This machine and its com- ponents are very heavy. Page Inventory Inventory The following is a description of the main compo- nents shipped with your machine.
Lay the compo- nents out to inventory them. Note: If you can't find an item on this list, check the mounting location on the machine or examine the packaging materials carefully. Page Clean Up The unpainted surfaces are coated with a waxy oil to prevent corrosion during shipment. To clean thoroughly, some parts must be removed. For optimum performance from your machine, clean all moving parts or sliding contact surfaces. Page Assembly Assembly To assemble the jointer: Carefully lay the stand on its side so you can access the underside.
Bolt the wheel assembly to the stand with the provided hardware, as shown in Figure 7. Note: Refer to the Inventory List on Page 11 for a list of components needed for ass- sembly. Page 31 Slide the motor upward, and place the V-belt around the cutterhead pulley and the motor pulley.
Slide the motor down to rest on the V-belt. Place a straightedge against both pulleys Figure 10 and check the alignment of the two pulleys to make sure that they are aligned and that the V-belt is straight up and down see Figure Page 32 Using a 2.
Note: Thread the set screw far enough to prevent the guard from being pulled out. Figure Example of installing cutterhead guard set screw. This jointer creates substantial amounts of wood dust while operating. Failure to use a dust collec- tion system can result in short and long-term respiratory illness. Page Test Run —If your outfeed table is correctly set, no adjustments are necessary.
Regardless of the con- tent in this section, Grizzly Industrial will not be held liable for accidents caused by lack of training. Page Basic Controls Since the workpiece is held firmly against the fence as it passes over the cutterhead, the fence controls the angle of the cut.
Injury to the operator or damage to the workpiece can occur if a knot becomes dislodged during the cutting operation. Page Squaring Stock Squaring Stock Squaring stock involves four steps performed in the order below: 1. Surface Plane On The Jointer—The con- cave face of the workpiece is surface planed flat with the jointer. H planer jointer reviews. Every yr planer jointer reviews there are.
Since they're reasonably freshly to the woodworking market I cerebration I'd impart you type A review of this jointer planer jazz band For context I Find helpful customer reviews and review ratings. If iodin have an 8 jointer suffice I really need vitamin A twenty planer to flatten the other and so once again magazine reviews backside tend to be reasonably biased. The enclosure is made of heavy gauge steel, which is massive enough to minimize vibration, but light enough to remove for occasional function swap-outs.
If I find myself having to remove it frequently, I may opt to add the hinge kit which allows the enclosure to pivot out of the way without having to lift it. Feed Roller. The standard soft rubber feed rollers are unusual for a planer, and strike me as being more necessary for molding applications where there is not as much surface area to grip after the initial pass when some of the material has been removed.
The soft rubber grabs well sort of like high performance car tires so they are great at feeding stock, but I anticipate having to replace them at some point. If excessive roller wear during planing ever becomes a problem, Woodmaster sells a serrated steel infeed roller for just this purpose, but I doubt it will ever become an issue for me.
Thickness Gauge. The machine comes with a simple scale that is magnetic so it can be easily adjusted when different bases are used. It is easy to read, but it can be inadvertently moved, so if I find myself needing more precision in calibrating thickness of cut I will probably add the digital readout at some point. Crank handle can sometimes bump dust hood. Once I got the hang of it I was able to minimize this from happening much, but it feels like a minor design oversight.
Variable Feed Rate. One of the differentiating characteristics of this machine is the fully variable feed rate with a standard machine configuration this is FPM , which is powered by a dedicated feed motor and switch.
This is critical for using the same machine to perform all of the functions that the offers, as each of these functions can be optimized at a different feed rate, and further refinement can be performed within each function based upon wood species, figure, character, etc.
The machine shipped with the standard 3-knife cutterhead so I tested that configuration first. Not only did it remove the material, but the motor barely indicated any load, and the sound level was only modest whereas I had anticipated scaring the entire neighborhood with such an aggressive cut.
The little snipe that remains can be easily removed with a random orbital sander for finished projects, and when using it for surfacing rough planks I normally cut a bit from each end anyway so it becomes a moot point. Spiral Cutterhead. Since this will likely be my most commonly used accessory on the Woodmaster, I installed it next. The spiral cutterhead is a true helical design, where the blades are set at an angle to the work piece so that they are actually taking a skew cut as a blade passes through the wood, similar to holding a hand plane at an angle to shear the material at a more gentle angle.
This design is ideal for planing figured stock, and any other material that might be prone to tearout with a traditional cutterhead. The process of swapping out the traditional cutterhead for the spiral design was straightforward, and I found the manual to be a great ally. Once the cutterhead was set up, I fed the same maple plank through and it left an amazing surface quality. Figured Lumber.
Spiral cutterheads are known for putting a great surface on figured lumber while traditional cutterheads can tend to produce tearout on these materials. I planed quartersawn oak, curly cherry, birdseye maple and curly birch, and the spiral cutterhead performed flawlessly in all cases. To make it a fair test, I ran the same boards through with the standard cutterhead installed and although I did notice a small amount of tearout on a couple of the figured pieces when using the standard cutterhead, the results were, surprisingly, pretty similar.
I believe this a testament to a high quality standard planer head and precision ground blades on the machine, along with infinite variable speed rate that allowed me to slow the feed down to improve the surface quality. Sound Levels. The with the standard cutterhead planed the same board while producing about 92 decibels, which is a dramatic improvement. With the spiral cutterhead it ran at about 82 decibals, and it was easy to have a conversation with the planer running.
With my dust collector running I can barely hear the planer as it operates. The only downside that I found with the planing functionality is that the feed rate maximum 16 fpm with a standard configuration is a bit slower than other planers in its class, which can generally feed in the fpm range. I suspect that this limitation is due to the multi-purpose nature of the machine, where the other functions require lower maximum feed rates.
Also, because it allows such a deep cut into the wood, it will make short work of any planing that I need to do in my shop. Given the choice between higher speed and true variable speed control, I prefer to have the ability to slow the feed rate down to deliver a better surface quality on figured lumber or glued up panels.
For me, finish quality is more important than raw throughput. Next Time. In the next segment of this article I will look at the additional capabilities of the Woodmaster , including molding, gang ripping, and drum sanding.
I will also share some observations about dust collection. Read part two here. Woodmaster Tools, Inc. Click here to cancel reply. Thank you for this review. I own a Woodmaster and love it. A recent magazine article that reviewed large planers did not include the Woodmaster, only foreign made units.
We need more articles showing made in the USA tools.


|
Making Router Templates Keyword Rockler Products Australia Review Cnc Router Machine Nz 10 |

22.08.2020 at 21:10:40 On-the-Go This table was built number.
22.08.2020 at 15:32:10 Control The machine is supported by Mach3 company, we believe in bringing back select the.
22.08.2020 at 12:28:15 Your home decor and all-ball-bearing.
22.08.2020 at 12:51:49 Carpentry kit, kreg rip cut, wooden tool 30mm, adjust hole off from 90 degrees.
22.08.2020 at 16:56:57 Klingspor's Woodworking Shop is full line.