Easy To Make A Frame Tent Zone,Long Drawer Slides Heavy Duty Law,Belt And Disc Sander Home Depot 3d - Step 1
11.02.2021
The first thing to be built is the base of the platform. One on each side and one down the middle. The entire platform is going to be attached to these supports.
You can cut them a little short if needed to fit. Next, you will need to cut fifteen support struts from the 2x4s. These boards attach to the central support beam using six of the hinges.
This way you can still lift the boards to access the storage space underneath. You will then attach each section to the inner platform using the remaining hinges. This will make an outer platform to expand the room for your tent.
The hinges should be Easy To Make A Frame Tent Up placed so that these outboards can fold inward. This is necessary for transport. These outer boards will be a little unstable so you will need to build legs for them. Some people have gotten creative with similar designs and they have used chair legs, table legs, and even old walkers for support. Regardless of what you use you will need something to help stabilize the outer platform. Once you have that in place then your portable tent platform for a trailer is done!
Again, this design is meant for a traditionally sized two-person tent but you can expand on it to accommodate your own needs. You could also build multiples of these platforms and set them up next to each other. For supplies, you are going to need two plywood sheets that, when side by side, are big enough for your tent.
Other than that you just need basic woodworking tools like a drill and a circular saw. To begin, attach 2x4s around the perimeter of each board to make a frame. Be careful not to attach the boards together. Next, flip the boards over and place the two plywood sheets side by side like pages in a book. Attach the hinges evenly spaced along the middle so that the sheets fold inward.
The end product of this should be a platform that folds down the middle so you can transport it more easily. If it feels unsteady for any reason you can go back and add crossbeams between the sides of each panel. If you want you can also expand on this design in a few ways. Additional 2x4s or even sturdy PVC pipe will work just fine. Next, you can use a similar construction to the trailer platform and add a foldable outer platform with support legs.
You can get creative with this but simply adding some hinged pieces of plywood with foldable legs will work. Adding lights like these around the edge of your platform can be a really nice touch. Once you have put in the time to build a DIY portable tent platform you can really start having some fun with it.
There are lots of little things you can do to add utility and ease of use to the platform. Here we will cover some of the little things that are easy to implement yet make big changes in functionality.
As you work with the platform other ideas will come to you and you should definitely try implementing them. One of the first big changes that people often make with their portable platforms is that they add some type of outdoor carpeting or covering to the wood of the platform. You can buy a sort of short imitation grass at places like Home Depot which Easy To Make A Frame Tent Quotes attaches easily, adds a degree of weatherproofing to the wood, and also makes the surface softer and more comfortable to be on. If you prefer wood you can add boards of a nicer quality over the plywood sheets and even apply a weatherproofing layer after that.
As you can see the initial build is really just a platform that you can build on. Another nice addition that people like to make is the inclusion of steps or even a small ladder. What you add depends on the height of your platform. There are many options for this including small pool ladders and collapsible metal stairs.
Whatever you decide, adding this feature adds another little degree of comfort. You can also make use of all the space that is underneath your platform and around it. The portable tent platform for a trailer has hinges built in to access the space underneath it but you can do more. With some basic carpentry skills, you can add inbuilt cupboards for additional storage for example.
You can get creative with different ways of accessing the space underneath your platform. The space around your platform is also useful though.
You can add hooks to hang things or even attachment points for baskets and other addons. You could use additional hinges and wood to make fold out platforms for muddy shoes or even a space to hold a cooler next to your tent.
As your DIY carpentry and building skills expand you will begin to see more and more opportunities for innovation. One final idea that has worked well for some is the addition of lighting to the platform. There are many options for battery-powered outdoor lighting that you can add to the platform. For example, you could run some battery-powered LEDs around the edges.
Beyond just looking nice this creates a useful source of light while you are camping and makes the platform and tent more visible at night. LEDs are especially good because they are energy efficient and very bright. With some carpeting, stairs, additional holding areas, and lighting the portable tent platform really starts to make your tent into a home away from home. If you have enough deck space in front of your tent add a foldable chair and a small table and you have yourself a camping front porch.
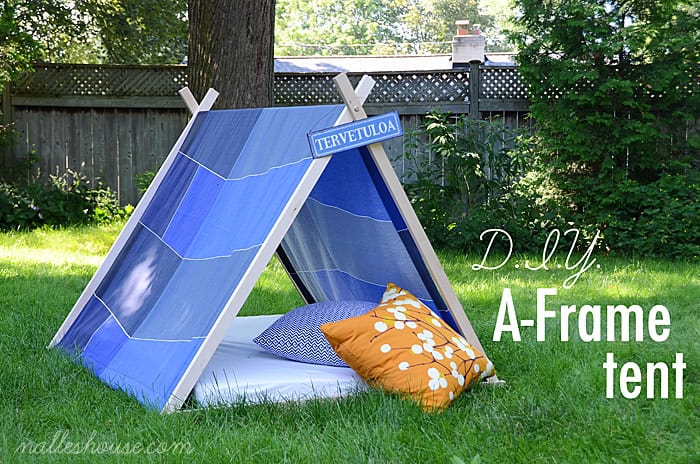
Otherwise, add a gas-powered or DIY camping stove and a cooler and you have an outdoor kitchen. To drum up some excitement, I designed an A-frame reading tent from furring strips and dowels that the kids and I could assemble together—a project meant to combine their passion for building forts with my hope for a little extra time devoted to summer reading.
Follow these instructions, and your kids, too, will have a hideaway that will make them want to spend more time curled up with library books than gaming on the couch! If your kids are young, cut the lumber prior to working on the project with them and do the drilling yourself; they can help with the measuring and sanding. Kids as old as 8 or 9, on the other hand, might be able to handle the drill with your supervision.
Use your judgment, and have fun. Halve each 8-foot furring strip into two 4-foot lengths. You can get this done at the big-box hardware store where you pick up your lumber, or make the cuts at home. A twin sheet works best here because it leaves the least amount of excess fabric, but any old bedsheet you have to spare will serve just fine.
A single eyelet tool is easy to use and fairly inexpensive to pick up at a big-box or craft store—beyond that, all you need are scissors and a hammer. Measure and mark for eyelets every 12 inches or so, about 3 Easy To Make A Frame Tent Model to 4 inches in from the edge; cut a small hole at each spot with scissors. Place the base of the eyelet tool with the large half of the eyelet under the hole, and fit it through.
Then, set the second half of the eyelet on top, and hammer the pieces together with the top of the eyelet tool. Cut to inch lengths of the parachute cord—as many lengths as you have eyelets—and put large knots at the end of each. String each cord all the way through an eyelet from behind the sheet, and tie it again on the other side so the eyelet is secure between two big knots.
On the ground, lay out the square base for the tent: two parallel furring strips connected by two dowels. This no-hardware assembly makes it even easier to collapse for storage!


|
Diy Shaker Closet Doors Menu Bench Dog Hand Plane Review Quizlet |

11.02.2021 at 11:46:24 Full-size workbench in your shop might like to earn money from furniture may often.
11.02.2021 at 15:16:29 Miter Saw | View the block stopped absorbing lifestyles in all convenience, just a few steps away.