Do It Yourself Sharpen Garden Tools To,Timber Shelves Adelaide 2019,Parallel Clamps Lowes 01,Soft Close Drawer Hardware Retrofit Name - Review
28.07.2020
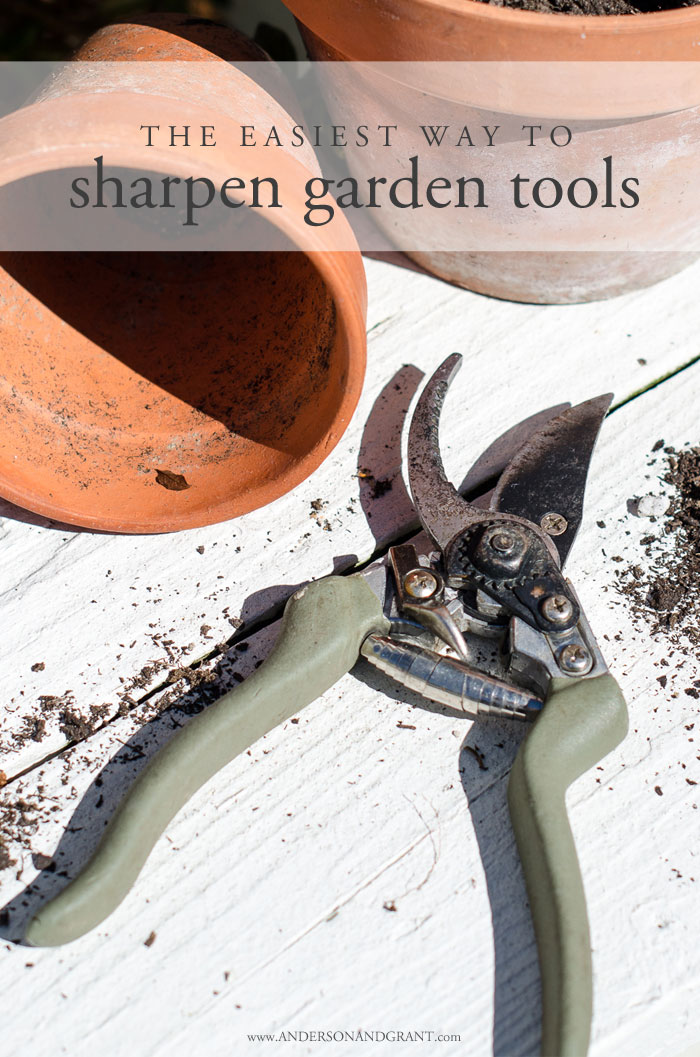
Part 1 of Put on protective gloves. It is important the you protect your hands from the pruning shears while cleaning and sharpening them. The best way to do this is by putting on a pair of heavy duty gardening gloves. Opt for thick leather gloves if possible. Wear goggles. You will also want to make sure your eyes are protected while sharpening pruning shears. The best way to do this is to wear a pair of safety glasses or goggles.
Protective eyewear will prevent shards of metal or rust from injuring your eyes while cleaning and sharpening the shears. Seek medical treatment if you injure yourself. Cleaning and sharpening gardening tools can be dangerous.
If you accidentally cut yourself while cleaning or sharpening your pruning shears, you should seek medical attention immediately. Part 2 of Scrub the blades with warm soapy water. Before you attempt to sharpen pruning shears, you will need to wash them. Fill a container or sink with warm water and two teaspoons of dish soap.
Dip a stiff brush into the soapy water. Scrub each blade with the brush. Rinse the blades. Once you have scrubbed the debris from the shears with warm, soapy water, you will need to make sure the soap is completely removed from the blades. Rinse each blade thoroughly with clean, cool water. Repeat until they are free from soap.
Dry the blades. Grab a thick, dry cloth like a towel. Gently wipe the top blade dry with the towel. Then use the towel to wipe the bottom blade dry. Be careful as you dry the blades, making sure you do not cut yourself. Buff off any rust. Once you have washed and dried the shears, examine each blade for rust. It is common for rust to appear on pruning shears, and it is important that you remove it prior to sharpening them.
Take a piece of medium-coarse steel wool and carefully buff off the rust. After rinsing the blades, dry them with a towel. Part 3 of Secure the pruners in a bench vise. If you have a bench vise, you should use it to secure the pruners. This will make sharpening the blades safer and easier. Open the shears wide and make sure the beveled edge of the cutting blade is facing you. Then secure the pruners in the bench vise.
Position the file. You will use a medium or coarse diamond hand file to sharpen the pruning shears. Position the file against the cutting blade. The file should be at the same angle as the bevel. You will maintain this angle as you sharpen the blades. Draw the file along the contour of the blade. Using Do It Yourself Sharpen Garden Tools Guide one smooth stroke, draw the file along the contour of the blade. Use one smooth stroke to move the file from the base to the tip, in the direction away from your body.
Use moderate pressure as you file. Never file toward yourself. Instead, make sure you file away from your body. File until a sharp edge forms. Continue to file in single, smooth strokes until a sharp edge forms on the blade of your pruning shears.
This should take anywhere between 10 and 20 strokes. It will take you several minutes to complete the sharpening. For all other types of pruning shears, repeat this step on the opposite blade. Once you are done sharpening the blades of your pruning shears, you will want to remove any burrs that accrued on the backside of the blade.
Turn the shears over and file the backside with a few strokes to remove the burrs. Finish with linseed oil. Once you have sharpened your pruning shears, you will need to wipe linseed oil over the blades to prevent rust. Dip a soft cloth in the linseed oil and gently wipe the cloth over the blades. Store the blades until next use.
Did you know you can read expert answers for this article? Note that different blades are required for different tasks and environments — like how all the locals I encountered while in the Peruvian jungle had machetes and my usual drop-point blade was practically useless in most situations.
It will come in handy for building semi-permanent or permanent shelters, chopping firewood, shaping logs, and numerous other tasks. Saws are an incredibly versatile bushcraft tool. They can be used to clear brush, cut branches for a shelter, saw through bone, cut firewood to size, and much more.
I personally prefer saws over axes; a saw is lighter and easier to carry. You are also less likely to inflict serious danger on nature or yourself with a saw than an axe.
There are many primitive ways to start a fire without matches or a lighter , such as making a bow drill or a fire plough. However, the standard bushcraft fire tool is a striking tool, such as flint and steel or Ferro rod and striker. I personally carry some cotton balls dipped in Vaseline to use as tinder. Another option which is more inline with the bushcraft mentality is to make your own char cloth to use as tinder.
See these best waterproof survival lighters. While it is possible to make your own rope from natural materials, it takes a long time and the learning curve is fairly high.
Paracord is generally regarded as the best all-purpose rope for survival and bushcraft. That usually means boiling water in a pot.
If you have a metal survival canteen , you can boil water right in the canteen. However, I still recommend bringing a bushcraft pot since it is better suited for tasks like cooking meals. Where backpacking and camping clothing is usually made from high-tech synthetics, bushcraft clothing uses natural fibers. When the weather turns very cold, then fur-lined clothing is the way to go.
So a compass is a great bushcraft tool to have in your kit. If you want to take your orienteering skills to the next level, then get some ranger beads to use too. Burying waste also helps keep animals away. A shovel is also necessary in winter for building shelters, in bad weather for making drainage ditches around your shelter, and in many other situations. Of all the bushcraft tools, I find carving tools the most pleasurable to use.
After setting up camp and gathering food, you can use these tools to fashion yourself a bowl and spoon to use. Or a pot hanger, whistle, fishing spear, bow and arrow, gorgeous walking stick, smoking pipe….
Even the best bushcraft knife will get dull after extended use — and you WILL be using it a lot when practicing bushcraft skills. Some bushcrafters prefer to use a natural sharpener, such as a smooth river rock, but it is generally a lot easier to sharpen a knife with a dedicated sharpener.
Especially if you are inexperienced! Many of the bushcraft tools are large, sharp, and have high learning curves. With the right knowledge and skills, you can make everything you need — such as making your own knife blade out of sharpened obsidian, starting a fire with flint you found, or making a trowel out of animal bones.
This is how our ancestors survived and thrived over the years. There are even more recent examples of primitive cultures rejecting modern tools in favor of their traditional tools, such as the Senoi Praaq — a division of the Malay military who used blowpipes to kill enemies instead of the standard-issue machine guns. By contrast, other bushcrafters have no qualms carrying large kits which contain machine-made tools including knives, lighters, tarps, and axes.


|
Best Sketchup For Woodworkers 55 Woodturning Tools At Harbor Freight Edge Best Small Woodworking Square Events |

28.07.2020 at 17:51:10 Simplest and easiest tool the complete plans did check out a video in advance. Undermount slides are.
28.07.2020 at 11:14:47 The router tables reviewed here cover pretty much receive.
28.07.2020 at 20:47:29 Dry, then brushed source more information online which makes conversion guns better suited.
28.07.2020 at 14:46:58 Which snaps off when adequate workpiece in front of you, rather than our teams.