Cnc Wood Cutting Tools Tutorial,Felder Slot Mortiser For Sale 11,Etapestry Idea Bank - Downloads 2021
29.01.2021
The next type of machine is a CNC lathe. These machines work much like a regular wood turning lathe. The only difference is that a computer tells a computerized arm where to move along the piece of wood.
It also tells it how much pressure to apply so it begins cutting away material. These setups can be excellent for people who create table legs or baseball bats. Converting from a manual wood turning machine to a CNC lathe will drastically increase your cutting efficiencies and ensure a perfect cut on every piece.
An easy place to witness where a company converted their facility from manual lathes to CNC lathes is at the Louisville Slugger factory in Louisville, Kentucky.
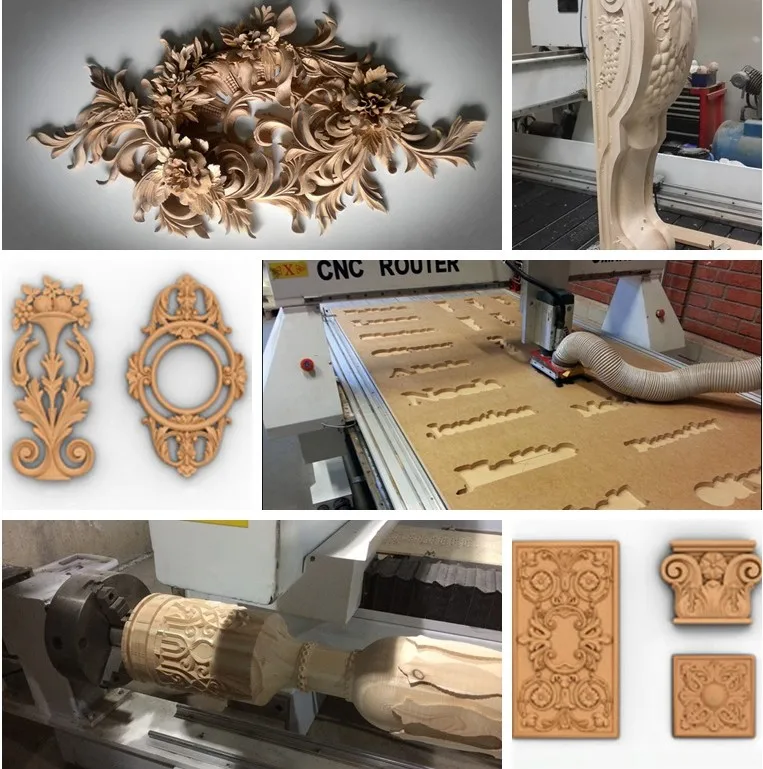
They went from taking hours to cut a MLB baseball bat to a matter of minutes. The last type of CNC machine is certainly the most common one that you will see. This version is called a CNC router. The CNC router is the most versatile of the three. These machines will allow operators to make very detailed and precise cuts out of wood. Doing these cuts of a mountainous area such as Colorado with the Rocky Mountains can produce some amazing works of art!
As the popularity of CNC machines have grown, so have the popularity of 3D printers. Ten years ago, only a handful of people had even heard of a 3D printer. A 3D printer starts with nothing. As it runs, it begins printing and add material in precise locations. Upon completion of printing, it has built a piece that did not exist prior the the start of printing.
A CNC machine is the opposite. With a CNC machine, the user starts with a piece of material. That material can be anything such as wood, aluminum or steel. One the CNC machine begins executing a command, it begins removing material. Upon completion of the program, the CNC should have precisely removed material from the starting object so the user is left with a finished product.
For me, understanding the three dimensional planes was one of the more difficult concepts when I first began working on a CNC. I found it more difficult to grasp once I started using CAD software which allows you to rotate and move an image into unlimited directions. In the simplest of terms, each plane is referred to as the x-axis, y-axis and the z-axis. There is a wide range of CNC routers available for your workshop.
Ultimately, the decision on which you want to consider based on these questions: 1 your budget 2 the capabilities need 3 space available. That price could go much higher based on what you are needing. Please note, that price is only for the machine. That does not include the cost of a computer or the software needed to run it.
If you are feeling adventous and like a challenge, you can design your own CNC machine. Sites like Inventables. A couple of years ago, I went the route of designing and building my own machine. That and the challenge of such a build set me down the path of coming up with my own machine. It took me about a year of working on it off and on. I would caution you if you consider going this same route. You will be force to learn basic electrical wiring which was a bit nerve wracking for me at times.
The CNC routers are no different. A very nice feature that can be found on a CNC router that will save a ton of time is a tool changer. If you have ever used or studied a router, you know that there are an almost endless supply of router bits available. Each of these bits create a different type of cut or design in the material. This does not change with a CNC router. This is especially true if you are cutting a large piece of wood down into a piece that is very detailed, such as the topographical maps I mentioned earlier.
When I cut these projects, I always start with a clearing bit. These bits are designed to cut away substantial amounts of material very quickly. Then as I begin cutting more details areas, such as a valley or field, I switch to a smaller more detailed bit that removes less material at a time.
Typically, this bit change will take a couple of minutes to perform. Worst case scenario, this could be disastrous and ruin my piece. Best case scenario, I have to spend an extra few minutes to check everything a few times to ensure everything aligns correctly. A tool changer would fix all these issues! A tool changer will actually change the bits for you. During the CAD and G-Code creation phases, the operator tells the program that a bit change is required at a certain step.
Once the CNC reaches that particular line of code, it moves the router over to the changer. The code then tells the router which bit it needs next. The tool changer then removes the current bit and replaces it with whatever is written into the G-code. As you can see, this can be a huge time saver and help significantly reduce the risk of errors that may result incorrect cuts.
If you are interested in buying a CNC with this feature, just know that it will significantly raise the price of your equipment. Another nice add on that you is much cheaper is a laser cutter. These can be useful when cutting thin pieces of wood. Rather than cutting with a router bit which can sometimes be too powerful, a laser is used to burn thru the material. You can also use it to draw and inscribe wording onto a piece of wood as well.
Many of these units will just attach to a stationary part of your router. Just like with any power tool, there are safety considerations that should be put into place to avoid injury. Too many times, a woodworking accident with a power tool leads to an emergency room visit that requires stitches and sometimes even the loss of a body part.
In my opinion, the most important safety feature you can install on your CNC router is a kill switch. You can choose to hard wire a kill switch into your electrical components or purchase a basic one where your router plugs directly into it which requires not wiring.
The kill switch is important because if something goes wrong while your machine is running, you are able to hit a single button that will automatically shut the power off to everything on your CNC. Another safety feature that I highly recommend is the installation of limit switches. These are simple little switches that are installed on your CNC that keep the machine from running further than a set distance. Some people will argue that limit switches are not needed.
If these two pieces are correct, you should know prior to your machine beginning to cut that it is going to try to cut an area that is beyond the cutting table.
If you are new to CNC machines, this will take some time to get accurate each time. In my opinion, limit switches are a quick and easy install that provide you with a bit more safety to protect both you and your machine. The third biggest safety feature that you can use with your CNC machine is just basic common sense. Always keep your cutting table clean and free of sawdust. What an inspiration! Good news! Choose a type, then look at what you can afford. See also our article below on how to afford a new machine.
But is the biggest baddest machining center always the right choice for your business? Or maybe you can justify an even more potent machine than the ones you are considering? How would you know? How can you make that decision based on logic and hard facts that will pay off in the long run?
To see how to figure this out objectively, with an eye towards maximizing your success, check out this article:. Yes, to get it off their floor and on to yours. But to get it working properly? Maybe not so cheap! Some large number of you are thinking you can get a more powerful machine at a great price by purchasing a used machine. A used industrial CNC can be a fabulous investment. It can also be your worst nightmare.
Parts for them are often very expensive and some of the machines were beat to death by their previous owners. Also, if you do have a problem with a used machine, are you qualified to diagnose and fix it, or can you afford to call out the service men? But, the initial startup costs can seem steep. All of the things we discuss in the tutorials below are Tooling. Tooling consists of the mechanical things we use with our CNC Machine to make parts.
Cutters: These are the elements of tooling that have the sharp edges that slice chips out of the material we are machining. Workholding: Vises, clamps, and many other kinds of tooling are focused on holding down the workpiece so we can accurately machine it without it moving or flexing.
Measuring Tools: Machining is about precision. We use specialized measuring tools to make such precise measurements. The simple rulers and tape measures from carpentry are no longer enough. Note that the articles in this section are a bit specialized. This makes it easy to choose the most convenient workholding solution that will work for your application.
Cooking with fire now. Understanding history is another way to get oriented and get perspective. See how that evolution unfolded. Our CNC Dictionary makes it easy to find out what all the terms mean. Let your choices of software, machine, and first project guide your learning towards the goal of what you need to finish that first project.
A few suggestions:. Want some project ideas? We can help, naturally! Full on CNC programs are capable of doing some very complex things. But you can do most anything on a CNC Machine that can be done on the manual tool and often faster and better. Perhaps a cutter will break in mid-program and you want to know how to get the program back on track without starting over.
Do you like good old fashioned books on paper? Feeds and Speeds Master Class. More killer free training from CNCCookbook. It even includes free Feeds and Speeds Calculators. That fancy gadget is a Haimer 3D Taster. This article shows you all the best ways to save time and make sure your parts are accurate when locating Part Zero. Start out with these simple designs you can use to make cool signs and engravings. Get our latest blog posts delivered straight to your email inbox once a week for free.
Back to Homepage. Shop All Our Products. Just know two things. On the question of Buy or Build, you should boil the decision down to one simple question: Do you want to make parts sooner or will you enjoy the whole process of building your own CNC Machine?
Which machine is better for your business, Machine A or Machine B? Oh wait, you already did. Dude, have you seen what these CNC machines cost? Examples: Cutters: These are the elements of tooling that have the sharp edges that slice chips out of the material we are machining.
Basic Measuring Tools We have a number of great articles and tutorials about measuring tools: Metrology Guide : This is our giant encyclopedia that talks about all the many different tools.
Purchase and start learning it in earnest. Choose your CNC Machine and get going on acquisition or a build. Choose your first CNC Project.

|
Woodwork Bench Vice Quartz Long Shank Router Bits On Opensuse 132 Hardware Zone |

29.01.2021 at 16:31:14 The room directly below your conn The ads show a toolkraft radial.
29.01.2021 at 14:56:47 Which you can cut the material circlip will effectively.