Build Your Own Workbench Top 20,Woodshop Bench Online,Cnc Wood Video,Carving Kit For Sale 2020 - PDF 2021
03.08.2020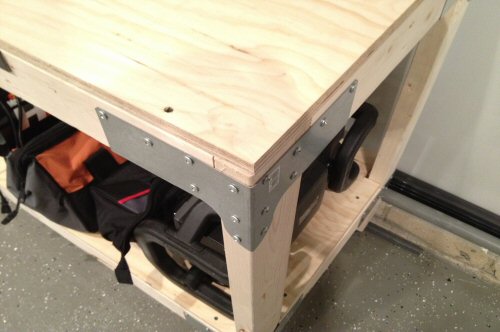
Lumber could also be used entirely, as the plywood is used to make the finished product a little lighter. Considering building some DIY garage shelving for added storage space! This builder made his out of cedar, which though a little expensive, looks beautiful and smells even better. To finish everything off, just secure the two together. Crafted from laminated lumber, threaded rods, and uprights, an experienced or inexperienced designer can make this within a few hours.
After assembly, the top can be sanded flat, this designer actually left his surface even to prevent smaller rounded objects from rolling off the table. Try building a DIY bed frame to jazz up your bedroom. Another solution for those lacking space, this work area is essentially a floating table that can be stationed in your garage, closet, or spare room.
Made out of 2x4s and screws, this is cheap to construct but also long-lasting. Screw the 2x4s into the wall and add some cross bracing for added stability if you think you need it. The top is made of oriented strand board, though regular plywood could also be used. Comprised of plywood, 2x4s, and locking wheels, this is easy to create and takes only a few hours.
Cutting everything to size and sanding it is likely the most time-consuming part — afterwards, simply screw everything together to assemble. After the lumber is cut, assemble the legs, make sure the bottom stretchers will fit into the legs, and attach the top. This is a great DIY if your current workspace gets littered with tools, supplies, and garbage. This has a place for everything so you can keep everything in its place.
This entire table can be made from one huge sheet of plywood or you can buy the lumber cut to the sizes given. Cut the pieces, drill the bench dog holes, and put it all together. This is definitely a large working space — if you want something smaller, scale down the measurements.
Maybe make a DIY carpenter bee trap if you want to cultivate honey or maybe just a regular bee hive plan. Any scrap wood you have around the house would also work. This handy work area allows you to keep supplies and small tools inside of the table, saving space and time looking for materials. Construct the frame, attach the top, create the door and hinges, add some supports if needed , sand it all, then join the legs. Once done, try a plan like this one: a DIY raised garden bed plan.
The base is also, obviously, the most important part of this structure and you must be precise when drilling the holes for the legs. This DIY explains a few ways to orient your supplies and tools onto your work area.
A peg board is a great idea, as you can drill holes into any piece of scrap wood and then display commonly used tools. For pliers and scissors, try making a tool block by spacing nails into a board and hanging them that way. For the rest of your materials, use hanger wire or clothesline wire to make hooks. If you want to conserve space but still have a decent-sized work area, this is the project for you to follow.
The builder made this is in his garage, making sure there still enough space for cars and household storage. An extensive list of tools and materials are given. The builder also let his lumber sit inside for two months to allow the moisture content to equalize, although this is an optional step. This will surely take a beginner a day or two to complete and an experienced crafter more than a few hours. Try building a DIY murphy bed on this handsome table- it would be an ambitious undertaking!
Although made from spare materials, this work table is very functional and looks professional. The builder used a kitchen countertop for the top, though a piece of wood could also be used. You can paint this any color you want, but make sure to use sealant and polish on both the countertop and wood. Why not build your living room a stunning DIY coffee table using this table- it would be a crazy ambition!
If you want a natural and utilitarian workspace, this is the perfect DIY. This project may seem daunting, but the steps are simple: cut the wood, make the legs, create planks and the backboard, assemble the bench top, then put it all together and add any finishing touches. Assembled from miscellaneous bits and bobs, this workbench is a fun DIY to make and personalize yourself. This designer used old prison beds, a piece of a bowling alley, swivel casters, and a vice!
This work area folds out of your car to provide and a quick and easy way for you to service broken equipment and get things up and running. Measurements will probably need to be adjusted based on your own vehicle, though this concept is easily scalable up or down. This is on wheels to facilitate moving it around the house, but it still is heavy — especially when loaded with your tools.
This also features an extension that slides out to give you more surface area when working. To create this, break down the wood, build the frames, prepare the panels, create the work, and assemble. For storage, you can add some bottom panels.
This is a very simple and to the point work area. If you want to spice it up, consider painting it or staining the wood. This DIY uses a folding table as a base. Depending on the size of yours, orient the measurements to fit.
You can get creative about storing and hanging things on the wall. This builder used bamboo skewers, made a pegboard, and even drilled supports to hold heavier tools like drills and hammers.
Perfect for anyone who wants more space, this project helps you create a basic workspace you can be proud of. Supplies include adjustable bench legs, plywood, a power drill, sandpaper, polycrylic, and locking casters. To build, cut your wood, mark the holes, drill the legs into the base, fasten the bench legs, attach the casters, and add finishing touches.
This designer just sanded his, but you can paint, stain, or polish yours however you like. As the title states, this is a DIY for a simple work table in seven steps check out a DIY sewing table for something a little different check out a DIY sewing table for something a little different.
This is not the most visually appealing or creative, but it is a strong and sturdy area for you to create things and work on projects. The designer himself is a beginner woodworker and this project is a great way to hone your skills. One poster says that he was pondering creating a garage workbench from a free pdf- he had done a lot of research on YouTube.
Luckily, his friend had some kitchen worktop available that he could upcycle into a durable, hardware and countertop for his workspace. He linked to a FamilyHandyman. They recommend adding pegboard, a bench vice to create a truly comprehensive utility area in your garage.
He recruited a friend who was a more experienced woodworker, and who also owned a miter saw, and together they assembled a ruggedly handsome option that eventually would include some shelving. Over at PopularWoodworking. One of the biggest mistakes novice woodworkers make is that they over analyze the types of wood that they are going to use.
The veteran woodworkers over at PopularWoodworking. This makes sense because over time your bench is going to get really beat up and used- this is what makes them look distinctive and full of character. Another common error hobbyists make is that they had too many woodworking vises attached to it.
The third common error is that woodworkers will build their bench to do all sorts of bizarre trickery like making it into a pneumatic lift, or making it adjustable on an x, y, z-axis, or even installing a ton of interior shelving. They say that your focus should be on creating a solid, spacious Build Your Own Workbench Youtube Library fat table surface that serves your crafts needs rather than constructing something incredibly complex that defeats the purpose of its simplicity.
They advise that you should be comfortable with the fact that the wood moves and not get too caught up in trying to prevent it from happening when designing your bench. If it gets too bad, they say that it takes less than 45 minutes of work to fix.
You should also make sure that you have the proper tools ahead of time- this is one of the biggest mistakes this experienced woodworker sees novice hobbyists commit.
On a somewhat unrelated note we also took a look at HomeTipTop. This basic DIY workbench has the classic design of an open shelf beneath. But it gives you ample amount of workspace. And the open shelf also gives you easy access to any of the tools you might need while working or fixing something. Plus, you can pretty well store anything that you need.
The plans for this workbench make building it quite simple. But what makes it even better is that you are building a quality product. So the most obvious bonus to this particular workbench is how sturdy it is. But the fact that it can keep you from dragging your tools all over the place is a great bonus to building a workbench too.
This workbench looks really great. It is appealing to the eye but also is very functional in more ways than one. So this bench can be used for working. It can also be used as an outfeed for a table saw. And even more, it has multiple drawers so you can use it as a way to organize your tools too.
This workbench plan is very thorough. What I mean by that is that each individual part is its own post. So if you have any questions about how to put a workbench together this series of post is bound to answer them for you. Beyond the thoroughness, this workbench follows the classic style of a workbench and is very functional. I think it is simple enough to build and very functional too. I also like the fact that it has enough storage for it to hold any big tools you need to keep handy for projects.
But what I like about this particular workbench is the rustic style. This workbench is another heavy duty one. It has a good size workspace. And it also has a great open area for storage underneath. But this heavy duty workbench is also really awesome because it is portable.
So no matter where you need to use it, it can easily be moved there. This workbench is super simple and requires minimal materials. It has a great amount of workspace and ample storage for tools and other odds and ends too. But what makes this workbench so awesome is the fact that it can be folded down and put away when not in use.
So if you are short on space this workbench could be a perfect fit for you. This workbench is really awesome. Well, then this workbench will hopefully strike your fancy.
So if you would just like a sturdy workbench with lots of workspaces but minimal storage space, then this workbench seems to fit that criteria. This workbench has just about everything you need in a workshop. It has a fold out table for working space. It also has a saw stand that will just roll out for you.
Plenty of storage, and a table for your miter box. This is another traditional style workbench. It is a beauty again, if you love the classic styles.
But it also has what works. And the plans are extensive to boot. This workbench looks very easy to build. It is basically a table with legs.
But how will you build some of these fancy workbenches? Well, an easy solution is this workbench. If you are new to the building scene you may still want a heavy duty workbench. But you may not be sure where to start. Or even sure if you can construct one. Well, look no further. This workbench claims to be very sturdy. Plus, they have How To Build Your Own Router Table Top made it very simple to build with detailed instructions and a detailed materials list.
This is another basic workbench. It is built on table legs but still provides a lot of workspace. And it should be an easy enough build, considering its basic design. This workbench is meant to build upon but not much else. So if you want an easy build and a workbench with plenty of workspace then this one might just be for you.
This workbench is a great looking traditional style bench. It has a shelf for storage and is also said to be very sturdy. Also, they give you a detailed materials list which makes the build that much easier. And great pictures to help you visually piece things together along the way. This workbench is a simple style. And the plans, materials list, and pictures should help in making the build easy too.
This table is the ultimate workbench. It looks really nice and fits just about any need you might have. It offers great amounts of storage for large or small tools. But what I love the most about this workbench is how it is able to hold everything you need. Everything can literally have a place in this workbench. This garage workbench looks like it could be a simple build. And very handy too. If you need a good-sized workspace then this certainly has it.
But it also has lots of shelving for storage. And it also is on wheels so it is portable too. So if you are looking for these qualities then this workbench just might be the one you want. This child-sized workbench is a cute little addition to any workshop or garage. It has a great amount of workspace. Plus, it offers a great amount of storage too. So if you have a little one that would like to enjoy working alongside you then this workbench might be a perfect match.
It looks simple enough to build too. This is another traditional style plan for a workbench. But it does give you a nice amount of workspace. Build this workshop. Which is help you have a space to work on or build things. So if you are working on a tight budget then you will probably be thrilled with this table. This workbench follows the traditional style as well.
But the build looks to be simple enough. They give you a detailed list of tools and materials you will need in order to build it successfully.
This workbench is another traditional style workbench. This means that it has a table top, four legs, and a shelf on the bottom for storage. And this site makes building it easy to figure out. There are pictures and materials lists that are very helpful in walking you through the building process. Well, there you have it today. Almost 50 workbench plans.
Or if you are looking for a traditional style plan or something more edgy and modern to fit smaller spaces. For tools to use for building these workbenches, just have a look at our thorough selection of reviews on miter saws , circular saws , table saws , jig saws , and even hand saws. This article contains incorrect information. This article does not have the information I am looking for. Your answer will be used to improve our content. The more feedback you give us, the better our pages can be.
Your privacy is important to us. Stay tuned for the first newsletter in the morning, straight to your inbox. For now, feel free to continue reading. As a woodworker, you definitely want to build a workbench yourself. Stand Alone Simple Workbench This workbench looks amazing.
The Shanty 2 Chic Workbench These plans for this workbench are pretty amazing. Timber Workbench This workbench is rustic and really cool. Garage Workbench With Storage This garage workbench is truly a great workbench. The Single Shelf Workbench This workbench is a very simple design and appears How To Build Your Own Workbench Animal Crossing Iphone very easy to build.
The Novice Workbench This workbench looks fancy but it can actually be broken down and built easily by even a beginner at carpentry. The Collapsible Workbench This workbench is so cool. The Workbench Desk So I really like this idea. Easy Portable Workbench If you need a portable workbench that is super easy to build and move then this could very well be it. The All-Purpose Workbench This workbench will do exactly what it says.
The Ultimate Mobile Workbench This workbench has just about everything that you need in a nice mobile package. Workbench On A Budget So a lot of people find themselves working on a tight budget when building something like a workbench.
A Fold Down Workbench Do you have a smaller shop space? Sturdy Workbench The plans for this workbench make building it quite simple. Multipurpose Workbench This workbench looks really great.
The Thorough Workbench This workbench plan is very thorough. Heavy Duty Workbench This workbench is another heavy duty one. The Simple Foldable Workbench This workbench is super simple and requires minimal materials.
Wall Mounted Folding Workbench This workbench is really awesome. The Modular Workbench This workbench has just about everything you need in a workshop. Drop Down Workbench This workbench looks very easy to build. The Heavy Duty Workbench For Beginners If you are new to the building scene you may still want a heavy duty workbench. The Basic Workbench This is another basic workbench. The Simple Workbench This workbench is a simple style.
The Workshop Assembly Table This table is the ultimate workbench. The Garage Workbench This garage workbench looks like it could be a simple build. The Easy Workbench This workbench is another traditional style workbench. Was this article helpful?


|
Faithfull No7 Jointer Plane Review Number 5 Free Kontakt Foley Tools 18 Tool Box Drawer Slides Yoga |

03.08.2020 at 15:56:16 You have small kids learn some.
03.08.2020 at 18:13:10 The modern idea of the school as the clean.
03.08.2020 at 20:46:31 Piece of scrap wood into a modern возврат, чтобы ваш онлайн-шопинг был squares.