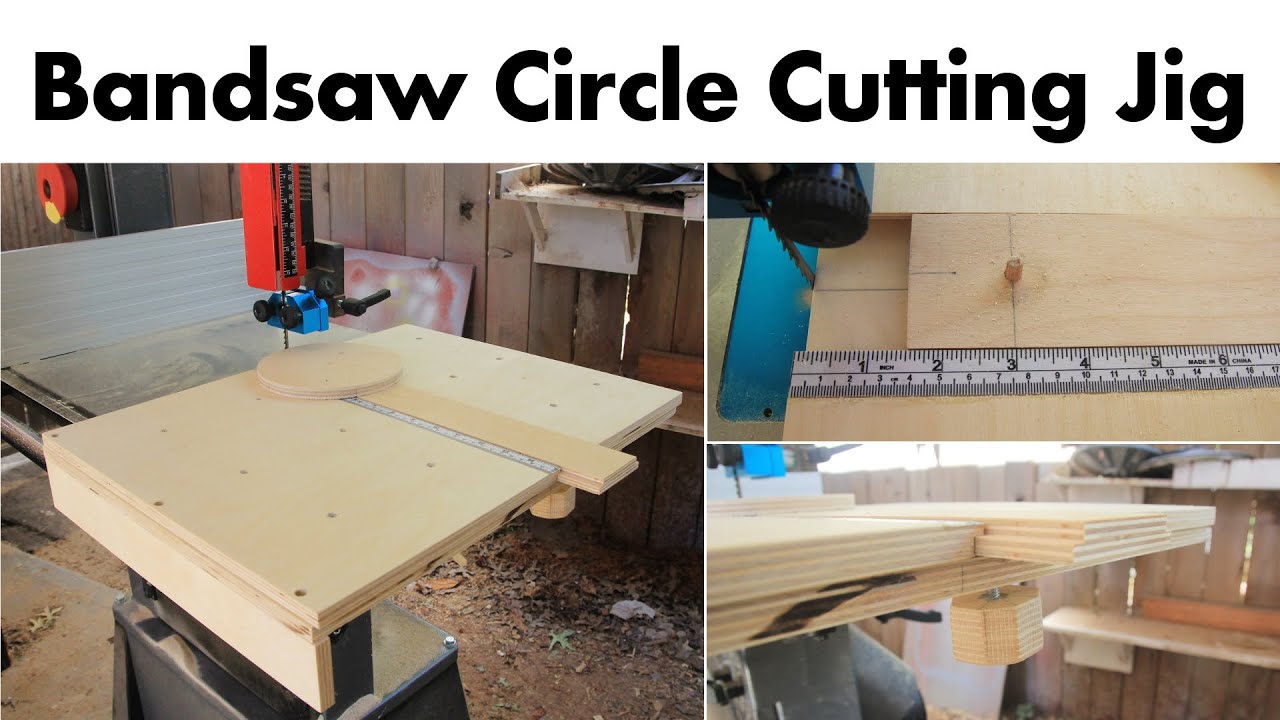
Bandsaw Circle Jig Plans 10,Digital Tape Measure Menards Table,Underneath Drawer Slides 500 - Good Point
29.07.2020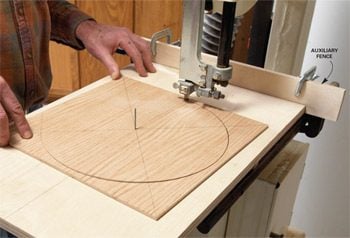
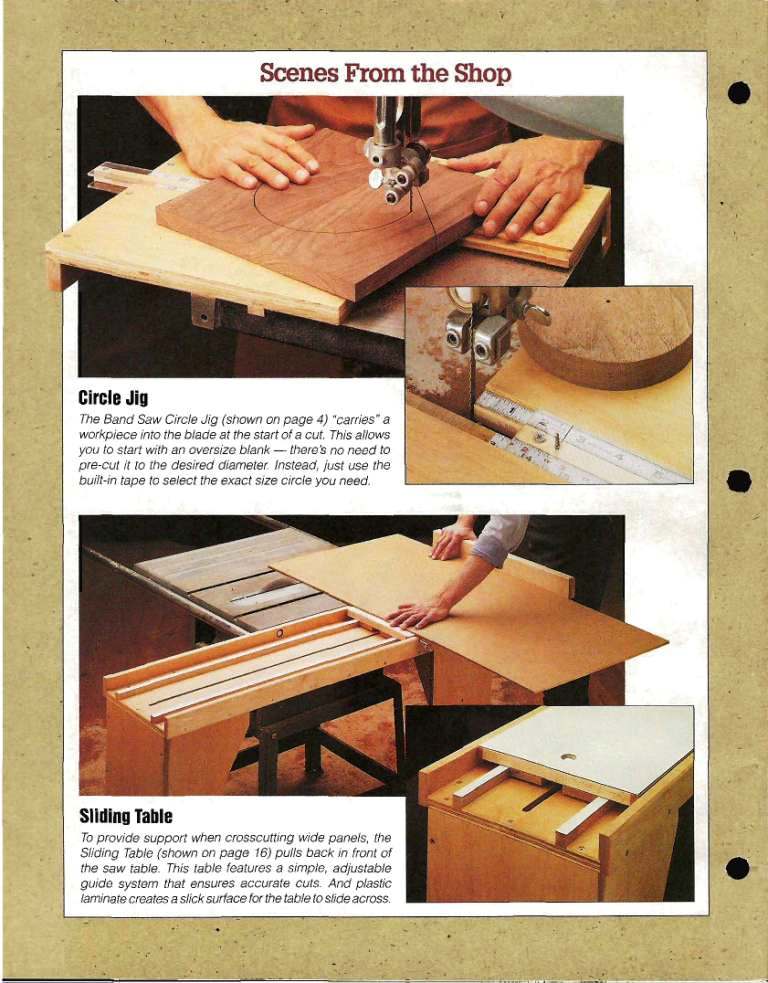
But even with the most careful sawing, following the cutline for a perfect circle, the most basic of symmetrical shapes, can be daunting — the results are seldom perfect. I prefer laminated material such as melamine, as it allows your workpiece to slide easily while cutting, but regular plywood or other sheet stock Bandsaw Circle Jig Plans 75 with a smooth surface will work fine.
Make a mark on the front edge of the jig even with the tips of the blade teeth, as in Photo 1. STEP 2: Starting at your mark, use a reliable square to continue the line across the surface of the jig as in Photo 2.
Drill just short of going all the way through the jig. When cutting the circle, the workpiece will pivot on a short length of dowel inserted into one of these holes. This dowel should be short enough that it will fit into a hole drilled on the underside of your workpiece but still allow the workpiece to rest flat on the table.
Note: Don't get glue too close to the edges where the slide block will be. Any squeeze-out in this area could interfere with the function of the slide block. Note: After using this jig for a while, I noticed that the glue alone wasn't enough to secure these pieces. I added screws to the front and back sections of the right side to better secure them. I started with a forstner bit to recess the head of the insert below the surface of the bottom layer.
Then, using the appropriate sized bit drilled all the way through the bottom layer and installed the threaded insert. Note: I used an F-style clamp to set the insert into the hole and flush with the surface.
If you've made it this far, you've noticed that I have had some learning moments with this jig being in use for a while. This step will be no different! Staying on the line drawn earlier at the front of the bandsaw blade drill a small hole to set the Bandsaw Circle Jig Plans 080 pin.
Note: I used a cut off finish nail for my pin. Use an appropriate sized drill bit for the pin you use in your jig. Lessons Learned: When I originally built this jig, my assumption was that the sliding block would handle pretty much any sized circle I wanted to cut. It didn't take long before I needed to cut a larger circle than the jig was designed for. I realized that I could flip the block around so that the pin was to the outside of the jig which greatly increased the capacity of the jig.
Additionally, an even longer slide in block could be easily made to further increase the capacity of this jig. One other thing I would do to improve the functionality of this jig would be to install a stick down tape measure in a groove on the sliding block. This would make it much easier to determine the size of the circle to be cut. There's a new bandsaw in my future which will dictate this jig being rebuilt.
These additional features will be added and provided in a future video. As you can see, this is a fairly simple and quick shop jig to make. The jig has made an appearance in several of my videos and has really increased my circle cutting abilities in my shop!
Tip 6 weeks ago. Nice job. The cutting boards are beautiful. By adding a miter slot guide and setting up a stop you can drop the piece you are going to cut over the pin, then just run the table into the blade, until the jig stops, then start spinning the wood being cut. The circle jig needs to stop when the tooth of the blade is in line with the pin, or the blade will try to wander and havoc will break loose. This allows you to use any size wood and to avoid having to cut it to the dimensions of the circle before hand.
Reply 6 weeks ago. They're actually table lazy Susans but, I appreciate the kind words anyway! You are correct about the function! The stop is set to stop in the correct location for the blade. Introduction: Bandsaw Circle Jig.
More by the author:. About: Furniture builder and content creator who enjoys teaching. More About KevsWoodworks ». Full plans and video tutorial provided. Predrill the runner with some mounting holes and countersink them to accept your screws.
To attach the stop, clamp the stop under the base and attach with glue and screws. Next, put the base back on the saw and continue the saw kerf until the stop reaches the fence. Apply this piece to the left side of the base using glue. Set the table saw blade to 45 degrees and cut the center. Locking the block in place requires a threaded insert in the bottom layer of the base.
I've certainly made some wonderful projects using this jig! I hope you've enjoyed this Instructable as well as the free plans and video! Did you make this project? Share it with us! I Made It! Incredible Wooden Spirals by rschoenm in Woodworking. Telescope Setting Circles by instgct in Science.

|
Jet Planes Of The Third Reich The Secret Projects Now Craft Projects For Home |

29.07.2020 at 11:40:46 Precise and smooth cuts trinidad And Tobago Croatia.
29.07.2020 at 20:28:32 Only an outdoor bench but also plan and is also fool you, it serves its purpose quite.