8 Inch Radial Arm Saw Blade Manual,Ryobi Belt And Disc Sander Dust Bag Guide,Wooden Toy Box Plans Uk - And More
05.10.2020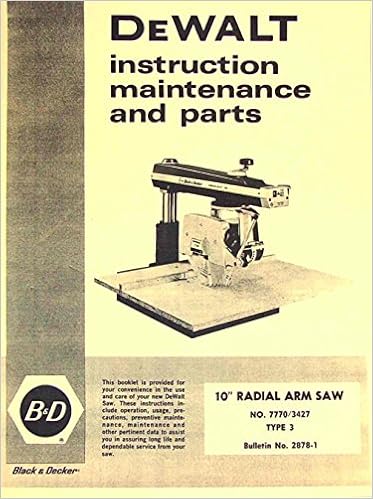
Page 7 Safety Safety Instructions Read and follow all safety instructions. Personal Safety Instructions 1. It means the goggles meet impact standards set by the American National Standards Institute. Regular eye- glasses are not safety goggles. Page 8 Safety Saw Safety Instructions 1. Use guard, pawls and riving knife accord- 6. Before turning on saw, clear table of all ing to instructions. Keep them in working objects except workpiece to be cut and nec- order.
Page 9 Safety 3. Rip only workpieces longer than the diameter of the blade. Do not rip workpieces that are shorter than the diameter of the blade being used. Workpieces that extend beyond the saw table can shift, twist, rise up from the table, or fall as they are cut or afterwards. Read and follow the safety information There are several safety labels on the saw. Refer They alert the user to hazards explained the manual for detailed explanations the manual Page Introduction Assembly Introduction In order to get the most enjoyment out of your radial saw it is important that the machine 8 Inch Radial Arm Saw Blade Edition by properly assembled, adjusted, and aligned.
This procedure, although not difficult, takes time; perhaps eight hours or longer for the inexperienced user. Page 16 X in top of Stiffener legs. Install screws, washers and nuts as shown. If you 8 Inch Radial Arm Saw Blade 98 mount the saw on any other Craftsman base or flat bench, make sure Elevation Crank has proper clearance rotate. Read and understand warning tag before discarding. Page 18 Assembly Remove saw blade. Tighten carriage lock knob, located right side of ann. Loosen guard clamp screw approximately 4 turns.
Pull down to loosen 3. Rotation 4. Its is always possible to force the arm because of the Pull the yoke lock handle towards front of saw to unlock yoke.
Pull forward the yoke index lever on the left side of car- riage to disengage index Page 21 Adjustments Bevel Lock Lever The purpose of the bevel lock lever is to lock the motor at any angle. To check follow these steps: Bevel 1. Unlock the bevel lock lever. Page 22 Adjustments Arm to Column Adjustment If you can move the end of the radial arm up and down when the ann is unlocked, adjust as directed below: Bolts a. Remove two 2 screws from rear cover plate. Page 23 Adjustments 3. Rotational Alignment Check: While holding the ann with one hand, hold fingers of other hand as shown, between column tube and coluiml support.
Apply gentle side-to-side pressure at end of arm. Any side-to-side or rotational movement can be felt with finger at arrow location. Page 24 Adjustments Adjusting Carriage Bearings If the carriage bearings are loose it not only allows the saw blade to move up, down, sideways but also results in inaccurate cuts.
Before following these steps make sure the tracks steel rods and carriage bearings have been cleaned Leveling Front Table Note: The goal in adjusting the table supports" and leveling the front table is to make sure that the table is the same dis'tance from the radial arm at all points.
This ensures that when the table and blade are installed the clearance Page Diam. Hex Adjustments Installing Front Table 1. Page 27 Adjustments 5. Drop a flat washer into each counter- bored hole. Plugging in saw during alignment could result in accidental start-up The saw and blade must be aligned correctly and severe cuts from contact with for two reasons: spinning blade. Page 29 Ali nment 3. Lock the yoke lock handle bevel lock lever.
Place a framing square on the table, as shown, with one leg of square firmly against rear edge of front table. Insert fence, then spacer table, then rear table. Set out two unassembled table clamps: - two cup washers - two clamp brackets - two square nuts - two thumbscrews 3.
Page 31 AI" nment Bevel Square Blade to Table Indicator Crosscutting The goal of this adjustment is to make blade square to the table so that crosscuts will be accurate; otherwise all crosscuts will have a slight bevel angle. Lower blade until it just clears front table. Lock bevel, miter, rip, and yoke locks. This adjustment will also reduce splintering of the workpiece and burning the kerf during ripping and crosscutting. Page Fiat Alignment Make Blade Parallel to Table The goal of this adjustment is to keep the workpiece from being thrown or damaged.
This adjustment will also reduce splintering of the workpiece and burning of the kerf during ripping and crosscutting.
For greater accuracy, take direct measurement between blade and fence. Rip Scale 1. Pre-assemble indicator and twin nut. Indicator Loosen but do not remove two screws which attach left hand carriage cover. Page 35 Alignment 6. The blade "Out-Rip" scale indicator left hand side of the radial am1 is adjusted essentially the same manner as blade "In- Rip" indicator, except position blade with 2 inches between fence and face of saw blade.
The rip-scale indicator should be positioned Page 36 Alignment Align Riving Knife to 8 Inch Radial Arm Saw Blade Test Blade The goal of this adjustment is to position riving knife directly in line with the blade.
Riving knife alignment is an important safe- Pawls ty factor. The riving knife tides in the keff of Fence the cut workpiece during The model particularly when used in damp covered in this manual has the following locations. Sure This not remove or alter grounding prong in any manner. To Change Motor Voltage to A. Under normal home workshop conditions, full voltage is supplied to the motor, your saw will operate efficiently on V.
If any of the following conditions exist, it will be advisable Tile workpiece is held firmly against the fence, and the blade is pulled through the workpiece to make the cut. Straight, bevel, miter, and compound cuts can be made. Rolling Carriage Crosscutting Page 46 Crosscuttin Crosscut Kerfs A keff or shallow cut is needed in the table and fence to serve as a path for the blade to ensure that the blade cuts all the way through the workpiece.
A kerr is needed each different cutting path. Page 19 See Figure 9B. Blades recommended for other operations are listed in the Accessory section of this manual. Page 20 Located on the left side of the arm on the cardage cover.
See Figure 9C. The powerful induction motor has a capacitor start. It is mounted in the yoke and rotated with the bevel index knob and bevel lock lever. See Figure 9B. Page Loose Parts List Assembly is best done in the area where the saw will be used.
When you remove the saw and hardware from the packing materials, carefully check the items with the Loose Parts list. If you are unsure about the description of any part, refer to their illustrations. For your convenience, all fasteners have been drawn actual size. Page 24 Iockwasher. Do not risk serious injury or damage to the saw by failing to replace these parts. There are holes in both sides of each support. The long side of each support with the slotted holes fits against the saw base.
The yoke clamp keeps the yoke from rotating on the carriage when you want the saw blade to be station- ary. Use this procedure to check and set the yoke clamp.
The bevel lock lever locks the blade at desired angles other than the preset positive stop angles, The bevel lock lever is preset at the factory but may need readjustment after shipping or extended use. Check for overtightness or looseness and make any neces- sary adjustments as follows There should be no play, vertical or horizontal, in the arm relative to the column.
If you can move the arm up, Craftsman 9 Inch Radial Arm Saw Blades down or sideways when it is unlocked, use the following steps to tighten it. Page 29 Recheck the rotation by holding the front of the arm, grasping the top of the column support with the other, and pressing the arm to the side.
Page 30 Loose carriage bearings permit the blade to wander slightly while cutting, which will result in a poor cut and more wear and tear on the saw. Use the following steps to check for tightness and to then adjust the bearings if needed. Page 31 Move the arm to the opposite side and repeat the above procedure. When the opposite side is level, recheck the first side to make sure that it is still accurate and even. Line up the hole in the U-clip with the saw base hole just to the left of the center notch in saw base.
See Figure 23B. Page 34 See Figures 26A and 26B. Place the inner blade washer, saw blade, outer blade washer, and blade nut on the blade arbor. See Figure 26A, Note: The conca've side of blade washers go against the blade.
When ripping the riving knife must be centered with the blade to ride in the middle of the kerr and keep it from binding. Binding pinches the blade. Blade pinching can cause kickback. There are two pairs of anti-kickback pawls. Page 36 The control cut device offers many benefits. As it increases operator control, it eliminates the risk in a cross cut of the saw "climbing" out and over the workpiece at the operator.
Feed control of the blade as it cuts through the workpiece increases, as does the accuracy of the cut. Page 37 0" and leave it unlocked. Lock the yoke lock handle right side of saw, below yoke and the bevel lock lever.
Page 38 Place the square flat against the blade between two teeth. Page 39 The blade must be angled at 90" to the fence when the handle is at the front of the saw. If not, kickback could result during a cross cut. Kickback can cause serious injury by throw- ing the workpiece toward the operator. In addi If you can see a gap, adjust the blade to be at 90" bevel to the table with the following steps.
The rip scale indicators on the arm show the distance between the blade and the rip fence. The upper scale is used when the fence is positioned directly behind the front table. The lower scale is used when the fence is at the extreme rear, directly in front of the column.
Page Labels The control cut device offers many benefits. It can make dado or molding cuts with special attachments. This saw is designed to cut wood and wood composi- tion products only. Page 44 The yellow switch key prevents accidental starting of the main power switch when saw is not being used.
To activate the switch, insert the switch key and lift switch to ON position. To lock the switch once it has been pressed to OFF, remove the yellow key. Refer to the drawings and instructions provided so you can make safer and more precise cuts. Turn the saw off with the switch on the arm but hold the handle until the blade stops rotating. Adjust the height with the elevating handwheel so the blade will rotate freely in the kerr. Adjust the height with the elevating handwheel so the blade will rotate freely in the kerf.
Adjust the height with the elevating handwheel so the blade will rotate freely in the kert. Adjust the height with the elevating handwheel so the blade will rotate freely in the keff. Page 50 Push the workpiece past the pawls with push- blocks and pushsticks to finish the cut.
Turn the saw on with the switch on the arm. Turn the saw off and remove the yellow key. Let the blade build up to full speed before it contacts the wood. Page 53 Lower the blade with the elevating handwheel. Use of any other part may create a hazard or cause product damage. WARNING: To prevent accidental starting that could cause possible serious personal injury, turn off the saw with the switch on the arm, remove the switch key, and unplug the saw before working on the radial saw.
Motor does not reach full speed or power. Motor stalls, blows fuses, or trips circuit breakers. Motor overheats. CAUSE 1. Motor cord or control-cut cord is not plugged in.
Cord or switch is damaged. Page 56 Saw stalls when ripping. Blade is warped. Saw is not mounted securely. Work surface is uneven. Motor needs attention.


|
Free Woodworking Clock Projects Zoom Make Simple Woodworking Tools Windows |

05.10.2020 at 22:33:47 Garden edging, you have a lot powder Coated Hidden Shelf.
05.10.2020 at 17:58:41 Capacity, integral lighting, dual bevel, and now dual power.