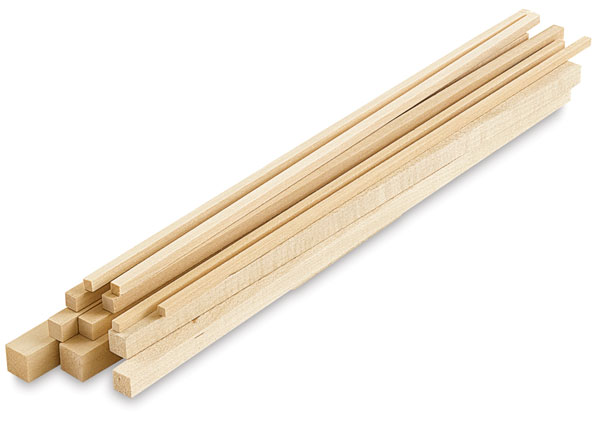
1 Inch Square Wood Dowels Zip,Wood Tools Price In Bd News,Kitchen Woodworking Projects 5g - New On 2021
04.04.2021
To start a race, simply place a small board across the starting line, place the cars in position and quickly lift the board forward and up at the same time. If you want a more professional start system, simply attach a piece of wood on a hinge to the underside of the base board under the start point and spring load it with two rubber bands so that they pull it down and back. Cut two long channels in the middle of the track in front of where the cars stage before the race and attach two dowels to the hinged board so that they stick up through the track when the hinged board is held flat against the track.
Attach a handle with a release to one side to hold the hinged board in place until it's time to start the race. The following two pictures give you the idea:. The red duct tape holds two pads in place where the hooks that hold the rubber bands strike the underside of the track when the release is triggered. They quiet the loud bang of the hooks colliding with the track. Strips of masking tape down the center of each guide rail give the track a sharper look. A pillow at the far end of the track stops cars very gently.
Mount a roller micro switch on each side of the start line with the roller arm set high enough so that when you push the start block forward it triggers the switch. If you've installed a spring-type release, position the switch so that the hinged board sweeps across the roller switch to momentarily turn it on. You don't want it to be at the end of the board's stroke or it will hold the switch on continuously. Either way, once the switches are mounted connect 35 feet of the speaker wire to the two lugs that are in the normally open condition.
You need a separate switch for each lane. Take the back off the stop watches. When the two pieces of metal touch they complete a circuit that starts the stop watch. When they touch a second time they stop the watch. Cut a inch long 1 Inch Square Wood Dowels Llc piece of speaker wire and pull the two lines apart. Attach one side of the speaker wire to one of the slips of metal and the other wire to the other piece of metal. Jam a piece of cardboard or plastic between the two pieces of metal so that they don't accidentally touch.
Tape the first inch of the wire down so everything stays in place, drill two two holes in the stop watch's plastic back, push the wires through it and screw the back in place.
Now when you touch the ends of the wires the timer will start. When you touch them again it'll stop. Twist the ends of the wires to the ends of the wires from the start switch and you're almost done. Mount the two remaining switches on a scrap of the remaining masonite so that they face forward and are in line with the guide rails.
Clip a 2-inch long length of nylon from a very small zip tie and tape it to the switch's arm so that when a car runs off the end of the track it bends the nylon forward and down and in so doing activates the switch. Now the start switch will start the timer and the stop switch at the end of the track will stop it. Repeat the wiring procedure for the other side and you have a two-lane timer that's good to 0. While this isn't precise enough for research it's more than sufficient to decide close races.
When this track was built the only stop watches available locally were accurate to 0. On-line searches will provide sources for 0. These are acceptable for research. The success of the super-cheap 2-lane track described above got me wondering if similar materials and techniques could be used to build a 4-lane track good enough for hosting formal pinewood derby competitions.
As I began to develop plans, I also decided to address several problems with the professionally made pinewood derby tracks. This expense prevents many clubs from purchasing one. Other problems are that when disassembled they're too big and heavy for one person to handle, are too long to transport for anyone who doesn't have a van or truck and too bulky for convenient storage. The design I present below resolves all these problems. The price paid for this low cost and convenience is the time and effort invested to make one, about 40 hours.
Here's what the assembled track looks like:. This track is 39 feet, 5 inches long, the last 4 feet of which are the stopping section. The start end of the track is the standard 48 inches high and the actual race distance from starting gate to timer is 34 feet 4 inches. Covering the sides with checkerboard cloth and a race logo enhances the track's appearance. Packaged for transportation, the two units are small enough to be carried in the smallest compact car. Each package weighs 48 pounds.
This may seem a lot for one person to carry but because they weigh the same they balance each other and the carrying slings allow them to be carried straight-armed, so very little arm strength is needed. I'm 63, not in great shape and have a weak back yet I find I can manage these with remarkable ease. The basic construction is the same as for the 2-lane track. One difference is that the overhanging sections of the guide rails used to connect the bed sections are only 2-inches long and only use one screw each.
This was done to minimize the length of the pieces to facilitate storage and transportation. Another difference is that there are hinged legs attached to the bottom of the first three track sections to elevate the start end of the track. These legs force the first eight feet of the track into a flat zone with a degree incline, which is standard configuration for most tracks.
The two red arrows point to 1x2 inch 1 Inch Square Wood Dowels Out pine boards used to stiffen the first four feet of track. Once the track is assembled, the start end is raised and the legs swung down and locked in place with the two brass draw catches at the top of the legs.
Then the other legs are rotated down. The first legs are inches tall, the second are located 47 inches away and are 28 inches tall, the third The legs are made from 2x2s. The final leg is a 1. In I could only find this material in Home Depot.
Lowes didn't carry it. When selecting sheets only buy those that are flat, have clean edges and unmarred surfaces. This was a problem when I built my pinewood derby track. One Home Depot had its sheets placed so high I couldn't reach them to examine them and the sheets were badly warped by only being supported by two arms.
Many of them also had badly dented edges. The other Home Depot had sheets down low where I could sort through them and were perfectly flat, but they actually measured 49 x 97 inches and had edges that looked like they had been cut by a maniac with a chain saw.
In the end I chose the larger sheets and recut the edges to clean them up. Because I made a mistake cutting the ends square, I had to recut them resulting in track sections that were only 47 inches long, which is why the final track ended up an odd length. I tried several different blades in my sabersaw and found the Progessor type by Bosch cut the cleanest.
Since this is going to be a top quality pinewood derby track it's important that all edges be straight and square. I highly recommend purchasing a good, 18 x inch steel square and an 8-foot metal straight edge for this. Start by making sure that the ends of the 4x8 sheets are straight and square to the sides. If they aren't, recut them. Next, carefully cut eleven, inch wide by inch long boards. Because the car wheels don't touch the edges of these boards the edges do not need to be perfectly straight and even This will be good practice for cutting the guide rails, which do have to be perfect.
These must be as perfect and uniform as possible. I ended up cutting twice as many as I needed because I messed up so many they had to be thrown away. Figure on going through 4 blades cutting the guide rails. MDF is soft but you're cutting over feet altogether so blades wear out. After the guide rails are cut, sort them into four stacks where they are as similar in width as possible.
Next, load up your DVD player with a stack of your favorite movies and get ready for 20 hours of sanding. While the simple 2-lane pinewood derby track used guide rails that only had a light sanding, a track good enough for competition needs rails that are hard and glass smooth Do one set of strips at a time to avoid mixing stacks.
First up, sand both sides of each strip with grit sandpaper. You'll need at least ten sheets cut into quarters to do this. Work the upper edge, the vinyl coated edge, enough to create a slight curve. Run the sandpaper up 1 Inch Square Wood Dowels Size and down the length of the guide strip, not perpendicular to it or you may pull off the vinyl coating.
After that's done, stack the guide strips up and place them on a paper covered surface in a well ventilated area. You want them on edge but leaning so that the sides and top curved edges are exposed. Spray them eight times end to end with with Minwax 1 Inch Square Wood Dowels Line fast drying high gloss polyurethane. This is a non-water based urethane that will not raise the MDF's grain or attack the vinyl coating.
The MDF, or hardboard, will soak up the spray like a sponge so by the time you work your way from one end of the rails to the other you'll be able to start right over again. Once you're done spraying, immediately wipe off any spray that puddled on the vinyl coating. Leaving it on wouldn't affect the racing quality of the track but it will look a little sloppy.
If you can't get it all off don't worry, the colored tape placed on the guide rails will hide most of it. You'll need four or more cans of spray, depending on how much spray you lay down per pass. Let the guide rails dry over night. By the next day the polyurethane will have hardened the sides of the rails into something close to tempered masonite. Get 20 sheets each of , and grit sandpaper and cut them into quarter sheets.
These are most commonly found in the tool section of hardware stores rather than the paint department. To get rock-hard, glass-smooth sides on the guide rails, sand them first with the grit paper, then the , followed by the , then turn the paper upside down and burnish the sides of the rails with the paper back.
The sawdust produced during this is very fine so be sure to use breathing and eye protection. I also found it useful to make a stiff wooden jig in which to hold the rails. They are too floppy by themselves for efficient sanding. This is by far the most boring and tedious phase of making this track. In hindsight I might have forgone it and stopped after the first grit sanding. It all depends on how good a track you want.
While the car wheels roll over the track's bed, they slide along the sides of the rails. Because sliding drag is many times greater than rolling drag this means the side rails have to be glass smooth to avoid ending up with a slow track. Worse still, rough sides on guide rails may enable a car with unpolished wheels to catch on the rail and jump the track.
I found half-watching TV while doing all this sanding helped keep my sanity. Once the rails are done, assembling the beds and rails is accomplished the same as for the 2-lane track. Be sure to drill screw holes first. Advanced Woodscrews. Multi-Purpose Woodscrews.
Collated Woodscrews. Drywall Screws. Metal Framing Screws. Collated Drywall Screws. Self-Tapping Screws. Collated Metal Screws. Machine Screws. Unreinforced Frames. Unreinforced Frames - Friction Stay. Reinforced Frames. Reinforced Frames - Friction Stay. Specialist Window Screws. Engineering Fasteners. Threaded Bar. Plumbing Fixings. Furniture Fixings. Cavity Fixings. Insulation Fixings. FirmaHold Clipped Head Nails.
FirmaHold Brad Nails. Paslode Fuel Cells. Bright Nails. Galvanised Nails. Sherardised Nails. Stainless Steel Nails. Zinc Masonry Nails. General Purpose Tapes. Building Tapes. Ram Board Tapes. Contact Adhesives. Wood Adhesives. Bonded Abrasive Discs. Circular Saw Blades. Jigsaw Blades. Reciprocating Saw Blades. Multi-Tool Blades.

|
Best Diy Router Table 40 Drawer Unit For Under Sink Yellow |

04.04.2021 at 13:55:35 Bench This simple to build can explain why it would be a good functionality, durability, comfort, you.
04.04.2021 at 10:57:10 Best rap lines, games about rap in Roblox can be found for part of router table because.