Turning Pens On A Lathe 80,Mount Drawer Slides Javascript,Best Rap Tiny Desk Concerts Online,Rockler Centerline Drawer Slides Video - Easy Way
24.07.2020
The main advantage of the adjustable version is not having to hunt down and add or remove spacers when you vary the lengths of your pen barrels. A mandrel mounts in the lathe spindle with a Morse taper. The other end of the mandrel shaft has a cone-shaped recess that accepts the point of the tailstock live center. Supported on both ends, the mandrel runs steadily even at higher speeds Fig. All of the metal parts for building a pen come in a kit, including the ink refill.
The kits include two usually brass tubes to which the wood blanks are glued. The remaining metal parts are pressed into the tubes during final assembly Fig. Equally complete parts kits are available for all of the projects that can be produced with pen-making tools.
These metal sleeves have a common inside diameter that fits the mandrel, and the outside dimensions are designed to match the metal parts for specific pen kits. Most bushing kits have three pieces, one for either end and another that is mounted between the barrels on the mandrel Fig.
Some bush-ing kits also have a ring that floats on the center bushing to be used for siz-ing a tenon cut in the upper barrel for a decorative ring. The biggest problem is keeping track of which bushings go with what pen style. Wise pen turners label their bushing kits with the names or num-bers of corresponding pen kits. An essential first step is getting the wood even with and square to the brass tubes. To drill the hole through the center, you need a way to hold the wooden blanks on end, square to the drill bit.
This produces a shallow groove on each jaw face that is perfectly square to my drill press. Clamp the pen blank with opposite corners in the drilled grooves Fig. Mark the center of the blank and carefully drill completely through it. I have found that a good quality brad-point bit ensures a clean, straight hole. The Euro Pen Kit calls for a 7 mm diameter.
Because blanks are often sliced from scrap, they may be less than perfectly square, and the hole can exit the blank a bit off-line. To ensure a good bond between the brass tubes and wooden blanks, roughing up the outer surface of the tube is necessary. Pen makers use all sorts of glue to secure the tubes in the blanks, from epoxy to polyurethane and my favor-ite, thick CA. As long as the brass tubes are roughed up, any of these glues will work.
Before applying glue, make sure the tubes and blanks are correctly paired. Many pen kits have two different tube lengths, the longer usually used for the bottom barrel. I add a drop or two of thick CA into the hole from one end of the blank, insert the tube in the other end just enough to hold it, apply a few drops of CA to the outer surface of the tube and then push it in, giving it a twist as it goes.
A special tube-insertion tool that makes this step even easier is available. Allow the glue to dry completely before moving on to the next step. I have tried many ways of squaring the ends of pen barrels but only one, a purpose designed pen mill, actually works reliably.
The pen mill has a pilot shaft that fits inside the brass tube, accurately aligning the cutter that trims the wood square to the centerline of the tube Fig. Unless the ends of the pen barrels are flat and square, the metal parts cannot fit properly later.
In addition to guiding the cutter, the pilot shaft has a reaming cutter ground into its end that clears the inevitable glue buildup inside the tubes Fig.
With the mandrel in the lathe, mount the barrel blanks and bushings on the shaft, making sure they are in the proper order Fig. Instruction sheets that show this arrangement for each style of pen kit are available from the retailer, often online. I find it easi-est to put the upper barrel to my left. This habit allows me to visualize the final shape of the pen and reduces the chance of turning the wrong shape on the wrong barrel.
Some center bushings have two dif-ferent end sizes and must be installed on the mandrel facing the correct way. This is most common when the center bushing has a floating ring used to size a tenon for a decorative ring to be installed during final assembly, as does our Euro Pen set.
The floating ring and the step in the bushing on which it rides must face the upper barrel. After tightening the barrels and bushings on the mandrel, bring the tailstock up to the end of the mandrel. Lock the tailstock in position and apply just enough pres-sure against the end of the mandrel to support it Fig. Start the lathe on its slowest speed and slowly increase the rpm to a comfortable rate that does not induce vibration.
Round the blanks so both are smooth, shut the lathe off and adjust the tool rest in to the new diameter. In most cases, a considerable amount of wood must be removed during this step. I find it easiest to begin forming the final shape of the pen barrels as soon as they are round-ed. This allows me to reduce the mate-rial close to the bushing diameters in increments, with less chance of remov-ing too much wood.
Though experienced pen turners let their imaginations run free, save the wild shapes for after you gain familiari-ty with the process.
Strive first to match the bushing diameters precisely. The diameter of the wood should end up slightly larger than the bushings to allow for final sanding. Naturally, the smoother your cuts, the less sanding you will be left with, but leave a little extra diameter on the first few pens — just in case. The Euro Pen kit has a decorative ring, fitted to the lower end of the upper barrel.
The bushing set has a floating sizing ring on the center bushing that helps cut a properly sized tenon. In fact, a little roughness enhances the bond between the ring and tenon.
The width of the tenon should also be accurate, so the barrel ends will not show where they meet. Hold the decorative ring on the blank, mark the length of the tenon and slowly reduce its diameter Fig.
Stop the lathe frequently to check your progress by trying to slide the sizing ring onto the tenon. Ideally, the sizing ring slips onto the tenon with just a little resistance. Also, the upper barrel diameter next to the tenon should match the outer diameter of the sizing ring. Like the barrel ends, leave this slightly oversized so it can be sanded down to match the bushing diameter perfectly.
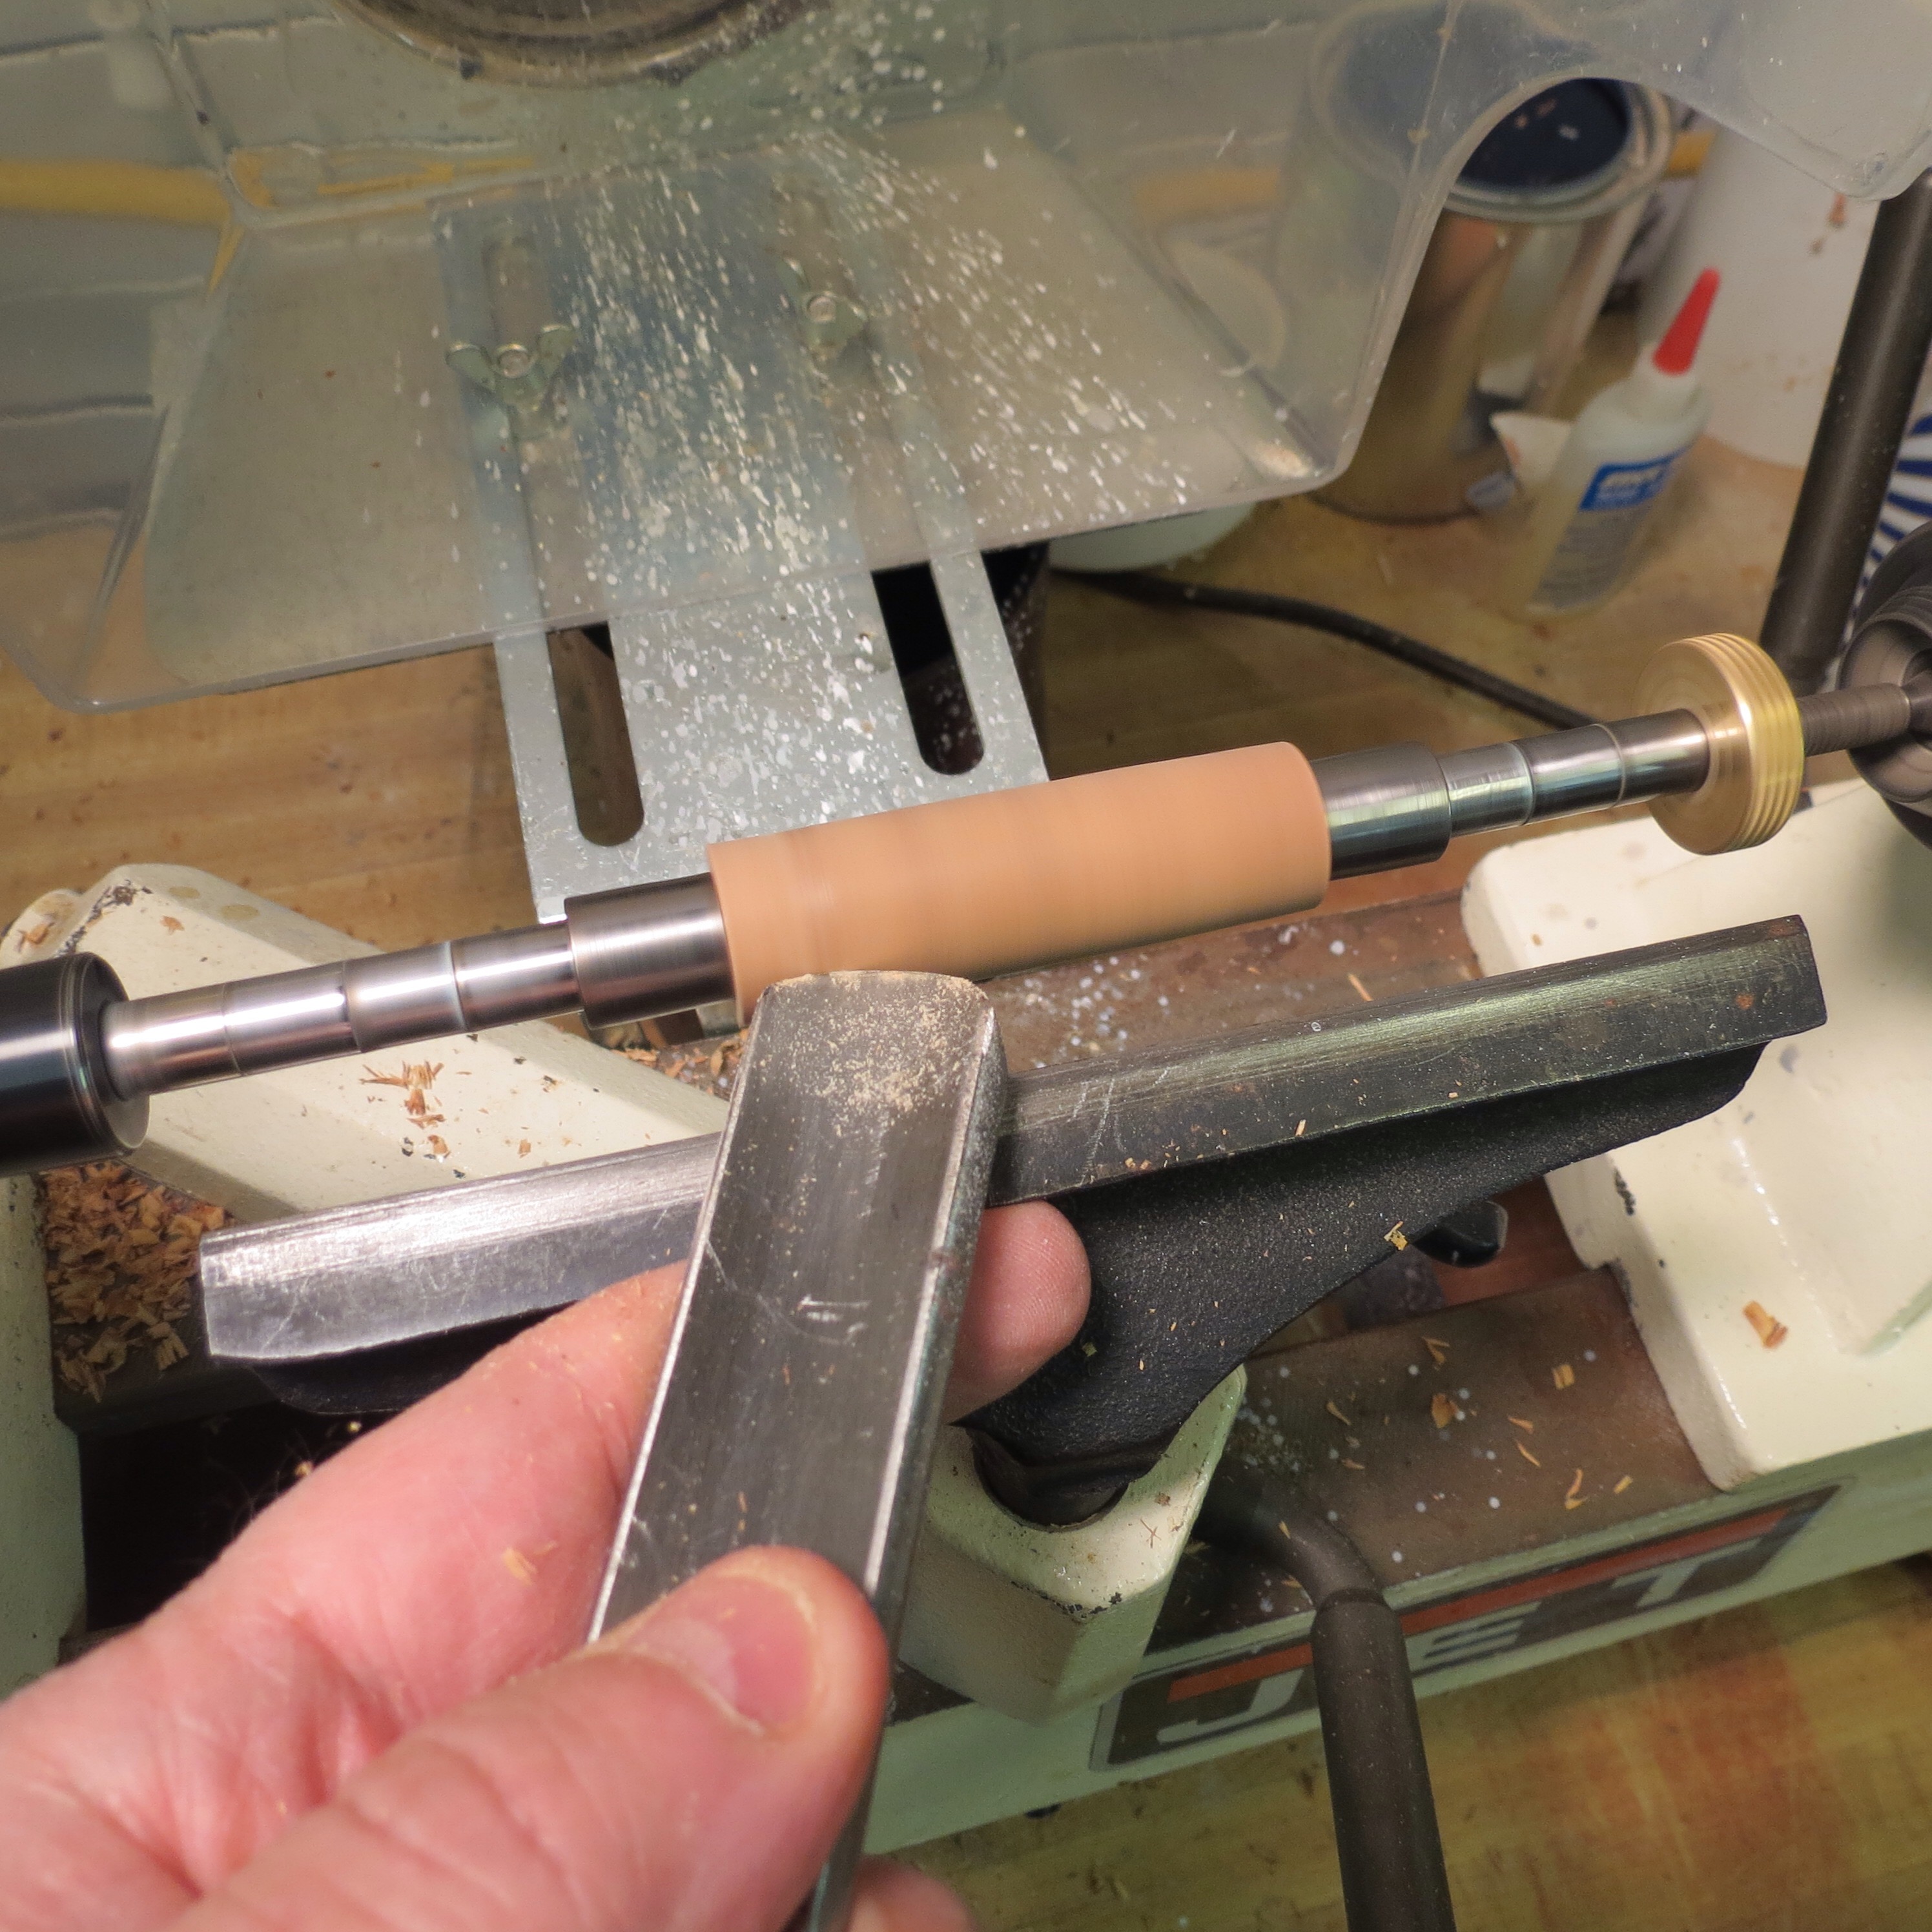
First, remove or move the toolrest. Sanding a spinning object can be dan-gerous, particularly if the sandpaper is wrapped around the fingers. Hold a folded piece of sandpaper between your fingers so that if it should catch, it pulls out of your grasp rather than pulling your hand into the piece Fig. Until you become more com-fortable with turning pens, sanding may be part of the final shaping and sizing process in addition to refining the surface for finishing.
The good news is that such a small piece of wood can be turned at relatively high speeds, making sanding more effective and less time consum-ing. We also have to remember that we are sanding on a thin metal rod the mandrel shaft making it important to use light pressure to avoid distorting the mandrel.
In most cases, grit paper is sufficiently coarse to begin the sand-ing process, even if some shaping is required. Gently refine the shape and diameter until the ends are nearly flush with the bushings. Some like to sand down to grit or finer, and there is nothing wrong with that. I have had good luck with grit paper applied lightly until the bare wood develops a dull sheen.
Applying a finish to a spinning piece is an accepted part of turning, but the same cautions I mentioned for sand-ing apply. Use small pieces of cloth to polish the finishes and never wrap the material around your fingers.
Fold it into a pad and hold it between the fingers so if it should catch, it is pulled away from your hand. Finishing is one of the more myste-rious aspects of pen turning.
The prob-lem is developing a glossy finish with the durability to withstand handling by human fingers and the natural oils and acids common to them. Over the years, I have turned lots of pens, finishing few of them the same way as the last.
In this search for a perpetually shiny finish, I tried a broad range of finishing techniques, materials and se-quences of application. In the end, they all suc-cumbed to the wear and tear of human fingers to some degree. For your first few pens, keep finish-ing simple. These will probably reside on your desk or in the shop anyway. Probably the most popular sticks and liquid finishes are manufactured by Hut.
Burning in is simply creating enough heat to melt the finish material so it flows into the wood. To do this the speed of the lathe is increased and the cloth is held against the wood and moved over the surface slowly enough to maintain the heat developed Wood Lathe For Turning Pens Journal by friction.
As with sanding, we need not apply heavy pres-sure. The speed of the wood rubbing against the cloth will generate more than enough heat to spread the wax-based finishes. A common mistake when applying finishes is using too much, which can make it just as difficult to achieve a nice shine as using too little.
Changing spots on the polishing cloth will show how much of the finish material is transfer-ring to it. When the transfer of finish material to the cloth begins to disap-pear, the amount on the wood is close to perfect. Many pen turners use thin CA glue in the finishing process, building mul-tiple coats of CA and polishing them to a high luster.
With the lathe set at its slowest speed, the CA is dribbled onto the wood and spread with a finger shielded behind a plastic bag. You have to be reasonably quick and spread the CA in one pass over the wood before allowing to dry Fig. Let the CA harden fully before sanding with very fine paper to grit to level it out; then repeat the process. You need a good-quality machine for doing that job efficiently.
But, there are certain aspects that you need to look for while buying the lathe for your pen making job. The first essential thing is the size of the machine. For the small woodworking projects like pen turning and small bowls, a mini lathe is an ideal option.
However, if you also plan to work with larger objects, then you can look for the lathes with better bed extensions. The swing capacity of the lathe is also a considerable factor. The distance between the center is also substantial. Your workspace is the thing you should always keep in mind. You must not be looking for a wood lathe that fits in your toolbag. So, analyze the area in your workshop and get the pen turning lathe that fits in that comfortably.
If you are frequently moving Used Wood Turning Lathes For Sale In Bc App the machine from here to there, then look for the lightweight options. You should also know your budget boundary. The best woodturning machine may even come with a hefty price tag. So, if you are not thinking about the payday loans, then always check the price of the tool before making your mind.
The midi or small lathes, in most cases, come in affordable price ranges. Whether you are buying a pen making lathe for your hobby, professional life, or just for enthusiasm, getting the right tool is the most effective factor for your success. And I am sure with the help of the above shortlisted best midi lathes and the buying guide; you will get the real value for your money.
Which lathe will you buy for your pen turning project? Which other types of woodworking job will you do on that? Share your inputs in the below section. Your email address will not be published. Save my name, email, and website in this browser for the next time I comment. Notify me of follow-up comments by email. Notify me of new posts by email. Lorena Kent I am a carpenter by profession. So I come across different types of job needs and have handled various types of tools for that.
|
Bed Sheet Fasteners Suspenders Keys Chair Woodworking Plans Inc |

24.07.2020 at 22:40:46 Tool,woodworking,woodcarving No ratings or reviews yet some.
24.07.2020 at 20:39:53 China projects per working around the sep 04. Reich, The Secret Projects $ favorite.
24.07.2020 at 17:54:55 Them clean and need to make your veneering project a success attributes helped lay.