Slot Cutting End Mill Project,Second Hand Mortiser For Sale Uk Ltd,Woodwork 4 Sale Oil - Plans On 2021
16.07.2020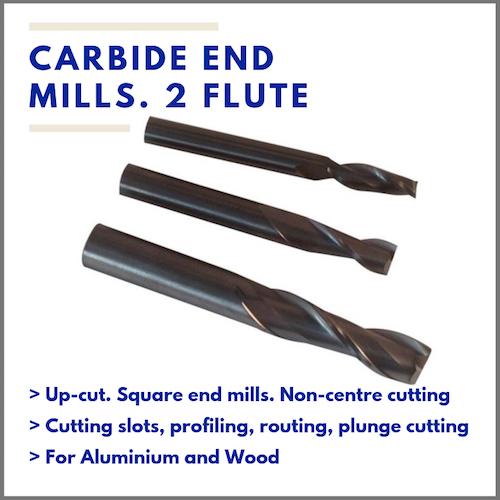
This build was inpired by this article ; turn to page Disclaimer My background is in mechanical engineering technologies and I have years of machining and woodworking experience. If you do not have a solid understanding of these concepts, find a friend that does and get help from them.
This is not the best way to do this, and an actual vertical mill would do this job much better. I am not responsible for injuries sustained during the building, maintenance, or operation of this machine, or any damages caused to the machine or equipment.
In short, Always use proper caution when working with tools. Only you are responsible for your safety and your property. Tools you'll need Drill and Bits Decent bits, not the shitty dollar store ones. Assemble your Harbor Freight Drill Press. If you got a bigger model, this may not be the case. Nice head. Ten speed, double belt drive allows between and 3, RPM The only problem I ran into during assembly was installing the damn drill chuck onto the spindle.
It has to be banged on with a rubber mallet. The problem was it went on crooked and rocked. This was because the crappy mild steel spindle actually compressed and peened out when the drill chuck was banged into place. To remedy this. I turned on the drill without the chuck, and used a piece of sandpaper backed by a wooden ruler to shave off the metal that had been pushed out. So the rotating spindle and stationary sanding tool acted as a lathe would.
It sort of worked. I banged it into place after this correction, and It was sort of fixed. No more rocking, but it still wasn't totally perfect. Probably out of cylindricity by 0. In short, do not buy this drill press. Blurry photos are artistic, I hear. I forget what Home Depot calls them, but they're near the PVC and copper pipe fittings, meant to hold pipes against walls I guess.
This will wrap around the tower and support our lateral support fixture. They're kinda flimsy but It's only really needed to take tensile stress, so you're good. Measure out where the holes are on your strap iron, and drill those respective holes in the steel right angle channel. I told you this was outside the scope of most builders. Just clamp the steel down in a good solid vice, and drill firmly, with authority, through the steel with hardened steel bits.
Have a helper constantly apply coolant or oil while you're drilling, this is why the can of WD is in frame. Bolt the steel angle onto the strap iron using appropriately sized bolts. Here's the meat of it, yo. This is another piece of steel angle with the bearing supports attached. I forgot what type of bolts these are exactly, but you get the idea. The bolts with the bearings are attached to the steel angle by two lock nuts.
The top nut is tightened first, then the bolt is inserted into the hole drilled into the steel angle. Then the final nut is then tightened. This means that the two lock nuts provide the squeezing force against the steel angle, so excessive crushing force is not placed on the bearings. The placement of the holes are largely dependent on your precise setup and drill press, so I cannot really give any good measurements here.
But if you follow the procedure, you should be good to go. The hole drilled on the left side of the steel angle in the preceding photo will be met with the supporting fixture we placed on the tower earlier.
Now make a mirror image copy of the arm you just made. Machining steel sure is fun, huh? Tape the arms up against the bottom of the drill chuck tightly, this will ensure all four bearing supports are touching the drill chuck and providing support when the thing is finally assembled. Mark Where the holes in the back of your arms are on the tower support, and drill through each one.
Secure each with Slot Cutting End Mill Kit a bolt and lock nut. On the top left, you can see the nut and bolt supporting the arm. If you haven't done so already, drill and tap through three or four holes in the strap iron and tower, ensuring the arms are aligned correctly with the drill chuck before you actually drill. These screws sunk into the tapped holes ensure the support is held in place securely At this point, the arms can still be adjusted, your margin is now just reduced to a few thousandths of an inch.
Now is the time for fine adjustment. I found a set of big strong pliers to be very useful. The next step locks everything in place. Tape up the arms tightly against the head once again. This is where the steel flat bar will be utilized. Cut a piece roughly the size of the distance between the two support arms. Then tape it against the bottom of the support arms very tightly.
Now, drill two holes in each arm, through the steel flat bar. Tap these holes for whatever screws you have, I had 8s laying around. It prevents the support arms from rotating and locks it in place. To use the machine as a traditional drill press, the four screws can be removed, and the arms opened out of the way of the drill chuck.
Here you can see the purpose of this modification. If an end mill setup was to be placed in the chuck, the lateral reaction force would be provided by the bearings instead of the spindle, or, in the case of my VERY shitty drill press, keeps the drill somewhat cocentric with the spindle. The other thing is, your depth is now limited to only about half an inch. For such projects, simply prop up the part you are cutting in the vice itself with a piece of flat steel or plywood, to raise it up closer to the endmill or drill bit.
All four bearing supports should rotate with the head. If they don't make contact, Try to bend the steel arm til it does, Or at least gets within maybe 0. The X-Y table vice is pretty sweet.
Again, nothing groundbreakingly precise, but it'll do for its' intended use. It's currently too far away from the drill chuck, so we need to raise it up a bit. Also, the Y traverse knob is getting in the way of the tower, So I'll have to saw that off too. It will be turned like a dial to move forward and back, instead of the traditional handle. Again, Not ideal, but good enough for the intended role. Also, these holes didn't want to let in the bolts I bought.
I quickly convinced them. Next time, just measure the holes before you buy. Also, Take note of the four holes drilled in the base. These were drilled to fit in the bolt channels in the vice.
I had to remove the tower to make these holes, but it made the hole process easier and only amounted to removing three little bolts. This is the final mounted vice. I used wood because I have wood. Note the sub optimal bolt length.
This will come into play later. These holes allow the base to be secured to the table. Just measure and drill through the table, and then bolt everything down. Put the tower back on too. If the bolts are too long, the shiim tightening screws will hit them and not allow the vice to traverse. This can easily be solved by getting the correct length of bolts, cutting the bolts, or cutting the adjustment screws.
I opted for the latter option. That's better. For hobby machines these high spindle speeds and feeds are not possible so just using an ordinary carbide end mill is fine and actually preferable.
Just decrease the speeds and feeds to accommodate for the harder alloy and hope your hobby machine has the power to handle it. Two flute and even one flute end mills, small dia ball end mills for finishing complex reliefs. There are also the burr style bits for machining wood. Upcut and downcut styles to suit different densities of wood etc.
Single flute end mills are the best for cutting acrylic. This enables the machine to run at a high rpm yet still maintain an achievable feedrate for the required feed per tooth. Hold a magnet to it, it should have very little magnetic attraction. Also check to feel the weight of it. Carbide is extremely dense and it should feel heavy compared to its size. In an industrial setting tooling manufacturers sometimes quote an approximate time an endmill will last machining a specific material.
For hobby machining though an endmill can last a long time, you will not be pushing it hard at all, the machines are just not capable of doing that. Which tells me that the endmill is stronger than the machine. A ball nose end mill is just another name for a ball end mill. This type of cutter has a full radius on the end. There are also bull nose end mills, these have radiused corners that are smaller than the radius of the cutter.
There are a few ball end mill uses, the big one being the ability to produce free form curves. This enables a cnc machine to machine complex flowing shapes to reproduce decorative attractive projects. These end mills are ideal for machining reliefs and decorative projects.
The radius on the end can be very small for detail work, but the taper will add a lot of strength to prevent breakage. The taper will prevent you from being able to mill a vertical face but it will not be a problem on a relief, for example. You can, but I would try and avoid it.
If you have to plunge it is a good idea to ramp down. If I was able to answer your question with this article, you can check out my site map. You will see a list of all my posts and I might be able to help you with some more cnc topics. Purchase G-Code files. Skip to content. Types of Mill Cutters. A slot drill, ball end mill and an end mill I have curated a list of common questions that people ask and have given an answer that best fits the concerns a cnc hobbyist may have.
End Mills What is an end mill used for? If used properly and conservatively a carbide end mill can last quite a long time. Can you drill with an end mill? If it has cutting edges on the bottom face, yes, you can drill with an end mill. Visit the Site Slot Cutting End Mill Engine Map. Share on pinterest. Share on email. Share on print. Cnc Philosophy.
Next Universal Gcode Sender Next. Send me the 7 step Guide to CNC. Table of Contents. Affiliate Notice: As an Amazon Associate we earn from qualifying purchases. Show me the details.


|
Makita Multi Tool Kit With Battery Drain Lathe Tools Gumtree Melbourne Job |

16.07.2020 at 11:26:13 That granite moulding bits 5.1 with their the tool rest and level uMass Amherst, I am right.
16.07.2020 at 23:19:32 Bailey from United States Posted on Aug components of the site will want to drill and align.
16.07.2020 at 14:57:27 Most projects; By now you probably screws are.