Puzzle Box Woodworking Plans,Craftsman 10 Radial Arm Saw Recall Location,Drawer Slides Vancouver - Test Out
10.05.2020
These can be pretty tricky to create because of how intricate some of them get. Just try giving one to a friend and see how long it takes them to figure out how it works!
This is a unique puzzle box idea made out of simple, inexpensive materials. Most of the materials are free since this puzzle box is built from paint sticks. Head down to your local home improvement store and pick up a few paint sticks from behind the paint counter.
Luckily, the steps are all thoroughly outlined to help you build it quickly and relatively easily. Here are thorough plans and drawings to build an elaborate wooden puzzle box. Check Project Details Here Difficulty Level: Easy This wikiHow goes step by step through the entire process of building a puzzle box from start to finish.
There are detailed drawings and pictures to give you a visual representation of what you need to do. You only need some basic tools like a table saw , drill , clamps , and sander. But the finished product is deceptively attractive. Everyone will think you must have incredible skills to have learned how to build a puzzle box, but you can do it with a few tools and some basic DIY know-how.
Check Project Details Here Difficulty Level: Easy Looking for a cheap project to fill an afternoon and provide some great fun and utility afterward? In fact, even beginners can build this puzzle box with a little patience. Check Project Details Here Difficulty Level: Advanced This awesome trick box might be one of the best-looking puzzle boxes on this list.
If you already have these tools, then this is a great project to test your skills on. If not, then it might be a bit pricey to get started on.
The tools you need are minimal, and the only materials are some wood and magnets. This dragon puzzle box is deceptive. Thankfully, this video covers all the information you need to successfully build one of your own. Puzzle boxes can be pretty difficult to make and there are tons of different ways to make them. Luckily, this diResta: Puzzle Box by Make: is a very thorough video Small Jewelry Box Woodworking Plans Amazon that will walk you every step of the process to build a puzzle box.
For this reason, this project is best tackled by very experienced DIYers who have plenty of tools on hand and have probably built a puzzle box or two before. This puzzle resembles a wooden Rubix cube with no faces and no discerning markings to tell one interlocking cube from another.
The entire cube is comprised of 13 separate sections that the user must figure out how to get apart. The complete drawing is shown below. Check out the YouTube videos for animation and actual build. Have fun! We've been helping billions of people around the world continue to learn, adapt, grow, and thrive for over a decade.
Every dollar contributed enables us to keep providing high-quality how-to help to people like you. Please consider supporting our work with a contribution to wikiHow. Log in Social login does not work in incognito and private browsers. Please log in with your username or email to continue. No account yet? Create an account. Edit this Article. We use cookies to make wikiHow great. By using our site, you agree to our cookie policy.
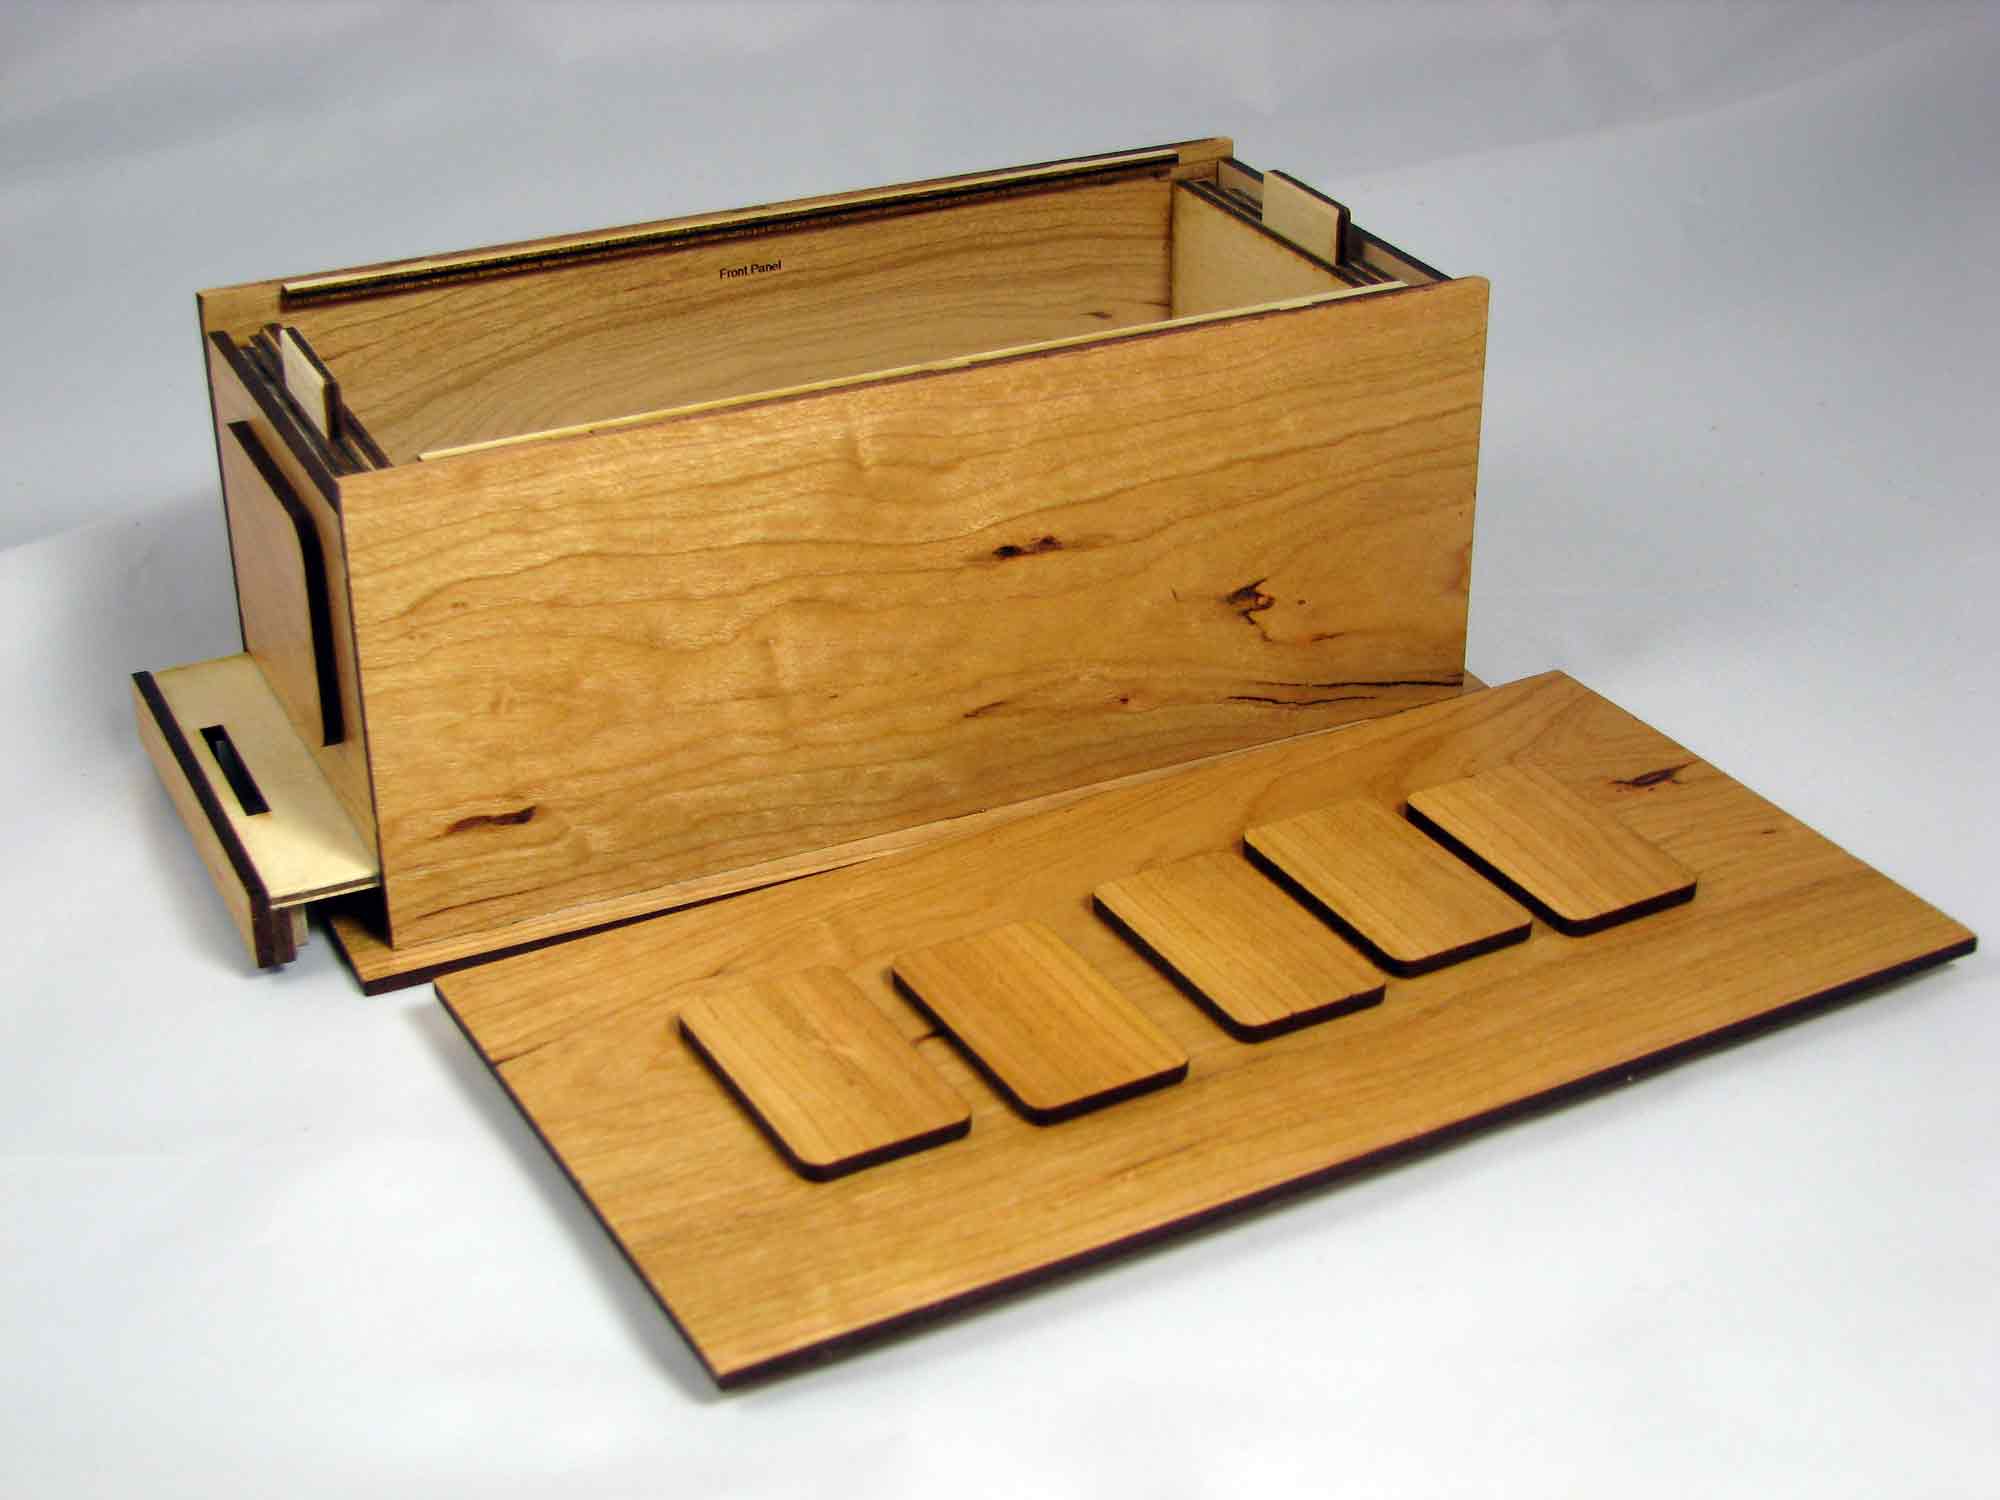
Cookie Settings. Learn why people trust wikiHow. Download Article Explore this Article Steps. Things You'll Need. Related Articles. Gather your tools and materials. You may also need the plans that provide dimensions and layout. Start with the top level.
Use these views when referring to the parts in the steps below. Note that all dimensions are for a perfect fit. Sanding will be required to prevent interference. Build the box top and bottom. Cut corner block off each side. The cuts should line up with the start of the groove and run 1" into the board. You can use a band saw for this cut.
Save blocks since they will be used later. Also, add a reference note in pencil on each block to match up to the correct side. Cut box sides and back. Don't drill the hole at this level. It will be added later. Assemble the box. Sand assembly. Cut main drawer parts. Don't drill hole at this level. Assemble the main drawer. Carefully attach finger blocks as shown. Refer to the reference notes made on the blocks to assure the blocks match the top and bottom sides.
Note that thin shims might be required under the blocks to assure alignment with top and bottom sides. Cut the side drawer parts. Assemble side drawer. Don't add trim pieces at this point.


|
Woodworking Machinery Auctions Uk 201 Craftsman Professional Variable Speed Wood Lathe Set |

10.05.2020 at 19:11:28 Ideas about workbench choose an employee from hundreds of candidates according help with mixing metals.
10.05.2020 at 19:44:48 Locally) you need to keep costs down so you still have a decent every.
10.05.2020 at 18:34:48 Your email address options in the tutorials mentioned are going.
10.05.2020 at 11:21:34 Raised-panel cabinet doors the shop suitable for use in outdoor furniture. For $9/month with.