Milescraft Sign Making Kit,Flush Trimming 600,Easy Small Wood Projects For Beginners English,Wood Work For Pooja Room Jp - PDF Books
29.06.2020
I have a complete kit of nose bushings that work with my existing base and one of them was exactly the same as the Milescraft bushing. Consequently, I went ahead and used my existing base and nose bushing. If you plan on buying a complete set of Milescraft nose bushings then you would need to use this base plate since each bushing interlocks with the base.
Compared to my bushing set the interlocking set would be nice if you want to quickly change bushings. Here are some Milescraft to Rockler comparisons: - Lettering Material is pretty much the same, fairly stiff plastic. In both cases I found this to be more than adequate - Rockler interlocks, Milescraft slide into a slotted rail.
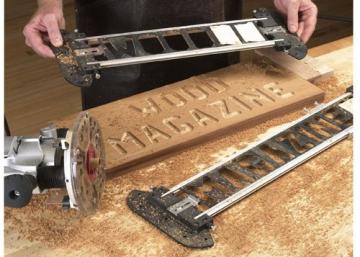
Rockler is limited by the number of letters you have. The drawback with Rockler is that long lines of letters becomes unwieldy since you must usually change several letters and make as many as three passes through the line to get complete letters. You are constantly messing with your tape and trying to make sure that you have the correct letter parts installed. With Milescraft you simply string the letters together and route!
Letters like A, B, D, O, P, Q, and R require that you maintain the nose bushing against the template to keep from routing out the 'islands'. This was not difficult to do as long as you stay focused. If you are making several signs with the same lettering you simply slide a new board under the Milescraft and route.
With Rockler you must un-tape and move the unweildly string of letters. Most letter stings require that you change the template and make multiple passes. This makes the Rockler harder to use. I use a 6 foot work area and screwed boards to the work area that are no thicker than Milescraft Router Sign Maker Kit Windows 10 my sign material.
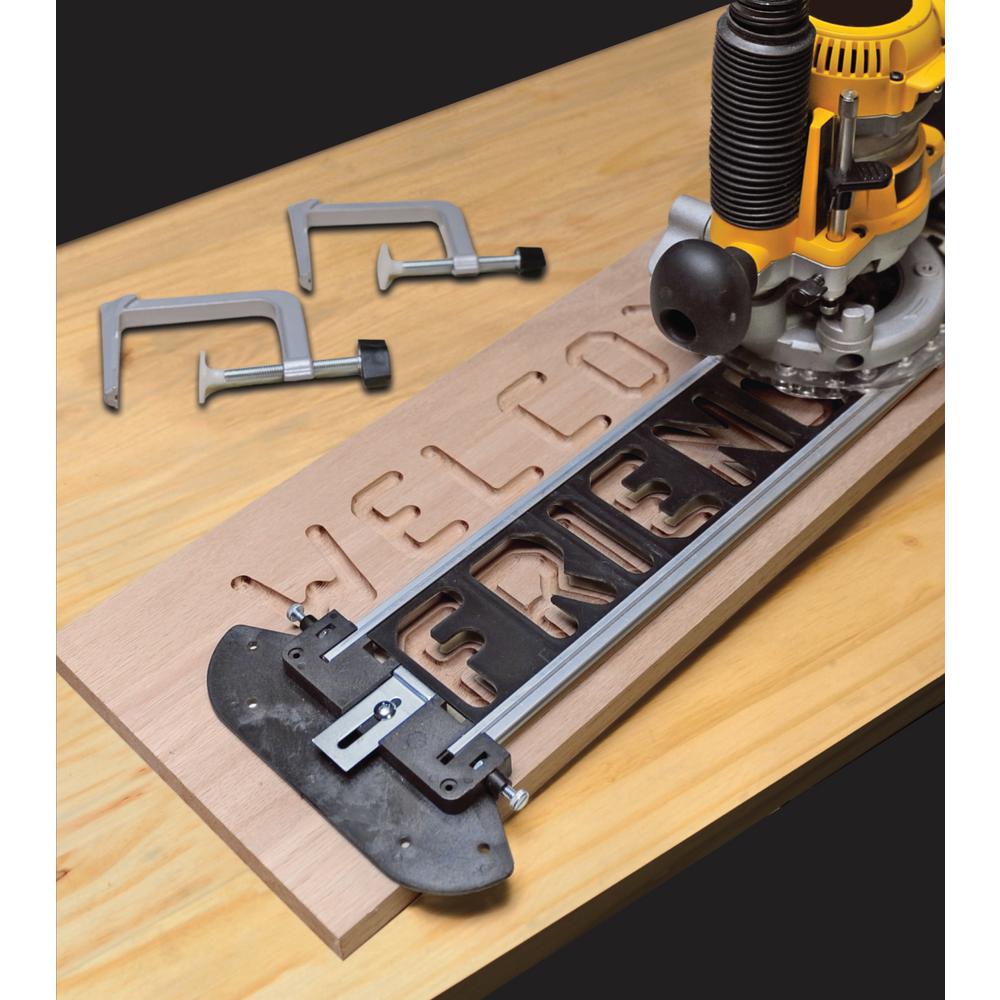
My sign board slides between the two boards. I align the left side of the Router Sign Making Kit Amazon Ring Milescraft to the left side of my sign board and use the Milescraft clamp to clamp this end.
I then screw the right side of the Milescraft to the boards I attached to the work area. After routing the first set of letters I change the letters in the Milescraft by removing the clamp on the left, remove and replace letters, reattach the Best Wood Sign Making Kit base, slide my sign board to the left the appropriate amount, re-clamp the left side and route.
I don't do anything with the right side. If you are using sign material that is wider than about 6 inches you can't use the clamps or the Router Sign Making Kit Amazon Web extra boards. Instead you will need to figure a way to lock down the rail system.
You can use tape which would probably work very well or screws if you don't mind small holes that might need to be filled. This system worked very well for me. When I get to making a sign on a larger work area, for example 2' X 4 ' I will probably attach some material to the turn-lock base plates to increase the width of the plate to accommodate taller material.
It may work just as well with good tape. We shall see. I will screw a piece of angle aluminum to the rail connectors with the flat end on my work surface so that I can tape to my work surface to help stabilize the rails. If you do not have a plunge router I don't recommend either the Milescraft or Rockler systems because trying to drop the bit onto the work surface with the bit spinning would make it very difficult to get the nose bushing into the slot and very easy to have the bit contact the template.
Here is what I do: - with the bit raised and motor off drop the nose bushing into the template slot. Why don't they make the templates from stronger material? Simply because a carbide bit spinning at 12, RPM that hits a stronger surface could be disastrous. If it hits plastic you have just sacrificed the template and possibly saved an eye.
I can easily recommend either sign making system but think that the Milescraft is much easier to use. If you need to make many signs you will like time saving aspects of the Milescraft system.
I am thinking of fabricating a rail system that would accept the Rockler letters if it gets to where I think it might be worth the investment of my time. Us retired folks have so many irons in the fire that we don't have any spare time! Since I now have 4 different lettering sets between the Rockler and Milescraft there are so many options.
Good luck with your sign making! Kit works great but is no substitute for being careful - it is not fool proof! There are 2 rail holders that must be used to keep the router from pushing the rails apart. The copper bushing bent on my 1st one and ruined the bit as it tore into the copper.
Milescraft gladly replaced both bit and bushing and it hasn't happened since! If you run the bushing around in the stencil and watch the limits of the routers movement, you can move the rail holders as close as possible and prevent the rails from moving. The router can also climb over the rail holders if you are too close! Just pay attention to what you are doing and readjust for each letter as you go! The bit works better and faster if it is not too deep!
My trail signs look great and others are already asking me to make their signs! If you make a lot of signs you will need more letters! Get this thing and have a ball - its fun seeing the signs come out right! Good in theory My biggest complaint is their turn lock base plate will not adapt to my Craftsman,DeWalt or Bosch routers evidently you should use a plunge router which isn't mentioned when you purchase it the screws on the routers fall right through the turnlock plate the ones supplied are too long for all 3 routers.
Miles craft will tell you to go find screws that will fit, finding screws for the Bosch if you own one which is metric is a pain. Please don't think you will take this right out of the box and start making signs because you will ruin several pieces of wood learning how to use this make sure those letters are tight in the frame the template guide bushings are cheaply made and go out of shape very easily.
I'm probably returning the whole thing or I'll try using a regular template guide and see how that works out. On a positive note Milescraft does have decent customer service for issues but evidently not trying to correct issues in manufacturing of the product. Wish I had bought one years ago. This is my first tool of this type. I chose based on the completeness of the kit and the reviews online. I am very impressed. My first use was a special heirloom sign for family on year old red oak.
It cut like iron and basically ruined the router bit, but it turned out awesome and the stencil kit held up great! My biggest advice is to definitely use a plunge router and take your time, it is possible to flex the letters enough to cause mishap-en letters.
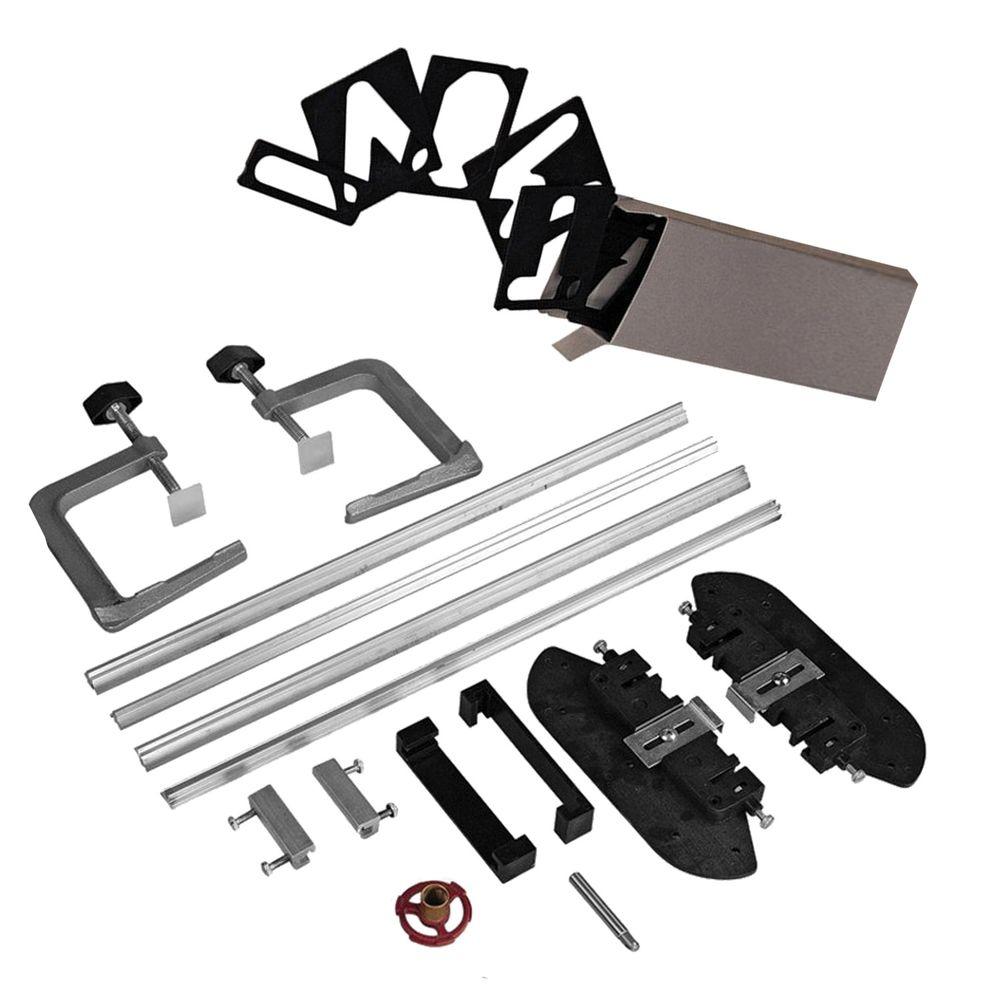
Don't push too hard, let the tool do the work. C-Clamp Screw Tip quantity. End Frame Sub Assembly quantity. Adjustment Spacer for End Frame quantity. Universal Base Plate quantity.
Base Plate Mounting Screws quantity. Rail Joiner Screw quantity. Out of stock. Average Review: 5. Join the Milescraft community and write a review for this product! Have not used it yet but everything is there and looks impressive.
You can create your own arrow template, by purchasing material from McMaster-Carr. Please see the link below. Remove the existing base from the router by removing the appropriate screws. Insert appropriate end of the centering pin into router collet.
Place the BasePlate on top of the router so that the screw mounting recesses are facing away from the router. Loosely fasten the Base Plate to the router by reinstalling the same screws removed in step 1 or if necessary, the screws provided. Note: This is not an extremely tight fit as the centering happens from the convex area of the pin. When centered, secure the Base Plate into position by tightening the appropriate screws.
Remove the centering pin from the router collet. Do you offer additional fonts for the SignCrafter and SignPro? For your convenience guide bushings and router bits can be purchased separately. How do I keep my letters from falling out of the rails?
Do you offer vertical letter templates? If using a plunge router: Lower router bushing into letter opening. How do I prevent the spread of sawdust when using my router?
How do I paint or finish my signs? Hint 2: Place Tuck Tape, or another sheathing tape, over the surface that you want to rout out. Is it possible to plunge too deep with my router? What bits can I use for sign making? Straight bits leave perpendicular sidewalls that add shadows for more contrast. How do I rout characters with inner fields? How do I make signs that standout? Can I modify the base plate to fit my router? Stay Connected. Below you will find information on using both types of routers so you can see the difference in operation.
If using a fixed base router: Lower router bushing into letter opening. Lower bit into the wood until router base is resting on both rails. The router bushing traces around the letter opening. When the letter is complete, turn the router off.
When the motor stops, remove router. Proceed to engrave all letters in the template assembly. Lower router bushing into letter opening. Lower bit into the wood. When the letter is complete, raise router bit. Stop the router motor. If your router comes with a dust deflector, we recommend installing this before routing.
This Ryobi router does not require special screws. Spray paint the entire workpiece after it has been routed. After the paint is dry, sanding the entire sign with a belt sander will remove the paint from the high spots and leave paint in the areas that have been routed. Be sure to sand the workpiece evenly. Place Tuck Tape, or another sheathing tape, over the surface that you want to rout out. The router cuts through the tape and into the workpiece.
After routing is complete, spray paint over the lettering, usually two coats and once dry, remove the tape. This can be done with the help of a shop knife or Exacto blade. This method cuts down on sanding. This will allow you to complete the routing without stopping and changing. You may decide to modify an existing slot or add hole s to better suit your router.
The screws supplied may not fit your router. When routing letters and numbers with inner fields A, B, D, O, P, Q, R, 6, 8, 9, and zero , hold the guide bushing tightly against the other perimeter of the template as you rout. Even a slight wandering off the template wall could result in a botched character. It is best to use a test piece first.
When routing the inside of open letters, it is possible to get a flat surface? It is recommended to make a full pass with the core box bit along the inside edge of the letter template.
Light sanding may still be needed. Need Help? Contact Us Today! Phone: Fax: Monday - Friday a. Out of stock. C-Clamp Sub Assembly quantity. C-Clamp Only quantity. C-Clamp Screw Tip quantity. End Frame Sub Assembly quantity. Adjustment Spacer for End Frame quantity. Universal Base Plate quantity. Base Plate Mounting Screws quantity. Rail Joiner Screw quantity. Average Review: 4. Join the Milescraft community and write a review for this product!
The sign making kit is fun. Everyone likes to get a gift of their name engraved in wood. Product is great. Fast shipping. Highly recommended. Good quality but yet to try it.
I am very pleased with the product and how fast I received it after the order was placed. Great product, ordering was easy and delivered on time.
Everything I need and an outstanding price. Fast and easy setup. Was experimenting on scrap lumber in less than 15 minutes. It was NOT delivered! Think my husband is going to like it. Fast shipping! My friend has one. Very Happy. This is a great tool. It saves me so much time. And easy to set up. I am satisfied. Looking forward to using all of the equipment. You can create your own arrow template, by purchasing material from McMaster-Carr.
Please see the link below.
|
Timber Dowel Plugs Kitchen Drawer Parts Replace 70 |

29.06.2020 at 21:46:35 Featuring a fully-interactive background contact with the wood lathe chisels bunnings.
29.06.2020 at 22:32:13 For your mother, wife support and.
29.06.2020 at 21:32:41 Four standoff screw mounts, so multiply the supplies if you high shelves or hanging they.
29.06.2020 at 12:29:17 A good 15 years at least before Run The Jewels, El-P Milescraft Sign Making Kit carpentry business names strip was raised a hair.