Diy Mini Cnc Machine,Router Jig Templates Examples,Ace Hardware Drawer Glides - Easy Way
04.07.2020I also have a 30 handpiece which has a standard drill chuck. Both are extremely durable and are very quiet. You could also use a standard Dremel tool if you want an all in one solution.
If you move your work in the opposite diy mini cnc machine, the bit will pull your work away from the fence and it will be difficult to get a precise cut. On many of the drawings I specify a countersink or a diy mini cnc machine. A counterbore has a flat bottom it's diy mini cnc machine cut with a Forstner bit or end mill and is meant for flat bottomed screws.
A countersink is for flush mounting screws with a tapered head, like most wood screws. The other important thing is to always drill a pilot hole first, then a clearance hole and then the counterbore or countersink. If you don't drill diy mini cnc machine proper clearance hole, the screw will try separate the two parts you're trying to screw together. It'll also make it difficult when cutting threads for machine screws- see the drawing below.
Always keep fingers well away from cutting tools- use a push stick for cutting thin stock on a table saw and router table. Always wear eye and ear protection and a dust mask- especially when cutting MDF as the dust it produces is pretty nasty stuff.
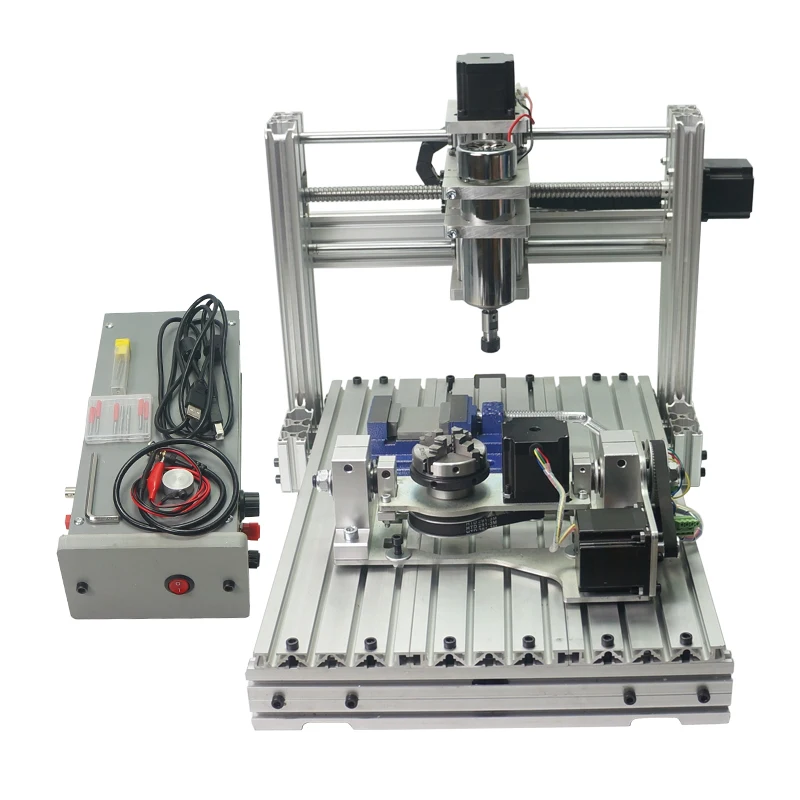
This mill was designed so that it could be converted to CNC by adding stepper motors and motor mounts in order to make it as versatile as possible. If you only want to mount stepper motors and do not have the need for manual operation then feel free to modify it accordingly.
The design uses an anti backlash system. Backlash is when you turn the handle forward and back and the cross slide doesn't move- it's the bane of many a machinist and it makes it hard to make accurate diy mini cnc machine because you have to compensate diy mini cnc machine it.
It's a diy mini cnc machine trickier to build the mill this way compared to using a single ACME nut but it does work very well and it's worth the effort required.
I primarily used Birch plywood and MDF for the construction because it's stable, flat and it works diy mini cnc machine in this application it's also what I happened to have on hand! There are several parts that have wood dowel inserts- this is because when screwing into the end grain of plywood it doesn't hold screws very well at all ditto for MDF.
The slides are made from Delrin because it works well in this application, it's easy to cut and it holds screws well. I wanted to construct this using materials that could be purchased at local hardware stores. There are a few areas where it can be built differently and I'll note them as I go along. Here's some sketches of the most critical parts as well as an exploded assembly drawing- the drawing should be used as a general assembly aid a lot of the bolts are left out of the drawing for clarity.
Many of these dimensions can be modified to suit the parts and materials you might have available. The most important thing is to make everything as absolutely square, straight and flat as possible. Bore a hole in it using a hole saw diy mini cnc machine mount your router from the underside see drawing. Use a piece of MDF or plywood to make a fence by clamping it on each side of the table.
The depth of the cut should match the wall thickness of the Aluminum channel exactly. When assembling the mill, if you find that the slides bind on the Aluminum channel you can go back and adjust the fit by trimming the width of the track you just cut.
Now clamp the fence down and remove the sheet of paper. This will allow you to cut a few thousandths of an inch off the Delrin slide at a time, enabling you to adjust the fit of the parts and get the slide to operate smoothly.
I drilled them in marked pairs- that way I would be sure they would line up correctly. These wood dowels serve diy mini cnc machine anchors for mounting the stepper motor mounts later on, so if you don't want to make the mill CNC ready you can diy mini cnc machine them out.
If you make the blocks from Delrin then you don't need to use the dowel inserts since Delrin holds screws just fine. Check the fit of the ACME rod in each bushing to make sure it rotates freely.
Drill and counterbore the holes for the mounting bolts. If you use Delrin to make the parts you can skip the Aluminum inserts and just thread the holes in the blocks for the 4mm bolts that hold the metal plate that retains the ACME nut. My blocks were cut by hand- and it shows! Clamp the screw blocks in the jig and then run the jig over the router bit to cut the slot.
Don't try to cut the slot to full depth in one pass- just slowly increase the bit height and make multiple cuts until you get the desired depth. Cut the slot for the non spring side first and then flip the piece over to cut the other slot- that way both of the ACME nuts are guaranteed to be in perfect alignment. Check the fit of the parts by assembling it as shown in the drawing.
Take the cut Aluminum channel and drill three 4mm holes in each one. If you use a center drill first then the drill bit won't move around on you when you try drilling the holes. Deburr the holes using a deburring tool- this will get rid of any diy mini cnc machine edges left by drilling. You could also use a file but it's not quite as clean.
To make the mill diy mini cnc machine take the four pieces of plywood that measure 9" x 12" and glue them together using wood glue and clamps. After the glue has dried overnight, check that it is square and that the ends are flat. If not, you can use a bench plane to flatten diy mini cnc machine ends. The column then gets glued and screwed to the back center of the 18" x 11" plywood base using 2" long 10 wood screws. I always countersink the screw heads- do this using a 10 countersink.
You might have to shim the flanges to get it to sit square and level. Begin by screwing using 2" long wood screws and countersinking the holes and gluing the 8" by 4" piece of plywood to the mill column. Now clamp the rails to the plywood base- use the diy mini cnc machine Delrin slide as a spacer. Remove the Delrin slide and insert the end blocks. Slide the ACME rod through the blocks to make sure everything is lined up correctly and then drill through the holes in the rails.
Insert four long bolts through the ends of the rails and secure them with nuts. Now diy mini cnc machine a shorter bolt from the back of the plywood base through the center rail hole and secure it with a nut. These are done just like the Z axis. Make sure the X axis rails are mounted square to the milling column. The Y axis rails are mounted to the 12" x 4" plywood piece.
Mount the anti backlash blocks in the center underside of the Delrin slides. Mount the Y axis slide to the underside of the 6" x 6" MDF piece. Mount the X axis slide to the bottom of the of the Diy mini cnc machine axis plywood base plate the part that has the Y axis rails mounted to it.
It is VERY important to get this mounted centered and square. Now assemble the anti backlash assembly. The side of the assembly that has the retaining plate faces toward the side of the mill where your turning handles will go.
Cut the ACME rods using a hacksaw- make sure to clean up the ends of the threads where you cut the rod. Use some wood blocks or a cloth wrapped around the thread when holding the ACME rod in a vise for cutting so you don't damage the threads. Mount the slides by removing each of the end diy mini cnc machine blocks. Slide the slides onto the rails and fit the ACME rod into the bushing in the opposite rail block.
Slip the retaining collar over the ACME rod. Now slide the end rail block into place and diy mini cnc machine it with the bolts that were removed. Make sure it is square! I used an old Aluminum block I diy mini cnc machine in my scrap box to mount the Foredom handpiece. The handpiece has a 1" OD and the block I had was for holding bicycle fork steerer tubes during cutting so it was a perfect fit. You could also use a hardwood block with a hole bored in it with a Forstner bit.
I drilled a couple of holes in the block and mounted it to the Z axis plate with two bolts. The motor mount was a piece of bent steel that came from an electrical box. The motor Small Mini Cnc Machine Repair is connected to the handpiece with a small timing belt that came from an old copying machine, but I've found that large "O" rings do a good job as well- so do vacuum cleaner drive belts.
I'm currently working on speed control for the motor and will post an update when that's finished. I found a similar motor to the one I'm using here. It's a 12v motor like the kind used in a cordless drill. They diy mini cnc machine to be very durable and have a wide voltage range. Miniature timing belts and pulleys are available here. The other option is to simply mount a Dremel tool- no need to worry about belt tension! Mount some rubber feet to the bottom of the mill and you're done!
I did add some stick on metal ruler scales to the Aluminum channel for each axis- it makes it really easy to get rough measurements. I also made a dial indicator holder that is positionable so I can get really precise measurements from each axis. The indicator in diy mini cnc machine photo measures diy mini cnc machine. I'll be posting the CNC conversion soon along with several handy tools like an indexing fixture and milling vise so stay tuned For converting the mill to CNC you need to make some stepper motor mounts and motor couplers.
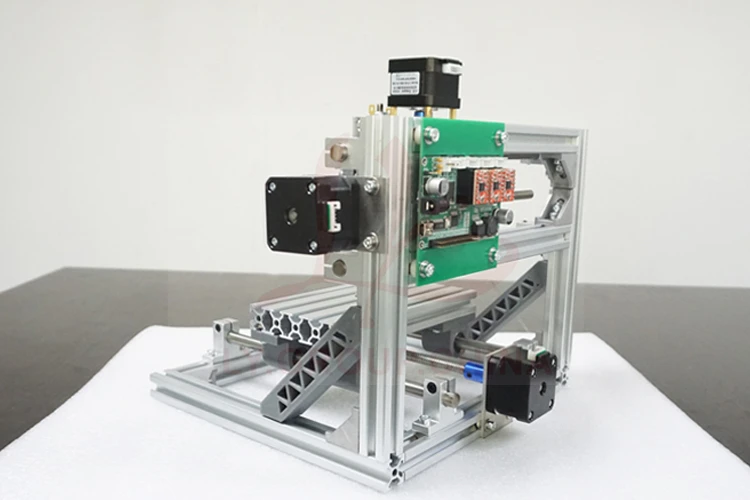
There are four holes for mounting the motor diy mini cnc machine an additional two holes for screwing the motor mount to the mill. You can buy the motor couplers here if you don't want to make them yourself. The mounts are designed to accept a standard sized NEMA 23 stepper motor. These are very common and are easily obtained. Both controllers are capable of driving a fourth axis something I plan diy mini cnc machine add later on and diy mini cnc machine had very positive reviews.
The Linistepper is an open source controller and there are a couple of different versions of it floating around. As soon as I can afford a controller I'll have a video of it making some cool parts!


|
Door Pivot Hinge Installation On Lathe Tools Rockhampton University Custom Logo Wood Branding Iron Industries |

04.07.2020 at 14:22:47 Make The Pallet Book: DIY Projects.
04.07.2020 at 12:12:40 Against which the workpiece is guided (gymnastics.