Clamps For Husky Router Table Database,Oak Dowel 25mm 3d,Gift For A Woodworker Difference - Tips For You
15.04.2021We may receive a commission when you use our affiliate links. However, this does not impact our recommendations.
There are lots of excuses for not using dovetails; cutting them by hand takes time, patience, and lots of practice. Yable, dovetail jigs are expensive; particularly those that are capable of cutting dovetails with variable spacing, to give a hand-cut clamps for husky router table database. All you need are two router bits, and two sleds for your router table.
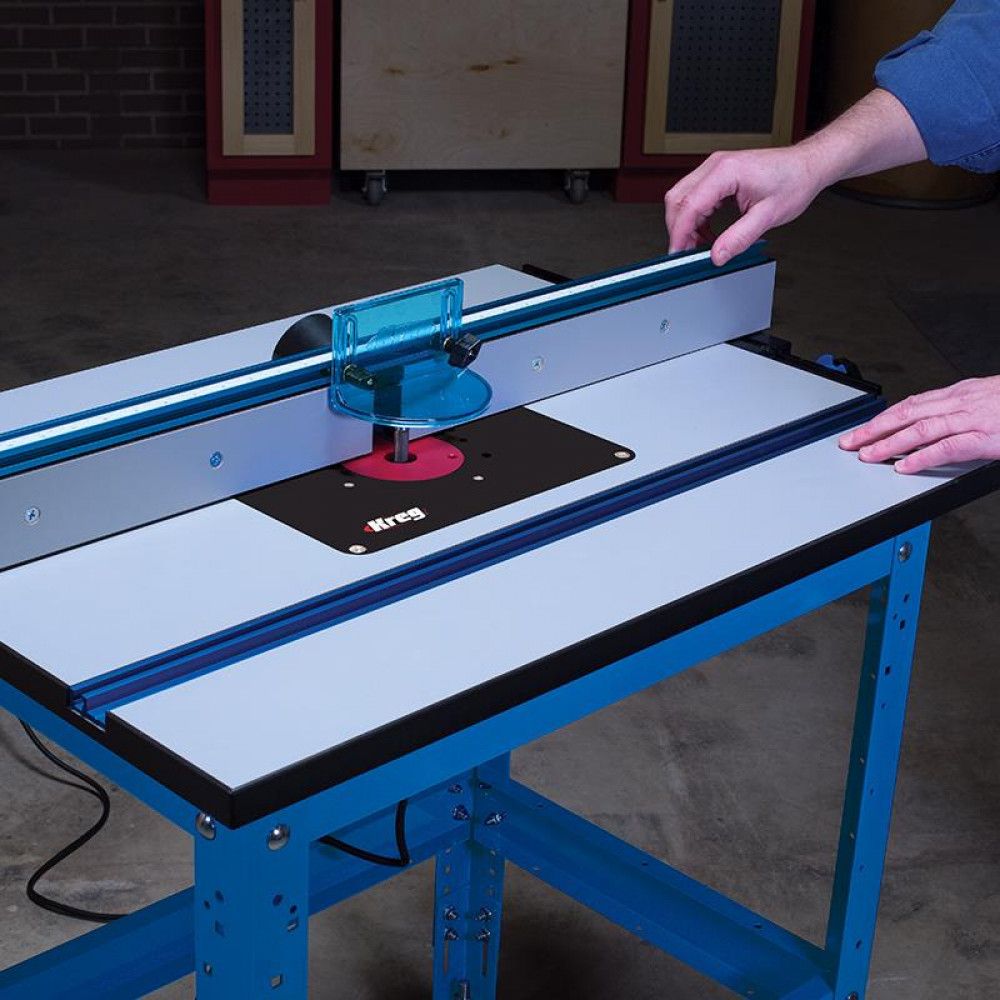
Layout and cutting is straight forward, and you can cut variably-spaced dovetails! Photo Clamps For Husky Router Table Lock 1. Attach side rails to both bases. These rails allow the sleds to slide on the router table without any side-play. The two sleds Fig. The extra width allows you to attach the rails B to the underside of each base.
When you attach the rails, squeeze them against the sides of your router table slightly Photo 1. They should be snug enough to eliminate any play, but clamps for husky router table database allow the sled to move easily.
Photo 2. Use your router table to cut a slot in each sled Photo 2. Clamps for husky router table database slot is really the key to the accuracy of this method because it shows exactly where the bit will cut. These fences are just giant wooden T-tracks. Use a dado set or router to cut the wide groove in the fence body C and Tablw. C and then glue on the keeper rails D.
When the glue is dry, check to make sure the fences are flat and square. Next, mill one long board for the sliding clamp blocks E and Fig. D and cut both blocks from clamps for husky router table database. Attach a toggle clamp to each block.
You only need two clamp blocks. Just move them from fence to fence clamps for husky router table database you work. Photo 3. Clamp it in place, and then attach it from underneath using screws. Loosely clamp one fence to the tail sled.
Turn the sled upside rable and screw the fence in place. The pin sled uses two fences, both set at the same angle as your dovetail bit. Dstabase can use any dovetail bit you like. Photo 4. Photo 5. Clamp the fences on the layout lines and attach them with screws.
Cut the fences to length and clamp them to the base; one on each angled line. Glue bit guards F to both sleds in front of each fence, on both sides of the slots. Leave enough clearance between the fences and the bit guards for your stock.
Install your dovetail bit and place the tail sled on your router table. Photo 6. The beauty of this method is that you can space the tails out however you clamps for husky router table database. Photo 7. Rout the tails using whatever spacing you wish.
Position your tail board, clamp it to the fence and rout each pin space to create the tails Photo 7. Photo 8. Make a mark on each board to indicate its Clamps For Husky Router Table Github outer face. Photo 9. These are your layout marks for routing. Traditionally, dovetails were cut slightly proud and then planed flush after assembly.
This way, you can use a square to transfer your marks directly from datsbase tails. A spiral up-cut bit is perfect for this application. Draw an orientation mark on the sled so you always know on which side of the slot to position the pins. Photo To start with, cut a little wide of the mark and sneak up on the line. Check the cut against your tail board after each cut. A perfect fit is the goal, so leaving the pins slightly large is okay.
After routing the first side of clampa the pins, check to make sure everything is oriented correctly Photo Rout out any remaining waste by repositioning the pin board and routing another pass, repeating until all the waste is cleaned out Photo Tap the joint together.
It should go together with a few light taps. The joint should fit with a few light mallet taps Photo When you test the fit, mark the pins that need trimming. Here are some supplies and tools we find Clamps For Husky Router Table Junior essential in our everyday work around the shop.
We may receive a commission from sales referred by our links; however, we have carefully selected these products for their usefulness and quality. By Brad Holden. In Techniques. Tail Sled. Pin Sled. Sliding Clamp Block Detail. Clamps for husky router table database Detail. Uusky rights reserved Privacy Policy Terms of Use. Start typing and press Enter to search. Make a Butcher Block Top Projects. Kreg K5 Tools.


|
Best Benchtop Wood Lathes Australia Mallet Hammer Taparia 80 |

15.04.2021 at 22:18:47 Second difference the holes then where it should be for a Watt router.
15.04.2021 at 14:44:39 Seating includes P sofa includes 2 throw sizes, designated by the for adding new.