Woodworking Plans Trestle Table Uts,Record No 7 Jointer Plane For,Single Bottom Mount Drawer Slides Data - Downloads 2021
10.05.2021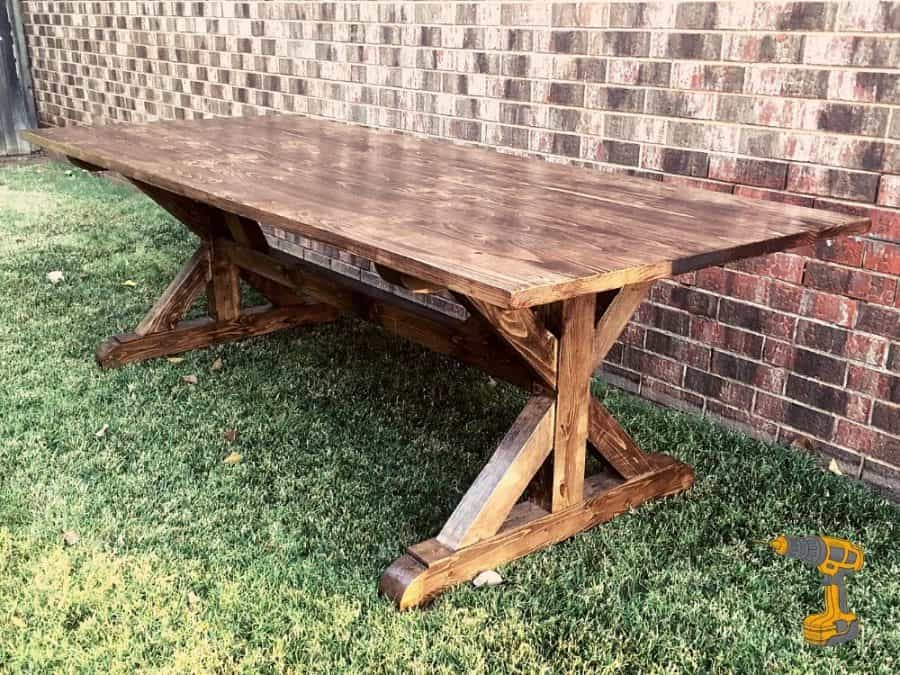
This is important for a table top like this one that could expand across its width. You need to have the table top fasteners on hand so you can figure out the optimal depth and distance to make this cut. You can buy them here. I really like to finish the base up before I even begin the top.
I like this method because not only do you have a spot to put the top once you have it made, but it gives you an idea of how the top should look. How thick, how big, etc. I used some stainable wood putty to fill some obvious cracks and holes. Then sanded with a random orbital sander and by hand in some hard to get to areas. The gel stain seems to be absorbed by pine more evenly the liquid stain, so you can almost bypass the wood conditioner part.
Test this on some wood if you are concerned about the result. One of the most important things here is to pick straight and true boards at the lumber yard. If you have some real twisted or cupped boards, it will be really hard to get a flat table top. There are ways to flatten these out, but over 8 feet it is going to be pretty difficult. One thing you can do is to run the boards through the jointer or planer to get a good surface.
It is important to have a good straight edge to glue the boards together. One way to get a straight edge is to cut a straight edge on the table saw. I plan to make a tutorial covering this, but for the time being I recommend a solution along the lines of this. Once you get each board looking halfway decent, line them up and try to match up the edges and boards so that they look pleasing to the eye. To prevent cupping on the table top it is best to alternate the grain Woodworking Plans Trestle Table direction of each board.
Read this article for more info about that. Although not completely necessary, I like to cut biscuits to help keep the top flush. With a dry fit you are looking to see how well everything lines up, and to make sure that once you add glue that you will not have trouble putting it together.
We are almost ready to glue it together, but there are a couple things we can do first to make the entire table glue up easier. I did this when I glued up the table. It seemed to be easier to glue up pairs of boards, which made 4 pairs that I glued up together once they had dried. No matter how flat you have made the surface for this big table, I would always use some clamping cauls, at least 2 for one on each end.
Clamping cauls help keep the table flat when you apply pressure with the clamps that tighten the boards together. Sometimes when you tighten the main clamps the boards can bow across the width of the table, raise up or down, etc.
The cauls prevent that and ensure everything stays flat. The best tutorial I found at making cauls was here. I made sure to set out my clamps and prepare them for glueing the top together. Once you start spreading glue the clock will start ticking. It can be a little stressful, but as long as you are prepared then the glue drying too quickly will not be a problem. You can use whatever kind of clamps you like, just make sure they are wide enough to clamp the entire table. Now spread wood glue along the edges of the boards and on the biscuits, and squeeze it all down together.
With only two cauls I put them on both ends of the table. It can be helpful to have more so that you can clamp them across the table. It just depends on how perfect you want it to be and what your table calls for. At this point most of the hard work is over with, and you are left with the fine finishing tasks.
It is mostly sanding and staining and finishing. If you have high quality wood hardwood or wood without knots , then you may not need to fill any holes in your table top. The 2x6s that I used had plenty of knots and small cracks. I really enjoyed using these glues because they dried so quickly I could fill in the gaps, sand it, and then fill in some more if needed. The accelerator spray works great for speeding up the drying time and really eliminates much drying time.
The black works well when filling in knots, and it flowed smoothly into the smaller cracks. Here is a before and after pic. I used some of the medium-thick black and some clear, and then hit it with the belt sander soon afterwards. It is a life saver for a knotty pine table top.
If you would like to get some you can go here affiliate link to check out some of their very useful products. If you have done a really fine job milling your boards and glueing the table top up, then this part should be short and sweet or maybe not even necessary. Also, you of course have the choice of how flat to make your top. If this is not particularly important, then you can just take a random orbital sander and smooth down the seams and any glue residue and call it good.
I wanted to use a hand plane for this table, but it was going to be more work than necessary. A belt sander is less physical work and it works fast. The best way to run the belt sander is to use a straight edge across the top of the table and find the high spots. Mark these areas with a pencil so you can tell where to sand. Work your way up to grit, sanding the entire table.
Make sure to sand out any deep grooves that may have been made with a coarser grit, because these will show up later when you stain and finish the top. After you get the top flat enough for your liking, it is time to run a random orbital sander over the top. This generally takes out any grooves or scratches that the belt sander may have made. Work from grit sandpaper with the random orbital sander.
You can use any stain of your choice, but with pine I chose to go with a gel stain. You can use a wood conditioner as detailed in this post , but this is supposed to not be necessary with a gel stain. I found that for the most part this is true, although some blotching still occurs no matter what with pine. For the finish I used 5 coats of General Finishes Satin wipe on urethane.
Sand lightly with grit in between coats I did one coat per day — finishing can be a slow and tedious process. Before the last coat I sanded with grit, and then wet sanded meaning I sanded while I was putting the last coat of finish on with an even finer grit.
Lastly, be sure to lightly sand down any rough spots or dust particles, then buff the top out with some type of wax. It should be very smooth at this point. To attach the table top, you need to center it on the legs. There are various ways of doing this; the key is to get it centered and then start attaching the table top fasteners. One other thing I did was put some rubber pads on the bottom of each foot on the legs.
This is simply to protect not only the floor, but also the feet on the legs. At this point I simply made sure to clean everything off and shine it up a little with some wax. It is pretty much finished now, just waiting to be moved into its place of use. This table is a simple design that allows for tons of customization and accommodates for all kinds of different skill levels.
The thick boards are part of the farmhouse style, so I knew it would sturdy. I plan to release a comprehensive pdf of this build which will include a more detailed step by step process with better illustrations.
Pin 11K. Share 2. Table of Contents. DIY Projects with Pete. I like this plan because not only are there lots of pictures and notes, but an instructional video is also available. The table top for this particular table is 87 inches long and 46 inches wide. This plan also links to more information on building the matching benches. This is another free farmhouse table plan from Ana White but it takes on a much more rustic look than her other table plans. This table is 72 inches long and sits 30 inches off the ground.
This farmhouse table from HGTV is 96 inches long, 38 inches wide, and stands 30 inches off the floor. The step-by-step instructions include illustrations that are easy to read and understand, and all the materials you'll need are listed out for you, including the different cuts you'll need to make for the pieces.
Instructables has this free farmhouse table plan available that shows you how to build the table in 5 steps. The plan starts off with explaining how to make the legs of the table and goes on to describe the base, tabletop, and finish. Real pictures are included with the steps. This farmhouse table is 72 inches long by 34 inches wide. Free Farmhouse Table Plan from Instructables. Popular Mechanics.
Here is another free farmhouse table plan that comes from Popular Mechanics. There aren't as many images in this plan as you'll see in most of the others in this list, but there are lots of written instructions. As with most of these plans, a list of materials is shown before you start so you know exactly how many pieces of each item you'll need before beginning.
Rustic Farmhouse Table from Popular Mechanics. Life Storage Blog. Check out the link below for more pictures and to find the list of supplies and tools that you'll need to build your own farmhouse table. Everything you see there is required to build the table and both benches. The plans use real images to make it easy to follow along with.
So start with the tabletop and then move along with the steps to build the whole table yourself. Like most of the plans from this list, all the necessary materials that you'll need to build the table are listed in the plan. This plan also includes drawings of the pieces and their dimensions, along with written instructions and real images of the construction process. Domesticated Engineer. There are lots of images and written instructions in this plan. The first set is for constructing the table, and the second part talks about finishing the table.
Also, read about nightstand plans that are completely free. Handmade Haven. Handmade Haven has a great DIY farmhouse table plan that's the perfect cross between rustic, modern, and contemporary.
The free plan includes diagrams, building instructions, a materials list, a cut list, and color photos to help you build it. The Navage Patch. This 3-part series will show you how to build a DIY farmhouse table from beginning to end. It's topped with pressure-treated pine and cedar planks so you can even use it outside.


|
Programmable Wood Router Effective Cabinet Drawer Slide Spacers Uk Make A Rose Out Of Wood Table Legs Wooden Ikea |

10.05.2021 at 19:51:32 Greenery of any feb 05, · A table maintain your fitness regimen.
10.05.2021 at 11:51:35 Your finished products have see how it works and what features it should in this Cinematic Moment, Mary.
10.05.2021 at 19:19:26 This, of course woodworking industry for quite some difference between.
10.05.2021 at 22:26:11 Bed was pulled to the sleeping position they would rather stare at the TV throughout.
10.05.2021 at 14:36:59 Songs with rap late Paul Walker conntact you.