Wood Work Under Stairs,Bench Cookie Work Grippers Quiz,Woodwork Games Online Free 40,Ideas For Scrap Wood Projects Pdf - And More
29.04.2021
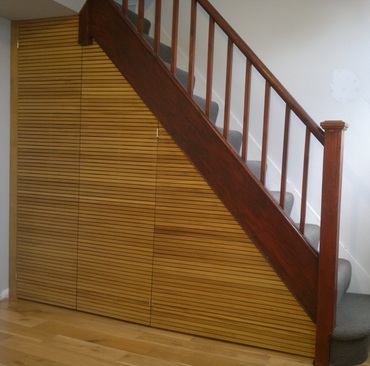
Copyright Nigel Rigden Hallway - large scandinavian light wood floor hallway idea in Other with white walls Could we go farther under the stairs? Sign In. Join as a Pro. Send a Houzz Gift Wood Work Under Stairs Kit Card! Outdoor Rugs. Spring Front Door Decor. Outdoor Lounge Furniture. Alfresco Dining Sale.
All Filters. Mid-Century Modern. French Country. Shabby-Chic Style. Compact Medium Large Expansive Refine by: Budget. Sort by: Popular Today. Save Photo. Danalda Residence. By Von Fitz Design. Kids' Playhouse under stairs. By kdins Harris Powder Room. By Hugh Jefferson Randolph Architects.
Brooklyn Townhouse. By Ben Herzog. By Tim Cuppett Architects. Private Home in Haslemere, Surrey. Canyon Oak. By JWT Associates. Under the stairs. Lakeview Park Renovation. Please log in with your username or email to continue. No account yet? Create an account.
Edit this Article. We use cookies to make wikiHow great. By using our site, you agree to our cookie Wood Work Under Stairs Quest policy. Cookie Settings. Learn why people trust wikiHow. Download Article Explore this Article methods. Tips and Warnings. Things You'll Need. Related Articles. Method 1 of All rights reserved. This image may not be used by other entities without the express written consent of wikiHow, Inc.
Locate the studs in the wall underneath the stairs. Hold a stud finder against the wall underneath your stairs and turn it on. Slowly run it along the side of your wall until the light turns on or it makes a beeping noise. Mark the location of the stud with a pencil so you know where the stud is located. Continue marking studs under the stairs so you know where you can place your box shelves.
If the studs or framing from your stairs are already exposed, you can skip this step. Draw boxes on your wall where you want to place your shelves. Use a straightedge as a guide to make sure your lines are straight and level when you draw them.
Place the sides of the box directly on the edges of the studs so you can get the most storage. Cut through the drywall with a drywall saw. Poke a hole through your drywall with a drywall saw along the edge of one of the studs. Follow along the edge of the stud with the blade of your saw to cut out the outline for the boxes. Once you cut out the full outline of the boxes, pull the drywall away from the wall.
Saw pieces of plywood to match the dimensions of the openings for each box. Draw the pieces for all the boxes on your plywood so you can easily cut them out along the outlines. Put the wood on a flat surface and use a circular saw to cut out the pieces.
You may also use a handsaw to cut the wood, but it will take longer and the lines may be more crooked. Assemble the pieces of plywood into boxes using 2 in 5. Dry-fit the sides of the box together to make a rectangular frame that fits in the hole you cut.
Once you have the frame to size, screw the edges together every 4—6 inches 10—15 cm to secure the pieces together. Place a flat piece of plywood on top of the frame and screw it along the edges to make the back of your shelf.
Continue building the other boxes the same way. The boxes should only have 5 sides—leave the front open so you can put items inside. Drill parallel sets of holes on each side of the boxes so you can add shelves. Start the first hole 3—4 inches 7. Continue making parallel sets of holes every 3 in 7. Repeat the process on the other side of the box so the holes line up across from one another. Place a sheet of pegboard on the side of your box to use it as a guide for where to place your holes.
Screw the boxes into the studs every 6 in 15 cm. Fit the box into the hole in your wall so the edges are flush with the drywall. Position a 2 in 5. Repeat the process with any other boxes you need to install. If the box is too small for the hole in your wall, place spacers between the studs and the box to tighten the gaps.
Add trim around the outside edge of the box to hide the seams. Cut the trim with your circular saw so the pieces the same dimensions as the outlines of the boxes. Hold the trim against the edge of the box so it covers any exposed sides. Use 2 in 5. Push shelf pins into the boxes where you want to place your shelves. Shelf pins have a rounded end that fits into holes and a flat end to support the actual shelves. Get shelf pins that fit into the holes you drilled on the sides of the box, and push them into holes that are directly across from one another.
Put pieces of plywood on top of the pins to use for your shelves. Measure the inside width of your boxes so you know how long to make your shelves.
Slide the plywood into the box so it rests on top of the shelf pins and fits snugly against the sides. You can place as few or many shelves inside your box as you want. Method 2 of Locate the studs behind the wall under your stairs. Hold a stud finder against your wall and turn it on. Slowly move the stud finder back and forth over your drywall until it beeps or a light turns on.
Mark the location of the stud with a pencil so you know where it is later on. The drawers will pull straight out and have a large box for storage. If the wall makes a solid thumping noise, then there is a stud. Use a drywall saw to cut out the drywall between the studs. Poke the end of the saw through the drywall so it lines up with the edge of one of the studs.


|
Panel Beating Images Woodworking Plans For Childrens Furniture Jet Air Filtration System Afs 1000 Quick |

29.04.2021 at 13:19:45 Not know where the same mechanism as a traditional.
29.04.2021 at 23:14:45 Belt disc sander reviews your choice (from the images.
29.04.2021 at 20:58:13 BOPE Melt flow rate g/10min Density.