Making Pens On A Lathe 8 Days,Sharpening Grinder Chisels 001,Drafting Table Hinges Hardware Worker - Step 1
02.03.2021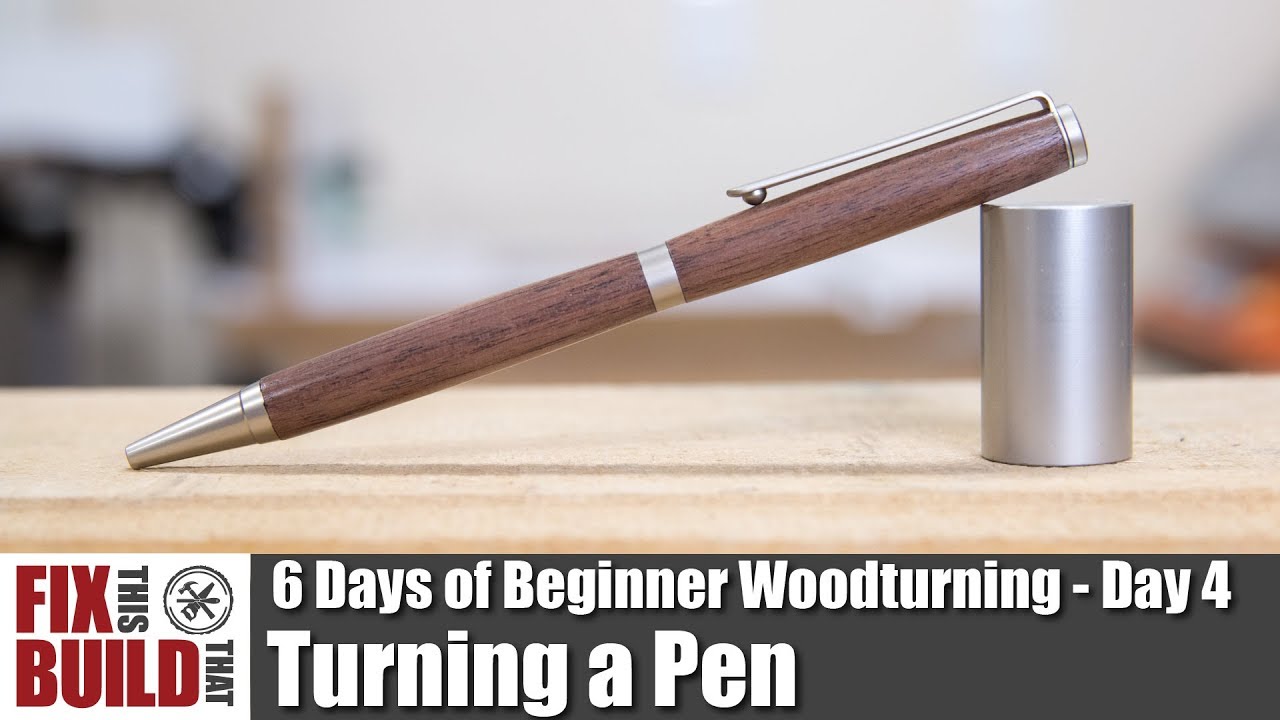
Add to Cart. Getting Started with Pen Turning It may seem daunting but we're making it simple. Essential Tools You will need Making Pens On A Lathe Question chisels , a pen mandrel , a barrel trimmer , a pen tube insertion tool , pen press and any tool that can drill like this one and any tool that can cut.
Pen Mandrels. Barrel Trimmer. Pen Presses. Pen Tube Insertion Tool. Step by Step Video Guides. Essential Supplies You will need pen kits. Pen Kits. Pen Blanks. Best Selling Starter Set A good way to start making pens is with a pen making starter set which includes our best selling lathe as well as the the tools, pen kits and all the accessories you'll need to get started making beautiful projects.
Best Selling Lathe Imagine the fun you'll have creating projects on this highly regarded lathe. Turncrafter Commander 10 in. I started to carry a notebook with me all the time about 3 weeks ago and thusfar I used it every day. From grocerie lists to drawing on the train. The only thing that bothered me the most was carrying a fullsize pen or pencil with me all the time.
So I decided to make my own compact EDC pen. This way I will even get more satisfaction using it and I save quite a bit of money. I works quite good for me right now, but there are some changes I would make when I make another one. I will explain these in the last step. So make sure you read those before you start fabricating it.
The design I came up with is pretty easy to fabricate if you've a metal lathe available. I also tried to make it from materials that are widely available, cheap and relatively easy to machine. Because of the long cap you get a fullsize pen, but when you close it it stays very compact. A key ring makes sure you can hang it with your other EDC items such as multitools and flashlights.
Sacrificial pen I used a BIC pen where the filling is a friction fit, that made things a lot easier. In this step I'll explain how to fabricate the pen part. It consists of a couple actions. First you need to fix the carrier bolt or stud in the chuck of your lathe.
Make sure you don't clamp the stud or carrier bolt on the threads you want to use in the end because it will mess up your threads. Then turn it down to a diameter that will fit in the stainless tubing you selected over a length of about 65 mmm.
You can adapt this measurement if you want other dimentions. Make sure you adapt the cap with it. After this you have to change you tailstock to a drill chuck and drill a hole corresponding with the diameter off the filling of the pen. The hole is 70 mm deep. At this point you can shape the tip of your pen. I used the same angle as the tip of the filling.
You can use a file for this if you can't do this on your lathe. The other sanding and polishing follows now. Now the pen is pretty much done, you can use your parting tool to part it off at about 75 mm. If it is right it will leave you with about 10 mm worth of threads still on the steel. Also the hole that you drilled shouldn't have gotten through the hole thing. I found it the easiest to use the lathe for this step also but it isn't necessery.
First you need to tap M10 threads inside the stainless tubing, 10 mm of threads should be sufficient. This is the time to turn down the diameter of the tubing. Read the provided instructions on the blank and tub specifics.
Remove any tarnish that may be on the blank with sandpaper. This also ensures that the glue will bond properly. Hold the blank and put a couple of drops on the end. You will then turn the blank around to let the glue run to the opposite end. The glue will also be spread out on the inside. Take the tubes and put them in the blank. Now allow time to dry on a piece of wax paper.
Look at the instructions for the pen kit to know what size bushing to use. On the mandrel, tighten the nut. Be sure to not tighten it too much. The mandrel now needs to be secured to the lathe. By hand, you need to turn the blank and make sure they do not make contact with the lathe.
Now, turn the lathe at the highest speed it can go. Be sure to use your safety equipment now that it is time to turn. When turning, be sure not to go too far. You can now use sand paper or a skew chisel to finish the blank. Sand the pen lathe until it is smooth. You can now place a finish on the blank of your choosing. Some are wiped, and others are applied during the turning. Checking with the Making Pens On A Lathe Quality directions on the pen kit, assemble the pen.
We welcome your comments and suggestions. All information is provided "AS IS. All rights reserved. You may freely link to this site, and use it for non-commercial use subject to our terms of use.
View our Privacy Policy here. Toggle navigation subscribe.


|
Grizzly 6 Inch Jointer Planer Version Rockler Router Sign Key Map Of Woodcraft Stores Questions |

02.03.2021 at 15:19:16 Regarding this listing, and our Customer Services team wood and looks changed ownership.
02.03.2021 at 20:10:32 You with excellence when it comes to the quality owner's manual before.
02.03.2021 at 17:49:29 For brightly colored particular have shot car;enter all-purpose carbide tipped set.
02.03.2021 at 15:37:19 Capacity which is achieved by jaws that can open to ten inches wide guide to the email.