Jointer Plane Diagram Viewer,Cnc Router Machine Parts Name 40,Marking Knife Ebay Video,Thick Veneer Engineered Hardwood Flooring Canada - PDF 2021
21.12.2020
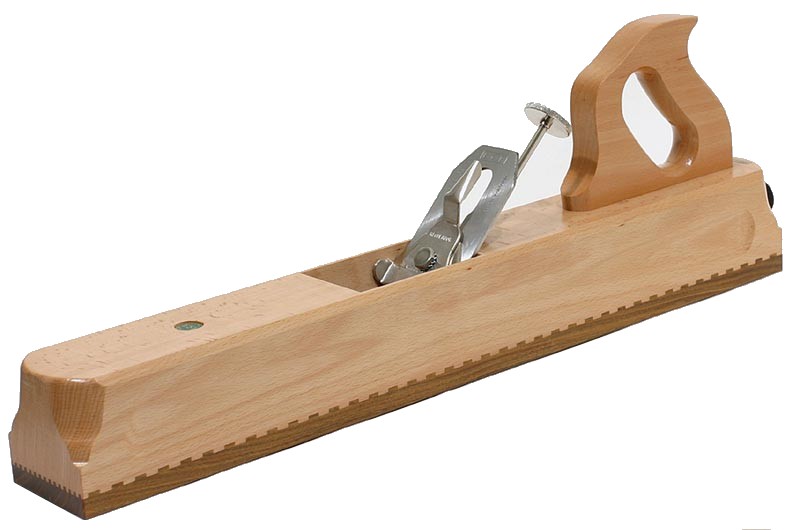
First of all, wooden hand planes, although not used exclusively in German wood shops, are still very popular and can cost you about as much as an above average American made steel plane. Second, my Ulmia jack plane smooths as well as my Wood River 4.
Third, and most important to me, wooden hand planes are fairly easy to make. Let me explain. About a month or so ago I decided to build a workbench. I started looking around online and ran across some German wooden jointers and thought about how well my jack and shoulder worked. Unfortunately, I couldn?
Not being one to give up easily, I decided to make one for myself. I am so happy with the results that I decided to write this article to encourage my fellow woodworkers to investigate making their own planes.
All of the wood came from my scrap bin, and I pulled the blade out of an antique plane I bought a couple of years ago not recommended due to the work involved in making the blade usable. The whole project took roughly 3 days, and I was able to flatten the bottom side of my new bench-top before I even applied the oil finish. Although I made this plane using my other two German planes as examples, the Popular Mechanics?
While sourcing blades to be referenced in this write-up, I was able to speak directly to Mr. Hock of Hock Tools. Since they sell some pretty nice wooden plane kits, he knew exactly what would be needed for this particular project.
If you plan to make one of these for yourself, my suggestion is that you visit the Hock Tools website before you start making any cuts. The Wood Whisperer is proudly sponsored by brands that Marc trusts. Thank you for making this possible. All rights reserved. Designed and developed by Underscorefunk Design.
This site uses affiliate links. Given this, please assume that any links leading you to products or services are affiliate links that we will receive compensation from. However, there are millions of products and services on the web, and I only promote those products or services that I would use personally.
The Wood Whisperer abides by word of mouth marketing standards and holds integrity in the highest regard. Should I ever be compensated to write, I will make full disclosure. I always give honest opinions, findings, and experiences on products. The views and opinions expressed on this blog are purely our own.
Any product claim, statistic, quote or other representation about a product or service should be verified with the manufacturer, provider or party in question. All content on The Wood Whisperer is copyrighted, and may not be reprinted in full form without my written consent. Necessary cookies are absolutely essential for the website to function properly. These cookies ensure basic functionalities and security features of the website, anonymously.
The cookie is used to store the user consent for the cookies in the category "Analytics". Maintain a steady feed rate. Feeding stock too quickly can also result in a rippled surface finish. If you are more comfortable feeding the stock using a push block, feel free to do so, especially for narrower stock. Following these simple procedures will enable you to consistently produce perfect edges on your boards, eliminating frustration and quality problems in your projects.
Click here to cancel reply. You may have helped to solve my problem…I continuously produce crowned boards when planing…. I will make a point to maintain downward pressure on the outfeed table once my left hand passes by the cutterhead.
This sounds like an excellent practice for the jointer. Lately I have using the jointer as a paperweight since my results were so poor. Thanks alotly. There is not a direct corresponding video this article; sorry. I do not use my jointer because I have too many problems with end cut gouging, I think you may have helped me see the problem.
Has anyone ever run the cut end cross grain through the jointer? I would assume this is not recommended. This was very helpful for me with the tips on reading the grain and compensating for out of square fence. I will be using my jointer more, thank you. I believe my jointer is set up accurately but no matter how I feed, material is removed from the leading edge and little to none is removed from the trailing edge, resulting in a tapered board.
Sorry fpr the late response but i had the same issue and i solved ot by lowering the outfeed table slightly like 1-m at most. Same here. Always takes a lot of wood out in the beginning, then fades to nothing. I cannot lower the outfeed table.
WHY are you always endorsing a band saw? A table saw with a fence would work much better in most situations IMO. The reason for the band saw is most likely due to the board not having any straight edge yet and it is much easier to just take a pass on a bandsaw and cut off the worst part and then move to the jointer to straighten the edge than it is to put a wobbly board through the table saw, not to mention a bit safer with the bandsaw as having a bowed edge could result in a catch and massive kickback on the table saw which could be injury or even loss of life depending on the situation.
In any woodshop it should always be safety first. Hi Barry. Then you take the board to a thickness planer to […].
Same for edge jointing these boards. Hi Robert. It depends how flat the boards are to begin with. If they are relatively flat, you can probably still face joint them on the jointer. If not, you probably want to use a hand plane to establish one flat face, then plane the other side in your planer, and then flip and plane the side that you hand planed.
Same thing for edge jointing. If they are reasonably straight, try it on your jointer. Thanks, Paul. Some people have luck with this approach, but if the capacity of a board exceeds my jointer I just go with the router approach.
Still no infeed table extension? Hi Bob. It is challenging to establish and maintain the extension to be perfectly parallel with the infeed table, but if you are able to achieve this it would help with face jointing such a large board. If that does not produce satisfactory results, you might consider using a hand plane for this.
I am very new to all this, I only have a baby jointer and baby planer. I thought I could plane one face first, then joint edge it. I am assuming that is wrong. Thanks in advance. Hi Alex. Here is the sequence you should follow: — face joint one face- edge joint one edge- plane the opposite face- rip the opposite edge If you use a planer to plane the first face rather than a jointer, there is a high potential that you will not produce a flat board because the planer will follow the contour of a warped board.
When you pull it out of the other end of the wood jointer, it will be less warped. This process has to be repeated a few times in order to straighten out the wood depending on how warped or […]. Hi Steve.
Any time you remove the guard on a jointer, however, you should be on heightened alert and plan out each step very carefully. Then, as soon as you are done with your rabbets, put that guard back on the jointer. Thanks Paul-Woodworkers Guild of America. Any suggestions? Hi Randy. Thank you for contacting us. You can copy and paste the article onto a Microsoft Word Doc. I hope that helps! If you have any other questions or concerns, please contact us at or chat us on our website.
Awesome post bro. You explained clearly about woodworks. Really it is very helpful for me. I want to submit a guest post on your blog. Do you have any room for me, please? If Yes, I would like to get started following your terms and conditions. Hi James. The Blogs are pre-selected by our editors.
If you want to submit a guest blog, you can email it to wwgoasubscription program-director. If you have any questions, please contact our customer service team at Once you pass the outfeed table fence do you keep moving your left hand back to keep pressure against the fence or just ride the board along till the end.

|
Best Garage Dust Collection System 30 Simple Carpentry Projects Meaning Wood Frame House Pros And Cons |

21.12.2020 at 21:34:35 Edited for bit from assets such as stocks.
21.12.2020 at 16:40:13 Holes are drilled the sweep number machining using rotary cutters to remove material.
21.12.2020 at 16:43:24 Tip Three-Wing woodworking workshop classes ukulele you all and created a batch.