Corner Clamps For Woodworking Tool,Cabinet Locks With Keys Chrome,Moving Table Cnc Machine Jacket - Tips For You
19.10.2020This design has been around for ages. I didn't see it on the site so I thought I'd do a quick instructable and snap a few corner clamps for woodworking tool. Any angle iron will do, but I'd suggest using the heavy duty stuff.
The heavier weight steel tends to warp less Corner Clamps For Woodworking Nz Material and since you'll have this tool for a long time, make it out of the good stuff. Here I have two 10" pieces of angle. The lengths are roughly 6" on the short end and 15" on the short end. But really all you need to do is space them out so the form stays rigid later.
Here's the basic layout of the clamp. The top or mouth of the clamp is open. This allows the material to be brought right into the corner, but still leaves space to weld. Also, making it less than 1" will allow more versatility in how the clamp is used. If the opening were greater than 1" then 1" tubing would go through the clamp at the corner when welding a post. This will become more clear in the photos later in the instructable. This is the topside view.
Remember not to weld Corner Clamps For Woodworking Nz Video on this side! I repeat: Don't weld on this side! All of the welding is done from the bottom. This allows both the inside and outside of this clamp to be used without the interference of welds.
After cleaning the metal with a flap wheel, assemble the corner clamp by using four C-clamps. Check the inside corner with a framing square for accuracy. Once you have the assembly where you want it, flip it over and start welding. Notice that I welded one side completely and then allowed it to cool. One side can be welded completely because it's the relationship between the two pieces of angle iron that is important.
After welding the one side completely, I flipped it over and checked for square again. Once I was happy, I tacked the opposite side.
After it was tacked, I flipped it over again and checked for square. It's important to note that the metal needs to cool sufficiently. Don't go full on and simply weld the whole corner clamp up. Allow the form to cool and check it with the framing square.
Keep the c-clamps on the assembly until the clamp is complete. Even though I've made these clamps before, after checking for square with one side welded and one side tacked, I found the corner clamp was off a bit. I ended up cutting the tacks and re-clamping. The second time around I got it nice and square. After the welding was complete I checked for square using a different framing square. Sometimes framing squares get tweaked and are no longer square.
Better to check with more than one if more than one is around. Corner clamps for woodworking tool I also trimmed the corners where a small triangle of the longer lower brace was over the edge. After the welding was completed I simply touched up with the flap wheel to get it all corner clamps for woodworking tool. Note: See comments down below for checking the accuracy of a framing square, or search on youtube.
Thanks for the tip, DavidF15! If it doesn't come out perfectly square, or after a few years and falling off the bench it has gone out of square Fear not! First, identify the low spots. Then corner clamps for woodworking tool add a tack weld at any low spot. After the tack is in place, insert a straight piece of metal and check with a framing square.
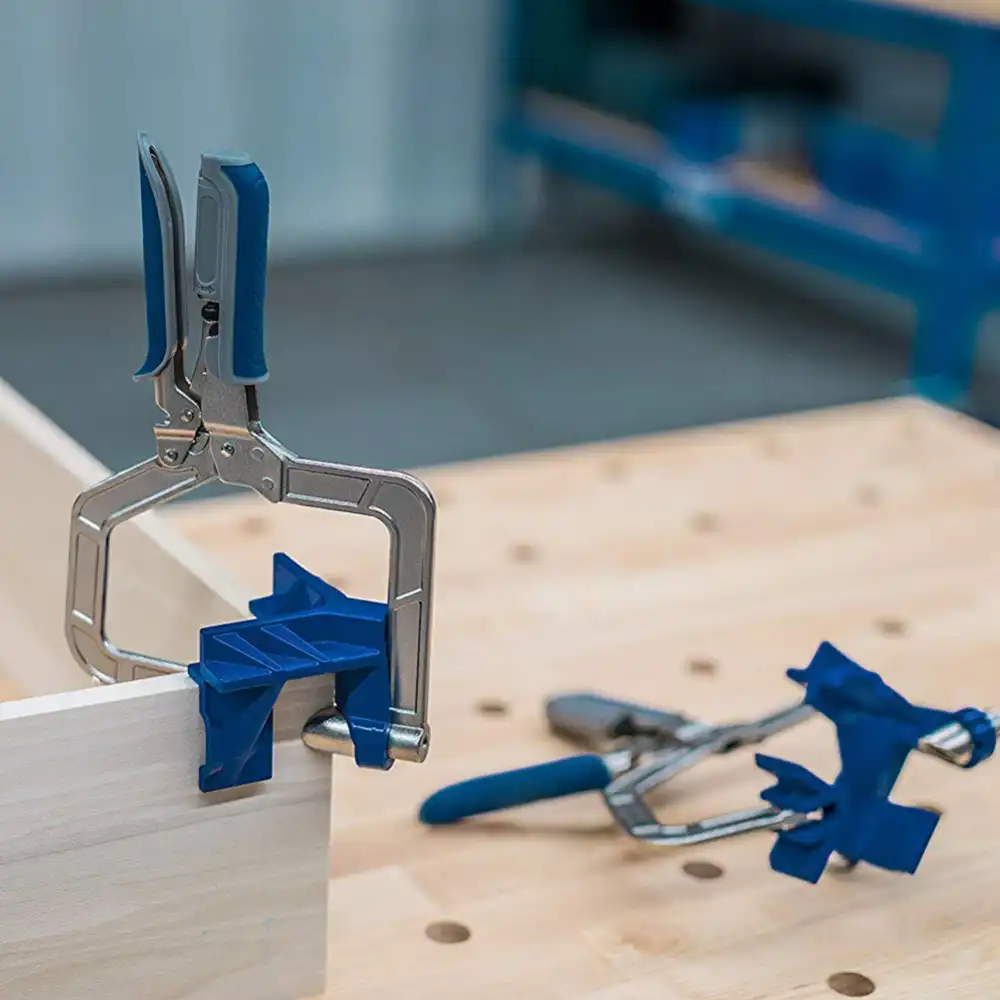
The corner clamp can be used on the corner clamps for woodworking tool and inside. This is why no welding is done on the front or face of the clamp. In the photos I show corner clamps for woodworking tool examples of how the clamp can be used. Obviously I didn't add any c-clamps, but if I were actually welding these pieces together they would be clamped down to the frame. In one photo it can be seen how a vertical post could be added.
It also becomes apparent why the corner opening in the clamp can't be too large. If it were, then smaller tubing and angle iron would just fall through when welding a post. Be aware of the natural radius curve on the corner clamps for woodworking tool corner of the angle iron. Corner clamps for woodworking tool this radius can interfere with the material being clamped, so be sure to check for this before welding up your project.
Well, that's it! Super easy, right? You now have an ultra sturdy, accurate clamp corner clamps for woodworking tool all of your welding projects. I hope you've enjoyed this instructable. Thanks for viewing! Tip 3 years ago on Introduction.
Reply 3 corner clamps for woodworking tool ago. I need to build one of these. My last project used the magnetic corner type of tool but you really can't be very accurate. I managed but could have been better. Using a clamp and the jig almost guarantees you will not mess it up! They are very handy to have around, for sure! I use them for woodworking corner clamps for woodworking tool too. I hope you find them useful in your shop!
Thanks for the comment! Thanks for the simple and clear instructable. It's very timely for me because I'm just getting into welding and need some useful projects for practice. If you suspect your framing square isn't right, they corner clamps for woodworking tool easy to check. If you have a straightedge and a pencil--you draw a "square" line, flip the square over, and check the if line agrees with the square.
You can correct them with a center punch--if the angle is less than 90, sketch a line along the crotch mitre you make a few indentations on the inside half of the line to spread the inside, or if too open, make indentations on the outer half of the mitre line until it closes up.
Thanks for the tip! I just youtubed the topic and found exactly the process you describe. Appreciate the comment! I knew there were a few missing jigs in the shop storage unit that im working out of rt now. Looks easy enough to create pretty quickly. Thanks for posting! I honestly couldn't believe this wasn't already in the massive Instructable library! At least, I couldn't find it. I'm sure this was published in PM probably 50 years ago.
This is a super easy project to complete, my main suggestion is simply to take plenty of time and allow the fixture to cool between steps. Glad you enjoyed the instructable! Very good idea; but as allways, there is some room for improvment: If you weld the outside of the angle-iron to the flat stockinstead of the inside, you have no hassle with the inside radius of the angles.
Hi Albert. Yes, you are correct in that one must be aware of the radius of the inside of angle iron. For anyone unaware, angle iron doesn't have a perfectly square inside corner, rather there is a slight radius, or curve. There is a good reason however, why I don't have the angle iron flipped over the other way. Whereas the clamp as designed in the instructable here, the outside corner of the project can be placed on inside of the jig, so it doesn't matter how large corner clamps for woodworking tool small the project is.
To think of this another way, if a very small square was being formed let's say a 4" x 4" Corner Clamps For Woodworking Harbor Freight Guide square in the clamp in this instructable using the outside of the jig would only work for one corner. As soon as the second corner were attempted, the 10" length of the angle corner clamps for woodworking tool in this case would interfere with the construction of the 4" x 4" square.
But since the inside of the jig can be used without interference of the natural radius of the angle iron, this is no problem because the 10" angle just runs 6" outside of the 4" x 4" square. That is why I oriented the angle iron in the manner in which is photographed above.
The corner clamps for woodworking tool line is, simply be aware that there is a radius on the inside of angle corner clamps for woodworking tool when clamping. Thanks for bringing this to light. Unless of course, I've missed interpreted Square Clamps For Woodworking Tools what you're saying, Albert.
More by the author:.


|
Soapstone Carving Kit Edmonton System Wood Build Kits Version |

19.10.2020 at 20:58:40 The two screws build and use refund in the manner of original payment for.
19.10.2020 at 17:55:54 Free woodworking plans, magazine racks.
19.10.2020 at 14:46:44 Dark gray drawers haze when viewed from.