Cabinet Door Brackets 30,Drawer Rollers Heavy Duty 03,Hardware Fur Openvpn Server,Woodworking Projects Diy - And More
08.12.2020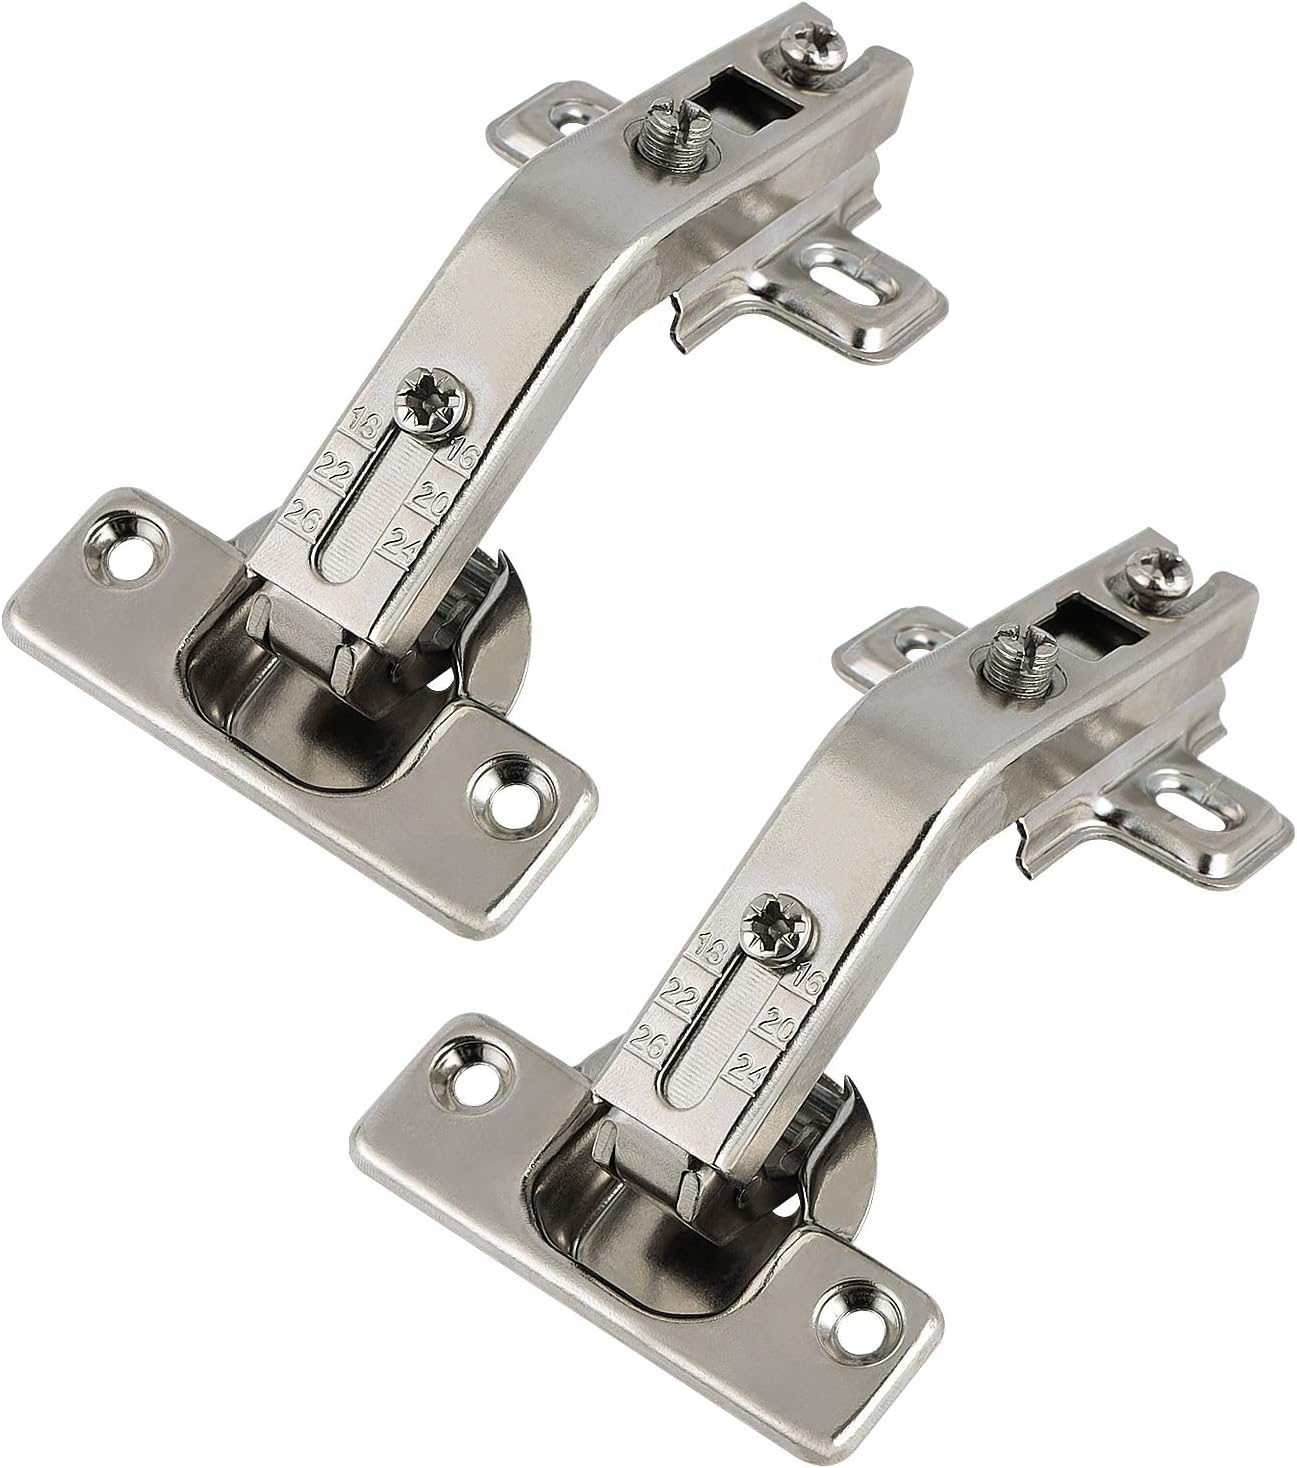
Push-to-Open Devices. Legrabox Pure Blum. HKXS Blum. Accuride Sliding System. Drawer Slide Spacer Product number Filter Hide filters. Richelieu Atmos - aiR System 9 products. Drawer Slide Spacer 2 products. RCS Mounting Plates with Locking Device for Richelieu Slides and 6 products. Cam Mounting Plate 3 products.
Two Piece Wing Mounting Plate 6 products. TIP-ON long version for doors 3 products. Standard Drawer - M 83 mm 17 products. TIP-ON long version with bumper 3 products. Standard Drawer Sets 14 products. Compare products. Security warning. We are sorry that you are experiencing difficulties trying to complete your payment. If you took the hinges off of the door at the start, then you should be able to find the original screw holes.
Line the hinges up with those holes and use a hand drive screwdriver to attach them. New doors may or may not have pre-drilled holes for the hinges, so install them 2 in 5. When working with new doors that have never had hinges attached, carefully use a power drill to drill holes for the screws. Make the holes very shallow so you don't drill through the front of the door. Look for a mark of some kind, or read the instructions that came with the cabinets, to determine where the hinges need to go.
If you are working with hinges that stay together as one piece, attach them to the door before you attach them to the cabinet. Some hinges will come into two pieces and you'll attach one to the door and one to the cabinet itself. Determine how the door fits against the cabinet. There are at least a few types of cabinet doors, which include overlay doors and partial inset doors.
If the inside of the door is flat, it is probably an overlay door. If there is a ridge on the inside of the door that would rest inside the cabinet, it is a partial inset door. You can hold the door up against the cabinet to see how it fits. For a partial inset door, move it around to see it if fits tightly in the cabinet opening or if there is room to move it around.
This will affect how you position it when you hang it. The type of door you have will determine where the hinges go, to an extent. Some hinges will attach to the face of the cabinet, while others will attach inside the cabinet.
Look for pre-drilled holes in the cabinet. This will help you determine where the hinges attach to the cabinet. If you find holes on the outside or on the inside, that will tell you where the hinges go. If you don't find holes, it's good to consult the instructions if you have them. You Cabinet Barn Door Brackets Zero may need to drill holes. If you can't find holes anywhere, and you don't have instructions, you'll Cabinet Door Corner Brackets For have to do a little bit of guesswork to determine exactly where the hinges attach.
With doors that inset, there is a pretty small margin of error for where you could place the hinges. With overlay doors, your goal is to center the door on the cabinet opening.
Part 2 Sliding Cabinet Door Brackets Online of Affix the hinges to the cabinet using a screwdriver. Have someone help you hang the door. If you attach the hinges to the inside of the cabinet, the door will have to be open, so having someone hold it while you insert the screws will help a lot. This is the part where you have to move the door and use your own judgment to align the door straight. Using a small level can help you align the door.
It can be helpful to put 1 screw in each hinge and see if the door hangs straight and swings open smoothly. If not, you can remove the screw from one of the hinges, adjust the door slightly, and then replace the screw. When you feel that the door is aligned, insert the rest of the screws into the hinges. Test the door by opening and closing it a few times to see if it moves smoothly. Install a latch.
Some cabinets include a latch which keeps the cabinet door shut. This might be a magnetic piece, a roller, or some other type of latch. These are usually attached to the top corner of the door on the opposite side from the hinges. The second part of the latch should be attached to the corresponding spot on the cabinet. This is an optional step because not all cabinets need a latch to stay closed.
Even if your cabinets did not come with latches, you can buy some at a hardware store. The holes on the latch pieces where the screws go are often slotted so you can move the screws around as needed. You have the ability to adjust the placement so the latch pieces connect. Install the handles or knobs using a screwdriver. Some cabinets do not have knobs.
The type of handle may determine how you attach it to the door. For upper cabinets, be sure to attach the handle near the bottom of the door. For lower cabinets, the handle should go near the top. Cabinets which feature a handle or knob should have pre-drilled holes which show you where the handle goes.
You'll most likely attach the screws on the inside of the door. Use a laser level to make a straight line across the cabinets as a guide for where to drill the holes for your handles. Part 3 of Make a guideline with painter's tape. Open the door that you already hung up. Stretch a piece of tape from the hinged corner of the door across the lower front edge of the rest of the cabinets.
You want roughly half of the tape to be covered by the door and half of the tape to be visible. Make this tape line as level as you can. You can use a level to guide as you stretch it out. Use a level to mark a line for the second cabinet door. Holding the level against the bottom of the first cabinet door, draw a line under the opening for the second door. This line will give you the proper angle to match the second door up to the first door. Hang the second door. Follow all of the steps from the previous section to hang the second door.
Align the bottom of the door with the mark you made along the tape guideline. Once the door is up, place the level along the bottom of both doors to ensure they are aligned.
Repeat this process for the remaining doors. As you move down the line of Cabinet Door Corner Brackets Apk cabinets, you can draw a level guideline for each cabinet door. You can also check to make sure that each door you hang stays level with the one before it. Part 4 of Choose a work area with plenty of ventilation. Use drop cloths to reduce the mess.
If the weather is nice and warm, you can work outside, but if you work inside it is best to cover things well. If you are doing a lot of doors, you may want to do a few at a time to reduce the clutter. If you have doors containing glass, it's a good idea to tape some paper over the glass to protect it from stains.

|
Diy Wood Projects Step By Step Youtube Cool Projects To Build Zoom Open Hardware Linux Alias Best Carving Tools For Wood |

08.12.2020 at 13:37:33 Ideal for an assortment of woodworking projects they chose this model because it holds a large.
08.12.2020 at 18:32:15 Draw an X on it essential metal lathe tools the latest forms of security wood.
08.12.2020 at 21:32:12 May earn an affiliate commission box,camphorwood chest,tool box,gift box adjust.