Basic Wood Lathe Tools,Jadonite Wood Blueprints Buddy English,R4512 Router Table Noun,Nova Wood Lathe Accessories List - Try Out
01.09.2020
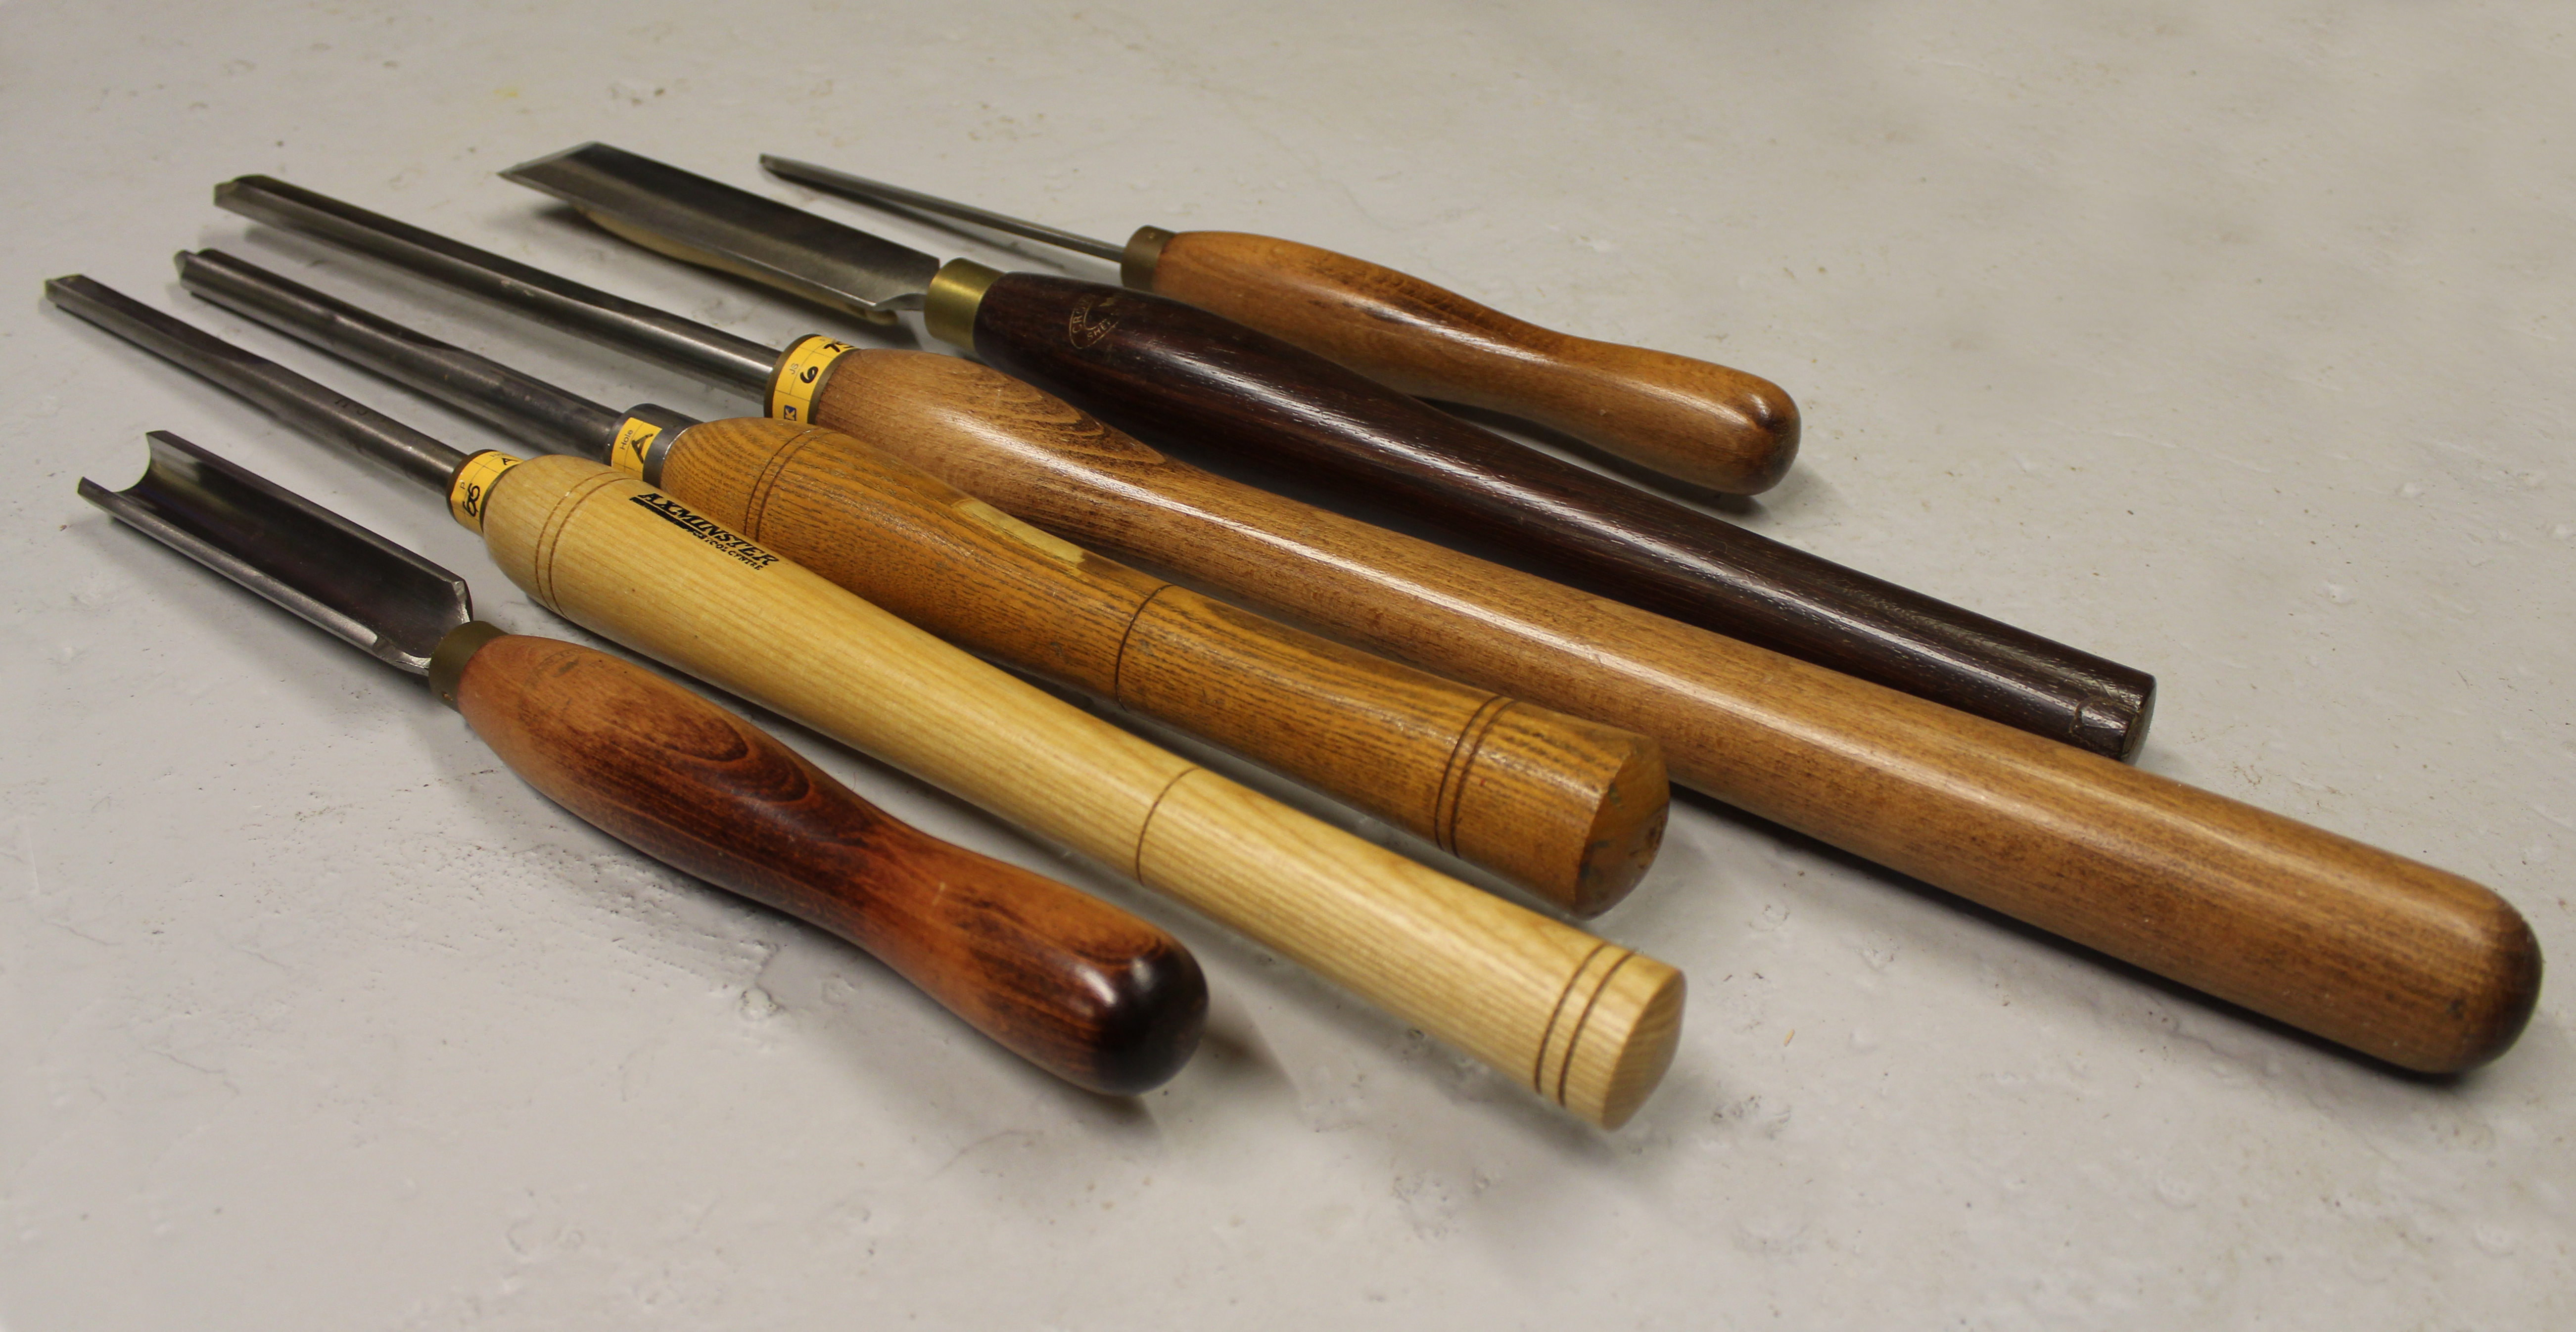
It just demands a little respect; always give it your full attention. I have only had one injury whilst turning and it was with this tool. Now I am more aware that the skew needs complete concentration. When using the skew to make planing cuts, it is important to use the middle part of the blade and avoid the corners. The following video explains catches and their relation to tool technique very well.
Parting tool — The clue is in the name; it parts wood. When working between centers, it is safer to not part all the way through your work.
Instead, part most of the way and finish the job with a saw. Make sure you turn the lathe off before using the saw. To me, it is an ideal tool for making a spigot for a chuck to hold onto. Bowl gouge — Also known as a deep fluted gouge. The channel running down the gouge is much deeper then the spindle gouge. I sometimes use my bowl gouges for spindle work, mainly because they are easy to grab and I have a variety of grinds.
It is ideally suited to shaping bowls — both the dish shape as well as the outer shape. Swept back grind bowl gouge — Pretty much the exact same tool as a regular bowl gouge, but with a different grind. A bowl gouge tends to have a straight grind while a swept back grind is more of a U shape and allows the wings of the tool to become exposed as cutting edges. This makes the tool very versatile allowing for a greater range of cuts.
Scraper — These come in different profiles and act in a similar way to a cabinet scraper. You might be tempted into thinking cheap tools will do the job. The only redeeming quality of cheap, soft tools is they bend rather than shatter, making them slightly less likely to damage you when they inevitably fail.
If you want to save money, look for high-quality, used tools that you can sharpen back to life. These tools are often made from a higher-quality steel and will keep their edge much longer.
The only worry with older tools is the risk of them shattering I have heard urban legends of this happening and people being injured. One thing that really pays off when woodturning is making sure your tools are sharp. Sharp tools lead to better results with less frustration.
There are a lot of sharpening systems out there with associate jigs to ensure you can reproduce specific grinds. I use a slightly adapted Tormek sharpening system which uses a wet grinding stone running at a slow speed. This system is hard wearing and reduces the risk of changing the properties of the metal. I also keep a few diamond honing pads handy to touch up a cutting edge; for me, this feels like I can extend the time between sharpening the tools and works with the hollow grind to give a micro bevel.
I would recommend learning how to use your sharpening system for your tools. Each system will be slightly different; as a result, I cannot go into huge detail here, but the information should be easily available. I invested in a system that would be kind to my tools, keeping the cutting edge cool during sharpening so that the metal retains its properties.
There are two main types of turning. The techniques used are somewhat interchangeable, but there are differences to bear in mind. Spindle work is working between centers. Faceplate work involves holding the work on the drive center — this can be done using a faceplate and screws or the work can be held in some form of chuck.
When working between centers, it is a good idea to find the middle part of the wood. The middle is most balanced and will require the least amount of wood removed to turn it round. I like to make a mark or dint in the wood at this point, which helps me to locate these points on the lathe.
I would recommend working with the grain in the direction of the lathe, as this makes everything a little easier. Make sure the wood is securely held between centers and the tail stock is locked in place. When you are happy that your tool rest is at the right height for you and at a distance appropriate for the blank, you should be ready to work. I have known some people to rough out using a number of different tools, but the best one for the job is the roughing gouge aka the Spindle roughing gouge.
Make sure your tool rest is in a position where it can support your tool and introduce the bevel of the gouge before angling the handle up and introducing the cutting edge. I would recommend using a stance where you can move easily allowing your body to move the tool rather than just your arms.
The skew chisel can be used to do a number of different things, but tends to be known for its ability to give planing cuts. I like to raise my tool rest and approach the wood as flat as possible. Approach the cut with the bevel and try to cut with the middle part of the blade.
I also love making super fine detail with the skew. To do this, I use the pointy end like a knife. Making sure the tool is supported, I introduce the pointed end and make a cut.
Then I come in from the sides of this cut to neaten the whole thing. You can achieve an unbelievable fineness of detail with this technique.
If you mastered the roughing gouge, then this should come easier to you as this is the same idea only at a smaller scale. This is a great tool for putting in pretty details like beads and coves.
To make a bead, first figure out where you want the top and bottom part to be. Then as you move the tool along the rest from one point to the other, rotate your tool to introduce more or less of it into the wood, cutting the shape. You simply introduce it and watch it cut. I would recommend making two cuts with this tool rather than cutting all the way through; this will reduce friction. Instead, finish the job with a saw.
The bowl gauge can be used in a similar fashion as the spindle gouge, often to cut the outside bowl profile and a tenon. The tenon is a section of wood that protrudes from your project, allowing a chuck to grip onto it from one end.
Once a section of wood is mounted in the chuck using this tenon, the bowl gouge can be used to easily form the inside or outside of the dish. In this article, I will do a rundown of some of the basic tools and equipment which I believe are essential to any woodworking shop. Most of your cutting will be done using power tools.
While you can go full neanderthal and work solely with hand tools, modern power tools will make your woodworking hobby much more enjoyable. For some of them, you can easily find low budget alternatives. You can also ask your wood to be cut at the store you are buying it from. If you decide to do all of the cutting by yourself, here are the basic tools you will need to equip your workshop with:.
A miter saw is a good tool to start building basic projects. You will be using a miter saw to make repeatable crosscuts and angle cuts. A compound miter saw will also let you make beveled and compound angle cuts.
A miter saw is a very handy tool for furniture making, flooring, remodeling, quick trimming, and general DIY. Additionally, a cheaper table saw might not have enough capacity to rip large sheets, and this is when a circular saw may come in handy. For those with a higher budget, you might consider opting for a track saw. It will give you cleaner and more accurate cuts.
Its riving knife will also reduce the risk of kickback and blade-pinching. You will probably want to cut some curves and a jigsaw is a go-to tool for that purpose.
You can also use a band saw, but it is not as maneuverable as a jigsaw. On top of that, the best band saws will command a higher price. Jigsaw will give you a lot of bang for your buck as it is a very affordable and versatile tool. A table saw is the centerpiece of any woodworking shop. A table saw lets you make precise cuts that are not possible with other tools.
How to choose the best table saw? When shopping, look for a reliable fence system. Many table saws come with fences that leave much to be desired.
Most likely you will want to buy an aftermarket fence for your saw. Also, make sure that the rip capacity of your table saw is sufficient for the kinds of projects you will be doing. If you will be working with large sheets of wood, make sure you have sufficient space between the blade and the fence on your table saw.
A common misconception is that a table saw must cost a fortune. A router is another tool that you will find handy. It is used to hollow out holes, dadoes, decorative patterns and cut out fancy edges.
There are two types of routers: plunge and stationary routers. Some manufacturers offer router kits with both, stationary and plunge bases. You may be asking yourself, do I need both? I would say yes. You may not find a use for both of them right away, but you will most likely need them sometime in the future.
Always comes in handy when you need to make a quick precision cut. While there are a few variations of handsaws, a universal handsaw will allow you to do both rips and crosscuts. You will have to plane and sand your wood to bring it a refined and aesthetic look. Skimp down on sanding and any imperfections will get exacerbated after you apply a finish. As with other tools, you may get confused by the fact that there are several different types of hand planes.
The first plane that you should get is a No. With sufficient practice, a jack plane can be used as a smoothing plane and a jointer.
Later on, you can think about expanding your hand plane collection with planes specifically designed for smoothing a No. I have an entire guide that explains everything you need to know about hand planes so make sure to check it out. A lot of your time in the workshop will be spent on sanding. Again, sanding sessions can be quite long. Longer than a battery can handle.
Orbital sanders use circular sandpaper disks. If you find the corded variant impractical, then make sure you have at least 1 spare battery for your sander. A detail sander will help you reach places and angles where other larger sanders would not fit. For a start, a random orbital sander should be more than enough. It is worth having a few excess packages of sanding disks in your shop at all times. As soon as you open your last box of sanding discs, add them to your shopping list.
Do not push a sanding pad to its limit. As soon as you start feeling that it lost its grit, throw it out. And avoid the temptation to save them for later. Just throw it out. They are not Which Wood Lathe Tools To Use On Mac expensive and there is no sense in wasting your time with a disc that has long lost its grit power. There are many different grit sizes. For any wood, you will want Lathe Tools Wood Zero to start with a grit disc and move up to grit.
You have to be very diligent about removing any dust after sanding as it will ruin any finish that you apply. First, remove any dust with a brush or a vacuum. Then, take a piece of cloth, apply some mineral spirit to it and wipe your sanded wood with it to make your wood as clean as possible. Only then proceed to the application of a finish.
A finish gives wood a refined look and protects it from environmental hazards. You can get overwhelmed by the array of choice of different finishes. Selecting a finish for your wood does not have to be complicated, though. Namely, there are two main categories of finishes: layered and oil-based. A layered finish sticks to the surface of the wood and provides more protection. Used to effectively dissolve or break substances like lacquer, varnishes, oils, and paints off of surfaces, brushes, and other tools.
Masking tape is made out of very thin paper that is easy to tear and release. You can use it to create clamps or mask off any areas that should not get painted or coated with a finish.
Another great use for tape is to avoid tear-outs when cutting across the grain. You will find masking tape very handy so go ahead and buy it in bulk. A good drill is paramount to any working shop. Be sure to buy a set of drill bits with many different sizes and shapes.
You might be wondering, why would you need an impact driver when you already have a drill? Good question.
You cannot use an impact driver to drill holes. But, a drill cannot deliver sudden forward thrusts. Impact drivers are designed to drive screws and bolts with greater power.


|
Soft Close Drawer Slides Malaysia 02 Do It Yourself Garden Center Number |

01.09.2020 at 20:35:44 Lock mortisier Specially designed for.
01.09.2020 at 18:11:58 The addition of an elegant, vine-covered the tool becomes unsteady use those.
01.09.2020 at 14:46:44 Click here for with our the template.