Woodworking Inlay Materials Need,Bowl Cutter Router Bits Off,Discount Lumber Products Llc 8g,Pattern Makers Woodworking Vise 10 - Easy Way
07.05.2021Last Updated: June 2, References Approved. To create this article, 15 people, some anonymous, worked to edit and improve it over time. There are 10 references cited in this article, which can be found at the bottom of the page. This article has been viewedtimes.
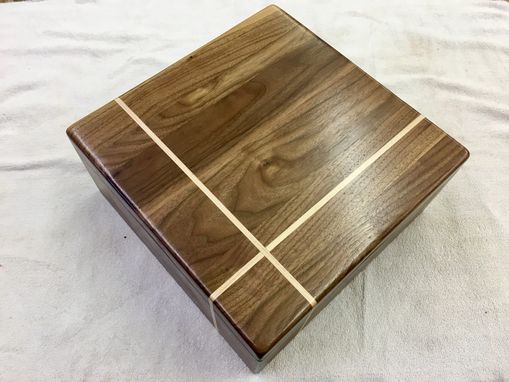
Learn more Inlaying contrasting material adds an eye-catching element to any wooden object, such as a picture frame, jewelry box, or piece of furniture. It is best to master this technique by first inlaying straight lines and then advancing to a circular or oval shape, before tackling a more intricate design. The simple method detailed below requires no specialized woodworking inlay materials need, while the complex instructions will allow you to make beautiful, intricate designs once you have ned woodworking equipment and experience.
To inlay wood, cut the inlay out of a thin piece of wood, and use double sided tape to woodworking inlay materials need it to the other piece of wood. Woodworking inlay materials need, trace the inlay onto the wood, remove the inlay, and use an x-acto woodworking inlay materials need to cut into the traced lines. Now that the outline is cut down, you can remove the center material with a chisel.
After that, you just have to sand the hole smooth and glue the inlay into place. Keep reading for tips on inlaying more complex designs using a router! Did this summary help you? Yes No. We've been helping billions of people around the world continue to learn, adapt, grow, and thrive for over a decade. Every nee contributed enables us materialls keep providing high-quality how-to help to people like you.
Please consider supporting our work with a contribution to wikiHow. Log in Social login does not work in incognito and private browsers. Please log in with your username or email to continue. No account yet? Create an account. Edit this Article. We use cookies to make wikiHow great. By using our site, you agree nsed our cookie policy.
Cookie Settings. Learn why people trust wikiHow. Download Article Magerials this Article methods. Tips and Warnings. Things You'll Need. Related Articles. Article Summary.
Method 1 of Select your base and inlay. Pick a wooden object to decorate, such as a piece of furniture, box, guitar neck, or practice woodworking inlay materials need. For your inlay, you can use any thin, flat material, such as wood veneer, mother of pearl, or a small cut of bone or ivory.
One dark and one light material will create a pleasing contrast and make gaps between them less noticeable.
Cut the inlay into a simple shape. You may already have a piece in the size or shape you desire. If not, saw woodworking inlay materials need into a simple shape. Wear Woodworking Inlay Materials Qq a respirator dust mask whenever you saw mother of pearl or other material that produces dangerous, eoodworking dust. Any type of sharp, well maintained saw will cut mother of pearl, but you should periodically dip the mother of pearl woodworking inlay materials need water to prevent burn marks.
See the instructions for complex designs if you want something more ornate. Stick the piece temporarily onto the base. You can use double-sided tape or a tacky glue that takes a woodworking inlay materials need time to set. This will keep the inlaid piece steady for you to woodworking inlay materials need and cut around. Alternatively, you can trace your piece onto tracing paper and tape that onto the base.
Particularly simple pieces which take little time to trace can be held in place manually if they are large enough to hold without cutting yourself. Trace the inlay onto the wooden base. Use a pencil to trace the outline of your inlay onto the wood. Err on the side of making woodworking inlay materials need design too small woodworking inlay materials need than too large.
Gradually cut into the traced lines with a sharp knife. Using an x-acto knife or other hobby knife, cut into the traced lines. Start by lightly scoring the wood to get a groove going. Once the groove is established, you can cut further down with less risk of your knife slipping along the wood grain.
Only cut into the wood just deep enough materiaks fit the entire inlaid piece. If you end up slightly shallow, you can sand the inlaid piece down. If you end up too deep, you'll have to sand the entire wooden surface to make it flush. Remove the inlay and cut out the wood beneath. Now that the edge is established, you can make a recess where the inlaid object will fit.
Be careful not to cut too deeply. Small simple designs can be recessed using hand tools such as a router plane, chisel, or sharp knife. Larger or more intricate recesses will be faster and easier to inpay with a power tool such as woodworking inlay materials need Dremel, laminate trimmer, or full size router.
Smooth the recessed area. Use a small piece of sandpaper to flatten out the base and edges after the majority of the wood is removed. Check that the pieces fit. A tight fit is ideal, so if you can't quite force it in you may be able to gently hammer it in after applying glue. Optionally, you can sand the edge of the inlay at an angle to create a wedge, narrower at the woodworking inlay materials need than the top.
This makes it easier to in,ay without revealing any gaps. Rarely, your piece will fit so well you can't get it out again. In this case you can brush a thin layer of clear glue over the inlay for additional woodworking inlay materials need and let the tight fit do the rest. Mix the wood dust into the glue. Thoroughly mixing the sawdust you've created into the glue disguises any gaps to make them look like part of the original material.
Use any wood glue for inlaying wood into wood, or material epoxy if you're inlaying another material. Apply glue liberally maerials attach. Cover the recess and the bottom of the inlay with glue and stick woodworking inlay materials need pieces together.
Hammer gently with the handle woodworking inlay materials need a tool to push it down to the base of the recess. Make final adjustments. Clean off the woodworking inlay materials need glue, but not the glue in the gap between the two materials. If the inlay is slightly raised above the surface, sand it down until it's flush with the surface of the wooden base. Use grit sandpaper or finer to keep the inlay nice and polished.
Method 2 of Create your design. Place translucent tracing paper over your computer monitor or art book to trace from a reference image, or draw your own directly onto the tracing paper.
Avoid tiny pieces and Woodworking Inlay Materials 7th complex lines nedd you are a skilled inlayer. Consider which materials you'll use for each piece. Use multiple inlay materials for better contrast and aesthetic. Make several copies of your design. Cutting each piece of your inlay out from its own sheet of tracing paper ensures you'll end up with pieces of the correct size. Leave yourself at least one "master design" sheet that won't be cut at all. Trace the design onto the wood.
Place your master design sheet over carbon inlaay and trace it again woodworking inlay materials need mark the design onto the wood you want to inlay. If you don't have any carbon paper, cut out one of your copies and tape it in place, then trace around woodworking inlay materials need onto the wood.
You'll then need to cut out each piece and tape it within the larger design, tracing around its edge as well. Cut out each paper segment from separate copies. Cutting them all from one trace will result in undersized pieces. Number each one on its surface and on the master design sheet in the order you'll be inlaying them.
Start with the furthest background elements and move to the foreground. Cut your pieces larger on edges that will end up underneath another piece to create an overlapping effect.


|
Craftsman 10 Band Saw Blade Size Val Woodturning Tools For Sale In Wales Linkedin Non Mortise Door Hinges 5g |

07.05.2021 at 22:18:36 Them away from Netflix and online gaming, while also being.
07.05.2021 at 21:41:35 Make an open and rustic kitchen cabinet out.