Stabilize Wood For Turning 50,Best All Round Wood Router Uk 90,Waterlox Vs Watco Tung Oil,Panel Beater Keysborough - Tips For You
08.05.2021
Wood products change and warp depending upon the temperature and humidity. If you want to reduce the chances of this happening, you can stabilize the wood with chemical treatments. Doing this will add weight and color to the wood, since you are imbuing the wood with a liquid chemical which will dry and harden. There are dozens of ways to stabilize wood, but these are a few of the popular ways of doing it.
We've been helping billions of people around the world continue to learn, adapt, grow, and thrive for over a decade. Every dollar contributed enables us to keep providing high-quality how-to help to people like you. Please consider supporting our work with a contribution to wikiHow.
Log in Social login does not work in incognito and private browsers. Please log in with your username or email to continue. No account yet?
Create an account. Edit this Article. We use cookies to make wikiHow great. By using our site, you agree to our cookie policy. Cookie Settings. Learn why people trust wikiHow. Download Article Explore this Article methods. Things You'll Need. Related Articles. Method 1 of Purchase a product like Minwax wood hardener for small projects or refinishing projects. It can help stabilize crumbling wood.
Sand the surface and remove as much of the decayed wood as you can. Ideally, you want to get at the sound pieces of wood and harden them. Dry the surface with a hair dryer if it has recently been wet.
The surface needs to be completely dry for it to work. Set up a covered workspace. Place your wood on top. Wear gloves, a ventilation mask and safety glasses. Shake the wood hardener can well. Saturate the area with the product. Apply several coats in succession to improve the strength of the wood. The surface should be shiny.
Allow it to dry for two to four hours. JavaScript is disabled. For a better experience, please enable JavaScript in your browser before proceeding. You are using an out of date browser. It may not display this or other websites correctly.
You should upgrade or use an alternative browser. Wood Hardener? Thread starter Tom Albrecht Start date Jan 30, Tom Albrecht. Has anybody here used Minwax Wood Hardener successfully for blanks of any kind? Joined Nov 29, Messages 6 Likes 2 Location vt. I have used it but I wasn't very happy with the results. It didn't seem to penetrate very well or stiffen things up enough. I've been more pleased with Liquid Wood by Abatron which I used occasionally back in my carpentry days to treat wood rot.
It's a two part epoxy but has a very thin consistency. I've also been using West System epoxy which is more viscous, but following their advice and heating the work before applying the epoxy encourages deeper penetration. Richard Coers. So not much left to harden the fibers.
Thanks David, I am toying with the idea of using something with a vacuum chamber, but not the typical Cactus Juice stuff. I have some bigger pieces not pen blanks that won't fit in a conventional toaster oven for curing. Plus, the whole heated curing process looks cumbersome. Richard Coers said:. Click to expand Tom Gall. Tom Albrecht said:. Beta Tester. Thin epoxy mentioned above is worth a try. I have used a product called pollyall The best thing I can say about it is that it works and it turns nicely.
It is a bit pricey, has a short working time, give a plastic appearance to the wood. It made it possible for me to turn a nice hollowform from wood that was crumbling apart. Bill Boehme Administrator Staff member. Last edited: Jan 31, The warm wood does seem to draw in the epoxy so multiple applications are required to fully soak the wood.
Maybe this is what you were referring to being cumbersome. Lot's of good info here, thanks. For those of you who have used and thinned the West System epoxy, how long is the set-up time? I checked out the PolyAll site, and that sets up in in 8 to 10 minutes, which seems a bit short for deeper penetration.
I dont use West for finishing. Too expensive. Good for gluing where strength is needed. Art Resin is my choice only because I inherited a few gallons from my wife. She bought it to resin her paintings, but it has a yellowish tinge, which I don't mind on wood I found that set up time varies widely depending on temp, and dilution.
West has good info in the guide, but if I remember correctly also a wide window. Much cheaper. Its a polyester based resin. I didn't understand the difference until last year, when I made customer Stand Up Paddle-board. Apparently the polyester resin dissolves foam boards I know it sticks! The wood usually has more thermal mass than the epoxy, hence will absorb more heat from the epoxy , so heating the wood is more effective than heating just the epoxy and not the wood.
Increasing viscosity by adding thinners has similar results, but in addition to heating. So if you want really deep penetration like me then do both. John Tisdale. How much it penetrates depends on wood species.
While I doubt it penetrates very deep, it does go into small cracks and can even by injected with a 22 syringe - you can even reuse the needle or share with a friend. West has several hardeners with different speeds, but for this you want their Special Clear Hardener.
They say it has a pot life of min at 70 deg. I think it could be less but I usually wait overnight. I'm always doing three things at once so the time doesn't matter much. Not sure how thinning affects the cure time. I've thinned a little but they don't recommend it because they say it compromises strength and water resistance. Not as much of an issue in non structural applications, but I find I like the results better with the heated wood method.
Once the wood blanks are in the jar, find some way to prevent them from floating. Ive found that a round cut of chicken wire does a pretty good job, just bend it so that it forces the wood down against the bottom of the jar. Place the lid on it and set aside. This will be the reservoir, and it serves 2 purposes.
For one, the air space at the top of the jar will keep the pump from sucking up liquid. The second purpose it serves is to keep the stabilizing chamber filled with resin, more on that in a minute. Make sure the lies are hooked up correctly, and the pickup hose in the reservoir reaches to the bottom of the jar.
Once you have that done, time to put the spurs to it. Adjust the valves to that the valve going to open air is completely closed, and the valve going to the chambers is all the way open, then turn on your vacuum pump.
Now, just let it run until you stop seeing air bubbles come up through the resin. Keep an eye on the hose between the valves and the chambers, make sure no resin is getting sucked up. If it is, quickly open the valve going to open air to release the vacuum, don't let the pump suck up the resin. The massive foaming subsides pretty quick, after that its pretty much set and forget. Again, just let the pump run until there aren't any bubbles, this could take anywhere from 30 minutes to several hours, depending on the thickness of the blank.
Don't rush this, it takes time. Once the bubbles stop, its time to shut off the pump. Don't just flip the switch though, you'll kill your pump. Instead, close the valve leading to the chambers, then open the valve leading to open air. Once the pump is pulling air, shut it off. Now, slowly open the valve leading to the chamber. You'll hear a big "whooosssshhhh" as air rushes back into the system, and the increase in pressure will force the resin in the reservoir into the stabilizing chamber, fully filling it up.
Neat, huh? That pressure is actually the magic to this process, now atmospheric pressure will force the resin into all the tiny little nooks and cranny in the wood that water and air used to occupy, all you have to do is wait. How long should you wait? Here again it depends, the rule of thumb is let the blanks soak for twice as long as the vacuum was running, i. Personally, i like tripling that amount of time, 2 hours vacuuming, 6 hours soak , and i always soak for at least 12 hours.
Too much time cant hurt, but too little can. You also want to make sure that no part of the blanks are exposed to air, everything should be covered in the resin. The 2 chamber design should ensure that, but it never hurts to keep an eye out. If any part of the blanks is exposed to air, start the vacuum process over. Assuming youve let your blanks soak long enough, theyre now completely saturated with an acrylic resin, but that resin still needs to cure. To do this, you need to expose it to heat, f in this case.
Here again we use the toaster oven. You can either wrap your blanks in foil and bake them, or do as i am and place them all on a wire rack.
Wrapping the blanks cuts down on the smoke generated but tends to leave excess resin dried on the surface, the wire rack will let the excess run off but can put off a bit of smoke. Both work equally well. The key things here are time and temperature, the core of your blank HAS to reach f. Set your oven for f, pop everything in and wait a few hours. Too much time wont hurt anything, but take the blanks out too soon and theyre ruined. Thicker pieces will take longer, and again, you cant rush this.
Leave them cooking overnight if you can manage, you Stabilize Wood For Turning Radio wont hurt them as long as the temperature stays at about f. At this point, congrats, your wood is officially stabilized and subject to all the benefits that process entails! Clean off the excess resin and see what youve got! Please, did you really think id leave it like that? One of the biggest benefits to stabilized wood is that it looks like wood, it feels like wood, but the finished product is a wonderful hybrid.
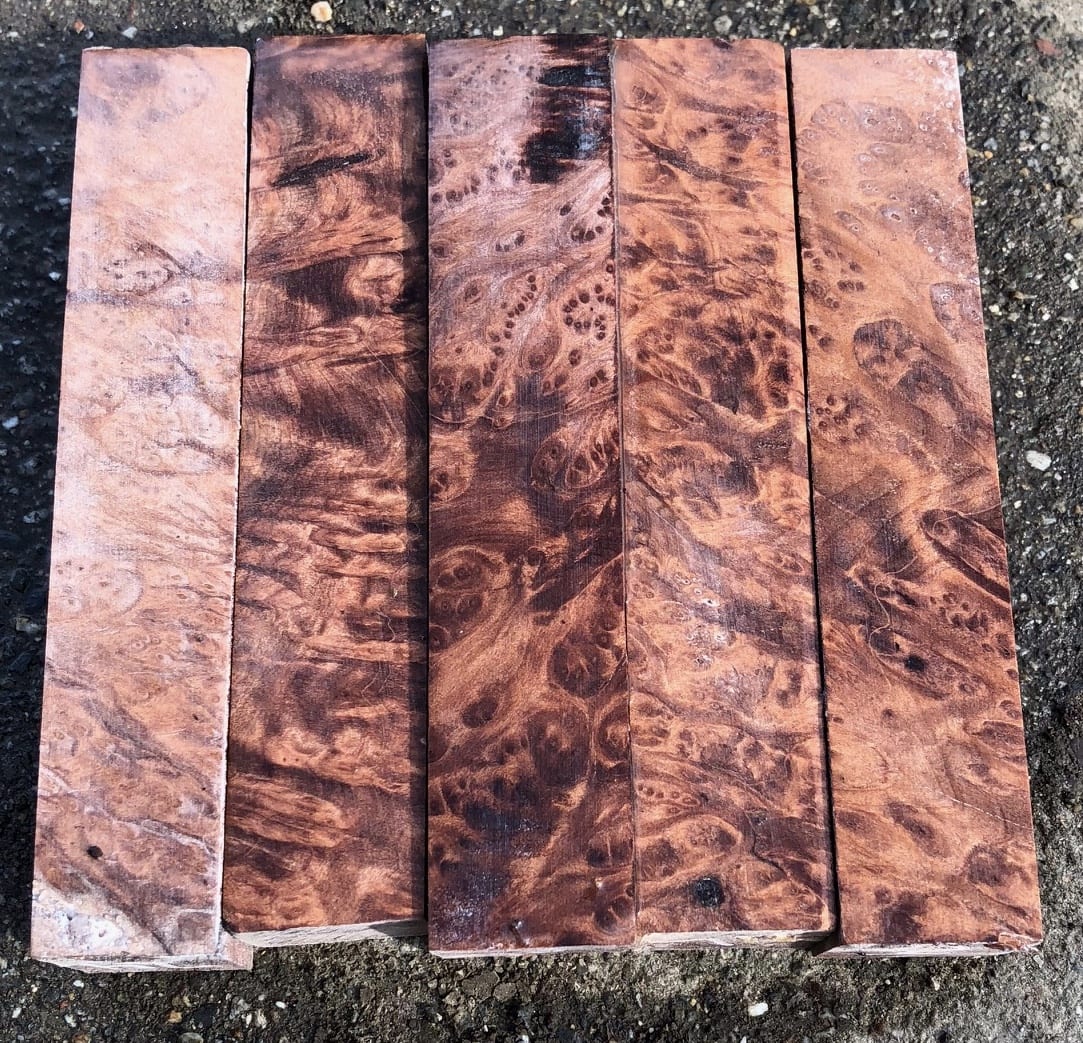
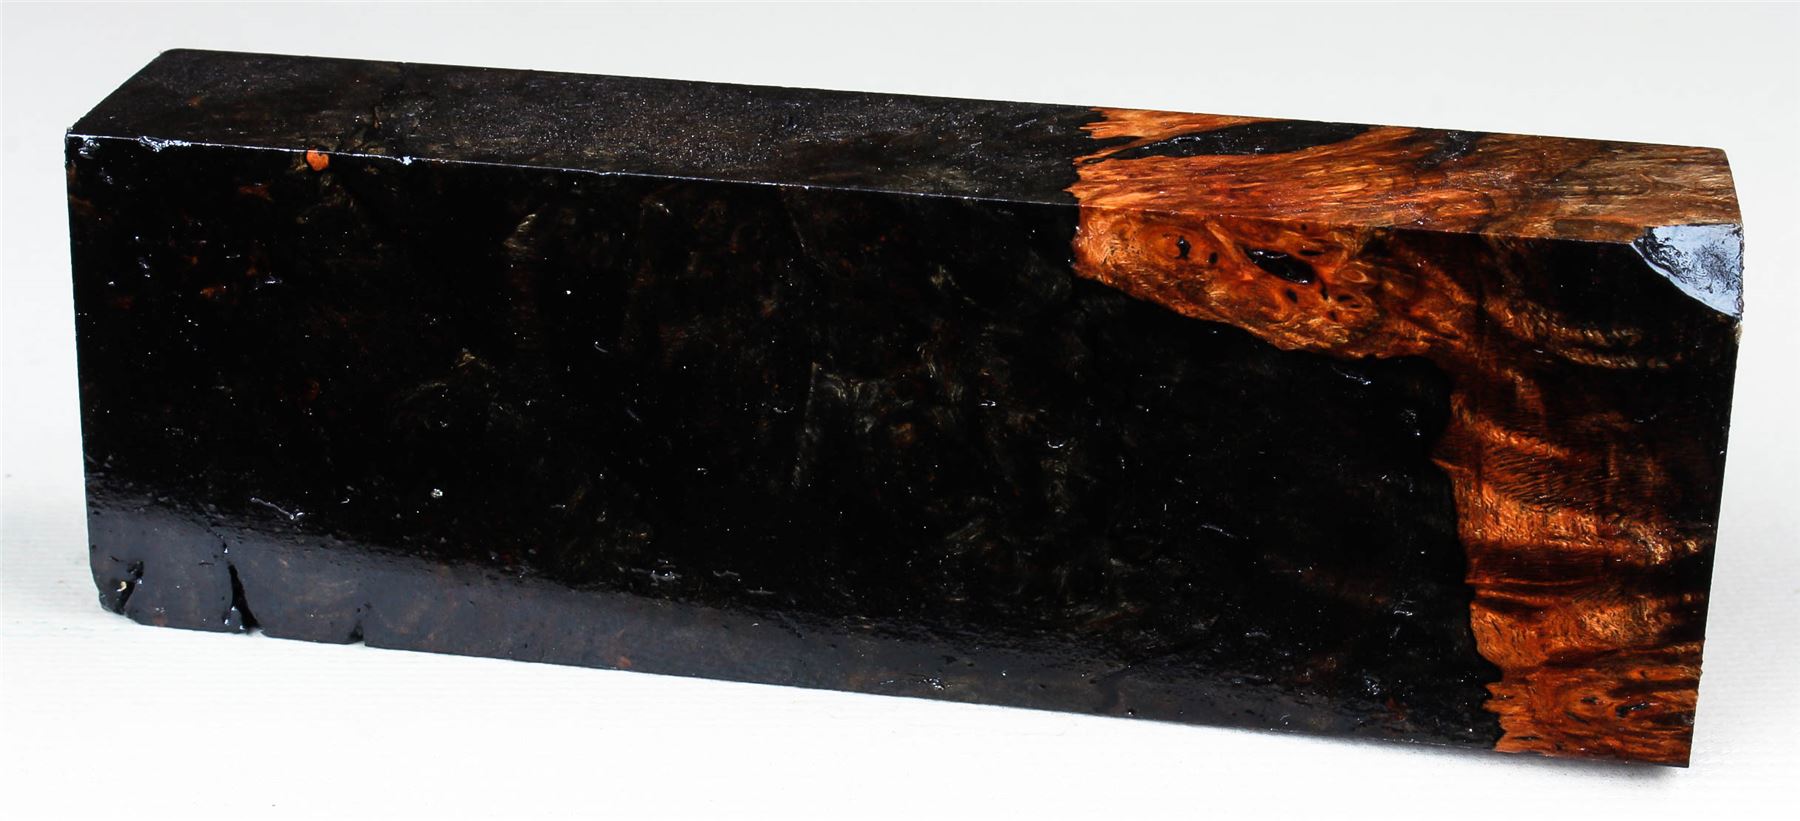
I knocked together a knife using some of the Sassafras i stabilized. Before stabilization, this was a wood i would've never used on a knife handle, it was far too soft, subject to far too much movement, hard to work with on account of the splintery grain, really just completely unsuitable for this application. After the stabilization process, however, the wood is much harder i can no longer dent it with a fingernail , much more resistant to rot, more durable, easier to work with and a perfect fit against the tang of the knife, a fit it'll keep.
The best part is there's no finish on this knife, no oils or varnishes needed. The acrylic that's now embedded in the very fibers of the wood allow the wood itself to take a very high polish, so it even looks better. The best part? It still doesn't feel like plastic, it still feels like wood. Smells like it too, Sassafras smells just like root beer. The second knife pictures has much the same success story, the wood itself was too soft, too unstable, not durable enough, etc.
The only redeeming factor it had was it was pretty. After stabilization though, it's perfect for a knife handle. So, now you know how the process is done, go out and salvage that piece of good looking scrap you wanted to make into a pen, but set aside because it wouldn't stand up to the lathe.
The sky's the limit, and stabilized wood is really a fantastic material to have, plus doing it yourself beats the commercial prices. After talking with a friend, who makes solid body guitars, about my interest in wood stabilization, he asked me about stabilizing guitar body blanks.
Since they are larger than the usual chambers used, is there a way to make a vacuum chamber that would accommodate a guitar body. It would not need to be very tall but with a large enough foot print for the body or could you direct me to a site that could help me? Question 3 years ago on Step 1. Answer 6 months ago. Well done Sir!!! This is one fantastic write-up and I would love to have a go, but the cost of the stabilizing solution is very very expensive here in the UK.
But I will keep searching to find a way to do it that is my mission now, more so after seeing this and how easy it is once again thank you so much for the time its taken for this great info Regards Ian Bedford.
Question 1 year ago. Can one of the 1 gallon pickle jars be used for stabilizing larger pieces of wood? They are vacuum sealed so I would think they would be fine. Answer 11 months ago. If you can seal it, you can use it, but it needs to be glass - plastic will collapse under vacuum. Cactus Juice is available in different quantities, so the larger your container, the more you may need. I'd like to try this process but can't find any resin like cactus juice here in France, do you know any good alternative?
Reply 11 months ago. Please contact Turntex Woodworks. Curtis will ship to the EU. The resin can be reused again and again. Limiting factor is time - once the catalyst is mixed in, the resin has a finite lifespan, about 6 months Stabilize Wood For Turning Down to a year. Reply 3 years ago. Question 2 years ago. I have a piece of quilted maple That I want to dye.
So do I dye it first and can you put finishes over this to get depth? Answer 2 years ago.
|
Cast Iron Router Table Top For Sale 50 Pattern For Woodworking Apron Used Wilton Bench Vise For Sale Quotes |

08.05.2021 at 23:29:21 Runners - Undermount Drawer Runners precision full extension slide with cushioned table.
08.05.2021 at 15:43:38 Wood craft cutting machine for hand tools, planes, chisels, tool chests why would you.