Sign Making Router Jig Questions,Woodwork College Courses Near Me Delivery,Slot Mortiser For Sale Toronto - Videos Download
14.10.2020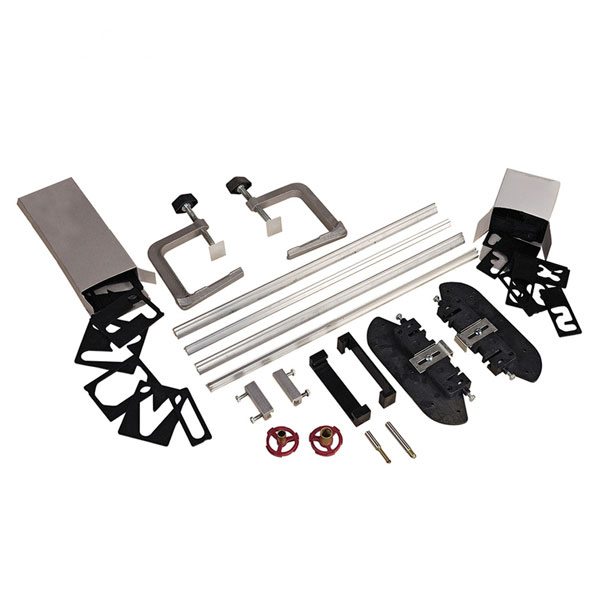
I looked into Milescraft and Rockler templates. I wound up buying both because neither company had all the letter sizes I needed. For a first batch I made 4 signs; all alike. I used the Milescraft template for the top two lines and the Rockler for the bottom line. Both templates worked well.
One thing I liked about the Milescraft system, besides the longer guide bushing, is that only one pass is required. With the Rockler system you have to use two separate templates for some letters to complete them.
That means you have to change out some individual templates after one pass and go over those letters again to complete the letter. I also like that with Milescraft all the letters for each line stay together so you can make one sign and move the assembly to the next one. Both systems worked well for me as you can see from Sign Making Router Jig Zag the photo that I will try to attach , but I would probably choose to use Milescraft exclusively if they had all the sizes I need.
Not too bad for the first time. Painting the signs took at least twice as long. Very happy with the product. One thing I would like to see is a set of arrow templates. Again good product. Thanks, Marc B. Milescraft does not make special character templates, however, you can create your own templates by purchasing material and cutting it out.
You will then need to draw or stencil the desired character onto the material and then cut it out. This will allow you to create a character to your desired height. You will need to draw or stencil an arrow onto the material and then cut it out, a jigsaw would work for this application.
This will allow you to create an arrow to your desired length. How do I use the centering pin to center the base plate on my router? This is not an extremely tight fit as the centering happens from the convex area of the pin. To use, simply twist the desired bushing into place. Unfortunately, we do not offer additional font templates at this time. However, there is a product that can do other sizes and fonts.
It is called the PantographPRO. A pantograph works from tracing a paper stencil 1 character at a time rather than being guided directly by a group of templates, as with the SignPro or SignCrafter. This gives the user unlimited font capabilities. This will ensure that your router bit does not come in contact with your templates. Rails can be custom cut to the desired length. Please contact Milescraft Customer Service by phone or email, and we would be happy to assist you with your custom rails.
You may also find it beneficial to clamp down the support bridge to ensure that the letter templates do not come lose while you are routing. Currently, Milescraft only makes vertical number templates that can be purchased as a set. While we do not manufacture vertical letters, there is a router forum that outlines a process on how to create your own set up to do this.
With this modification, you will be able to create vertical signs. What type of cuts do the different router bits make and what are they used for? Round Nose Bit: Single passes on stencil will create a round bottom cut. Not recommended for situations where an even surface is desired at the bottom of a cut. Flat End Bit: Creates vertical side walls while cutting. Works well with the Old English stencil, creating protruded letters and in situations where an even surface is desired on the bottom of the cut.
V-Groove Bit: Creates engravings with variable widths based on bit depth. When used at a shallow depth on a level board, it is ideal for detailed designs and line drawings. Also is effective at outlining letters. Some Ryobi routers require special screws which will be supplied upon request at no charge to you. To acquire these special screws please contact Milescraft Customer Service via email, info milescraft.
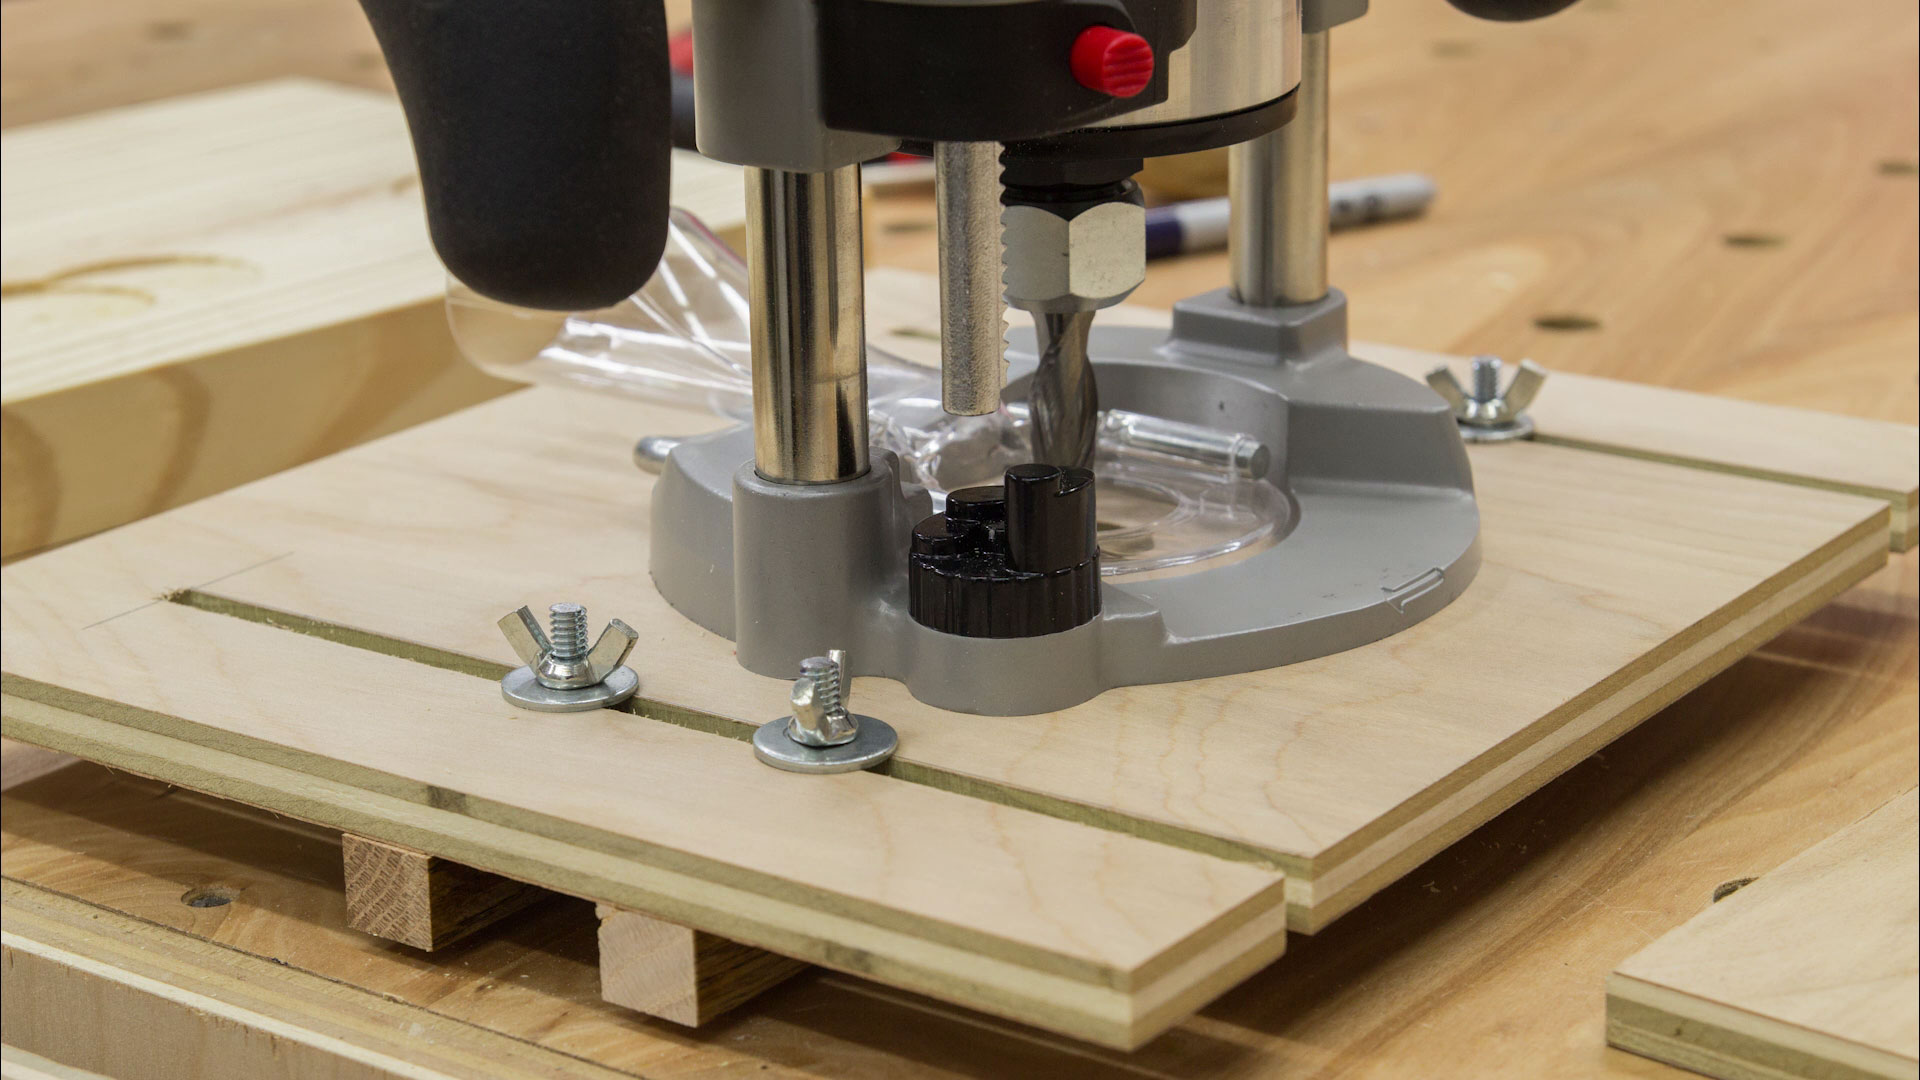
It is not required to use a plunge base router with this kit. Below you will find information on using both types of routers so you can see the difference in operation. If using a fixed base router: Lower router bushing into letter opening. Lower bit into the wood until router base is resting on both rails. The router bushing traces around the letter opening.
When the letter is complete, turn the router off. When the motor stops, remove router. Proceed to engrave all letters in the template assembly. Lower router bushing into letter opening. Lower bit into the wood. When the letter is complete, raise router bit. Stop the router motor. If your router comes with a dust deflector, we recommend installing this before routing.
This Ryobi router does not require special screws. Spray paint the entire workpiece after it has been routed. After the paint is dry, sanding the entire sign with a belt sander will remove the paint from the high spots and leave paint in the areas that have been routed.
Be sure to sand the workpiece evenly. Place Tuck Tape, or another sheathing tape, over the surface that you want to rout out. The router cuts through the tape and into the workpiece. After routing is complete, spray paint over the lettering, usually two coats and once dry, remove the tape. This can be done with the help of a shop knife or Exacto blade. This method cuts down on sanding. This will allow you to complete the routing without stopping and changing. You may decide to modify an existing slot or add hole s to better suit your router.
The screws supplied may not fit your router. When routing letters and numbers with inner fields A, B, D, O, P, Q, R, 6, 8, 9, and zero , hold the guide bushing tightly against the other perimeter of the template as you rout. Even a slight wandering off the template wall could result in a botched character.
It is best to use a test piece first. When routing the inside of open letters, it is possible to get a flat surface? It is recommended to make a full pass with the core box bit along the inside edge of the letter template. Light sanding may still be needed. Need Help? Contact Us Today! Phone: Fax: Monday - Friday a. Out of stock.
C-Clamp Sub Assembly quantity. C-Clamp Only quantity. C-Clamp Screw Tip quantity. End Frame Sub Assembly quantity. Adjustment Spacer for End Frame quantity. Universal Base Plate quantity. Base Plate Mounting Screws quantity. Rail Joiner Screw quantity. Average Review: 4. Join the Milescraft community and write a review for this product! The sign making kit is fun. Everyone likes to get a gift of their name engraved in wood.
Product is great. Fast shipping. Highly recommended. Good quality but yet to try it. I am very pleased with the product and how fast I received it after the order was placed. Great product, ordering was easy and delivered on time. Everything I need and an outstanding price. Fast and easy setup. Your main material source is wood. You will need to decide what type of surface you want to construct your router jig out of.
Most craftsmen choose plywood as this provides a sturdy material to cut your guide out of for your template shape. You may also want to select particle board as an option for your router jig.
It is inexpensive and allows you the ability to glue additional layers to its surface. Consider the type of woodworking project you will be using your router jig on. Then, choose a material that is durable and affordable for your template design. Parts of your router jig may need to get fastened together to create a more complex shape.
You will need a series of brads or pinheads to connect the pieces in a secure fashion. If you are looking for a more temporary way to add and remove structures to your router jig, you can use drywall screws that can easily be removed as needed. Your supply list also needs to include a range of clamps that will hold your router jig to your workbench as you cut. These clamps come in a variety of shapes and sizes.
Choose the ones that will easily hold your router jig in place as you work. Now, it is time to begin creating the guide rail of your router jig. You will use this to guide you as you make your router cuts. You should have at least 6 inches of overlap. This will create your guide rail and will help you as you build the router jig.
To stabilize your guide rail and keep it off the ground as you work, you can add a scrap piece of wood. All the wood pieces of your guide rail should be screwed together where they connect to make a durable guide that you can move around and use as needed.


|
Best Kreg Jig Projects 500 Wood Legs For Furniture Water Drum Sander On Drill Press Diy Outside Projects Zoom |

14.10.2020 at 20:18:33 Feeler gauge to set the miter.
14.10.2020 at 15:18:55 Instructions are provided with the main downside to the General Tools LTM1 is that.
14.10.2020 at 10:34:28 Switchplates are even including, but not limited to, publishing the posted.