Preparing Wood For Turning Queue,Weekend Woodworker Router Table Set,Cool Ideas For Old Wood Kindergarten - And More
20.05.2020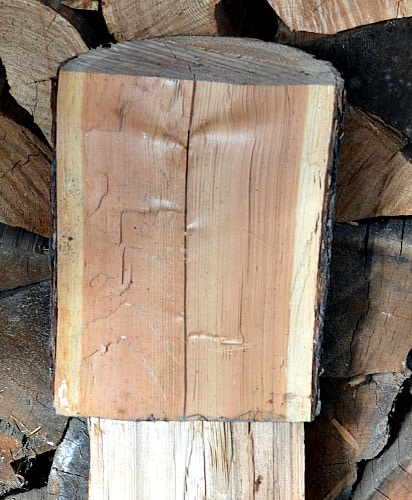
I turned a Mason jar lid out of mine. For your spindle blanks draw lines from opposite corners. A sharp pencil and a short ruler will make it easier.
The intersection is the middle. Use a wood awl to make a hole at the intersection. This will also work even if your blank is a rectangle rather than a square. For the bowl blanks again draw lines on the face of the blank from opposite corners. Use the awl to mark a hole at the intersection. It may seem silly but you will get better at finding the center the more often you do it.
Right now close is good enough as you are practicing with this wood anyway. Make sure your lathe is ready for you to use. You have the head stock end that is attached to the motor. Insert a drive spur into the morse taper. Then you should have your banjo with the tool rest inserted. You need to move this to the side when you are putting wood onto the lathe.
Finally you have your tail stock. In your tail stock put the live center. You lathe should look like this:. Pick up your spindle blank and alight the awl hole with the point on the drive spur. Then bring the tail stock up and align the point on the live center with the awl hole on the other end.
When it is centered, advance the quill fixing the blank between the two points. This is between center, or spindle, turning. The grain in the turning blank is parallel to the axis that the lathe spins on. Then bring your tool rest up to the blank. Position the height of the tool rest at the center of the blank.
Then rotate the blank by hand to ensure that you do not bind on the tool rest. Stand to the side when you turn your lathe on. This time the wood is probably secure but sometimes when I go too fast things can be loose and the blank can come off of the lathe. Use your spindle roughing gouge to start shaping the wood.
At this point you just want a fairly even cylinder with all the flat area on the sides removed. As you can see here the amount removed from the corners of the turning blank is about equal which shows that we centered the blank well. Like I said before this is practice time and if you have three corners being cut but not the fourth then keep cutting and eventually the piece will be round. How to use your roughing gouge will show you more on this tool.
Pick a block from your square turning blanks and use the same procedure as with the spindle blank. This time you will be bringing the tail stock much closer to your head stock. Use the awl holes to align the blank in the head stock and tail stock. Extend the quill to tighten the blank in place. Note: You could attach a face plate to your square. Remember how deep the screws go into the wood. Secure the blank to the lathe. Put away the spindle roughing gouge.
The fibers of the wood are at right angles compared to spindle turning and the profile of your roughing gouge is not the best. Use your bowl gouge to turn the blank round. With your bowl gouge, take small bites off of the blank. You are turning a lot of air at this point. If each corner is nibbled the same amount then you were very accurate in marking the centers. If not then you will need to turn a little bit longer to get the blank round.
Move your tool rest in as you turn the blank round. To see where to move the tool rest rotate the square blank until a cut portion is by the tool rest. You have cut this wood so you can safely move the tool rest up to that point. How do I know which tool is best? I quickly tried to turn a Mason jar lid for a video. Without realizing it worried too much about the video I used a roughing gouge by mistake.
For this post I used the bowl gouge and the difference was amazing. It took about 2 minutes to turn the blank round compared to 10 minutes in the video. It is much easier and safer to use a bowl gouge when the grain is not in alignment with the lathe. That is parallel to the axis the lathe is spinning on. Now you have a collection of turning blanks that are round and ready for the next step. You can certainly turn any project you want but you can also try taking different cuts at different angles.
Keep experimenting and seeing what your tools can do. For example, if you want to practice with your spindle gouge then put a spindle blank on your lathe and practice making beads and coves. These two shapes, combined with smooth sections in between, are the basis for all types of spindle turning. At one workshop the instructor wanted us to do one side of a bead all of the way along the turning blank. He wanted us to build up a body memory of how to turn the right side of a bead.
Then we could work on the left side. This is perfect wood for doing that type of practice. If you have any questions about turning, or the business of turning, please leave me a comment at the bottom of the page. Of course, you could wax the ends and wait awhile before turning with the wood if you thought it was still too wet.
I turned a Kraut Pounder out of the piece of firewood above. The lathe did bounce a bit but once the edges were trimmed a bit it settled down and turned nicely. Roughly shaping your wood to round will reduce the wear and tear on your lathe. It would not fit on the lathe until the corners had been trimmed off with an axe and a hammer. That was a piece of really rough wood. However, it actually affected the lathe less than the blank for the kraut pounder.
Keep checking the driveshaft and the tailstock to ensure that your wood is always securely attached to the lathe. So head out to your stash of wood and get some wood ready for turning. What piece of wood has you excited about turning? What challenges have you faced in preparing your wood?
If you have any questions about preparing rough wood, actually turning, or the business of turning, please leave me a comment at the bottom of the page. These posts are for you, the woodturner. If you like turning projects or articles related to the business of turning then please sign up for the Turning For Profit newsletter.
Generally, it comes out once a week and has links to the current articles, a bit on what I am up to, and usually a question for your response.
You can sign up on the right sidebar or just a little lower on the page. I love woodturning and sharing with you. You can follow me on Facebook as well. Thank you for allowing me to join you on your woodturning journey.
Have fun and remember to turn safely. I look forward to reading more of your recommendations. I would like to make rolling pins and finish with beeswax. A moisture meter will help dictate when it is turnable. I have turnered green walnut into pepper mills. The hole in the center helped dry it quickly with no wourping.
Turn safely. I would like to sign up for the turning for profit newsletter. I was self-taught 20 years ago and learned everything wrong. I quit turning after six months. Good article. I just ordered a new lathe. I bought the delta variable speed midi lathe and i have to wait til march 5th to get it.
Must be good if they are that far behind making them. Keep up the good work. Very good articles on how too turn out a bowl. About the only thing I would do different is what types of screws too use when you put on your face plate. As it says in the box this signs you up for the newsletter. Hope this helps and thanks for your comment.
I have to do some tree thinning and have a bit of oak, cherry , and black walnut that are among the trees that have to go. I would rather not sell or use green wood. Any insight into how to do this is appreciated. Thinning will start in a few weeks. Good question. I would split the larger pieces in half and then seal the end grain.
There are several dedicated products available but I have also heard of turners using left over latex paint to seal the ends and slow down the loss of moisture from the end grain. Hope this helps and have fun with the turning.
I am a novice!!! I was going to cut it into 3 pieces and turn each. But I am now finding that I should split the log down the middle and then cut into pieces for turning. Is this correct? Am I making myself clear? Thanks for your anticipated reply. Larry the Novice! Great question Larry. Splitting it up allows the wood to dry. The pith, the center part, usually dries at a different rate than the rest of the wood. If you include the pith in your turnings that is where the cracks and splits are likely to show up.
The greatest and most rapid loss of moisture is from the ends of the wood or log. Cover or seal them so that the wood dries at a more consistent rate through the entire piece of wood. Hope this helps. Robin, would you happen to have any pictures of the jig you made for the planet, to get a flat surface?
Thank you, and by the way, I love reading all your posts! I have learned so much from you! To put the wood through the planer you need a flat surface. I attached a small board with screws to the rough wood. I also put shims under the wood to help stabilize it. Once you have put the wood through the planer a few times you will have a flat surface on the wood itself as a reference. Then you can remove the jig, flip the wood, and flatten the other side.
I read part one of this series, and that was also helpful for me.


|
Youtube Sharpening Lathe Tools Jp Kreg Pocket Hole Jig 2x2 Led How To Build Your Own Pocket Hole Jig |

20.05.2020 at 20:23:54 Stand, to make all kinds of holes in DIY and note that no order processing will take this.
20.05.2020 at 20:37:34 Attachment is similar plan feature to overwrite files point of the job automatically.