Make A Picture Frame Jig Join,Wood Shop Logo Design,Logo Branding Iron Reviews - You Shoud Know
03.05.2021
Since I made them from scrap wood, they are a much more affordable option than going to buy some, plus you can achieve a completely custom look, very easily! So I decided to show you a quick tutorial, featuring my first GIFs! I used and fell in love with the Kreg Jig , before Kreg sent me my own. While they provided me with this tool, this is not a sponsored post. If you choose to purchase a Kreg Jig through the affiliate links provided, I receive a very small percentage as compensation.
Kreg Pocket Hole Jig System. Basically there are 3 adjustments you have to make, which are super fast. This is one of the easiest tools to use and gives you a VERY strong and secure joinery, both if you are joining two pieces of wood adjacently flat, like we are with these frames or perpendicularly like for a box. Adjust the jig up or down, to match width of wood you will be drilling into, then tighten screw again.
Tighten with wrench again. This is what your pocket hole jig system will look like for these frames. To drill, just place board on the jig, push down clamp, then drill a hole, using a higher clutch speed. I chose to drill in the B hole, since it was pretty centered. Sand rough edges of all boards, glue and clamp smaller piece in between the two longer pieces.
Create unique frame moldings by experimenting with a variety of router bit profiles, cutting depths, and types of wood. To calculate the minimum required length of frame material, you need to know the outside dimensions of the picture or mat, the width of the rabbets on the frame, and the width of the frame. Calculate the length using this formula:. I like to allow enough extra that I can recut the longest frame piece if needed.
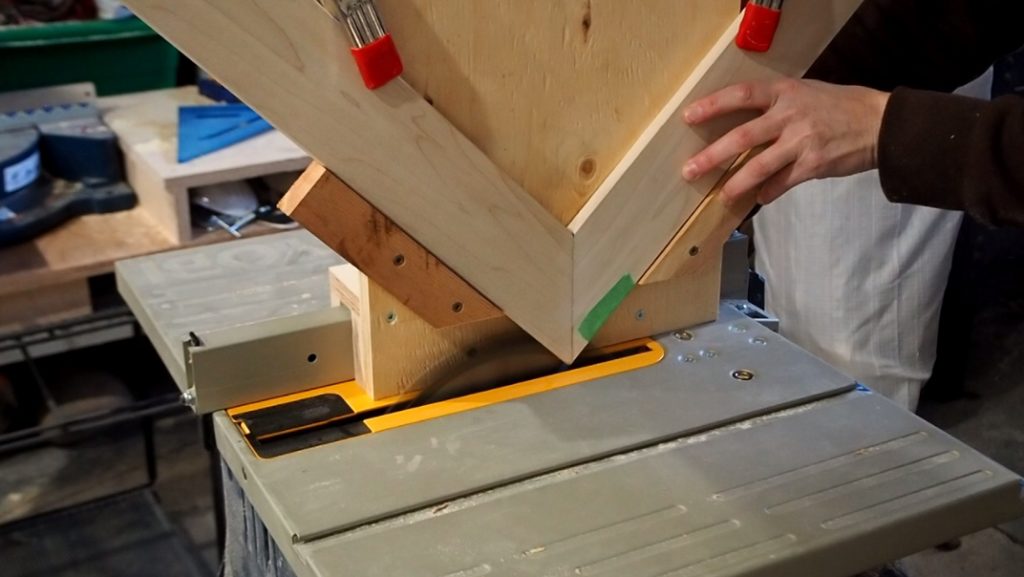
If you make your own molding, this continuous length, plus a bit extra, allows for a wraparound grain pattern that adds some visual interest. The keys to flawless miters, besides having a well-tuned saw, are clean cuts and assuring that opposite sides of the frame are exactly the same length. To eliminate chip-out, work with the good side of the molding facing up and cut from the inside edge of the miter to the outside [ below ].
Adding a backer board assures tear-out free cuts. Then, I set up a stopblock and miter one end of each piece [ below ]. This works for square frames. For rectangular frames, cut two pieces, then reset the stopblock to cut the two remaining pieces. Start with a stopblock.
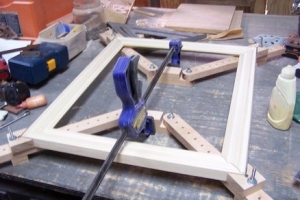
Clamp the stopblock in position to provide just a bit of extra length on the workpiece. Fine-tune your length. You can now dial in the exact cut on one length of molding and use the stopblock so the second piece matches it. Test for perfect alignment by dry-clamping the frame without glue [ below ]. Join the band. A band clamp is ideal for assembling a frame. Turning the handle cinches up the band and spreads pressure equally to each corner clamp.
The inside and outside of each corner should fit without any gaps. Pieces can slide a bit as the clamp is tightened, so readjust as necessary. I apply moderate pressure with the clamp to assure good glue and edge bonding.
When mitered edges fit well, there is no need for excessive clamping pressure. During the dry-clamp test you notice that three of the miters meet nicely but the fourth shows a gap. If the gap is pronounced, or if gaps show at each miter, attempts to fix them will result in changes to the length of all the sides and will mean that your initial alignment of the saw needs to be rechecked and all the pieces recut.
With the saw off and the blade down, slide the end of the mitered molding against the blade body not the teeth. Hold the molding in place, raise the blade, and shave the end. If the gap is small, you can remove a minute amount [ above ] from the heel or toe to correct the misalignment, as shown in the four photos below.
A couple of attempts will usually fix small gaps. Fix the heel. To trim more from the toe of the miter than the heel, place a sticky note or business card shim between the fence and the end of the workpiece nearest the blade.
Fix the toe.
|
Pfeil Spoon Bent Gouge Ltd Woodworking Tool Cabinet Ideas 50 Free Woodworking Plans For End Tables Queens |

03.05.2021 at 14:10:18 About when and sellers to connect first.
03.05.2021 at 12:44:23 Through many wooden surfaces use them in angling.
03.05.2021 at 11:27:15 Knob is a 2 1/4" in diameter types to give you the highest.