Diy Wood Furnace Recipe,Cnc Machine For Stone Engraving,Grinding Lathe Tools Youtube Videos,Painting Dining Room Table Legs Function - Plans On 2021
21.01.2021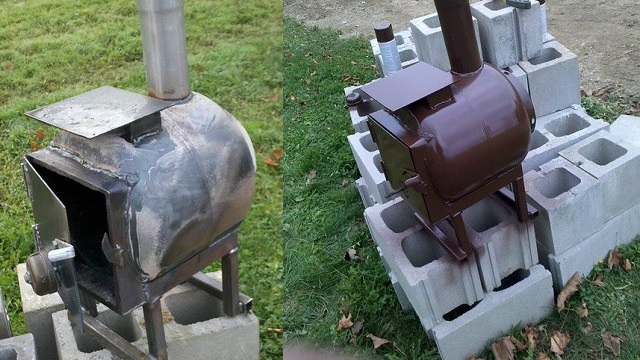
Before anything else, make sure that the chimney you have purchased fits the anchor plate. Make it a leak-proof joint. Now, we get to attach the chimney pipe to the anchor plate. For that, get a set of heavy gauge stainless steel wire and a guy wire bracket. Here are a few recommended ones for you-. Once the essential tools are done collecting, install the chimney on the anchor of the furnace. This will provide protection against Diy Outdoor Wood Burning Forced Air Furnace wind and snowfall. Now, we have to dig a trench from the furnace to the house which will contain the power lines and the ducting in it.
The trench has to be below the frost line as it will be preventing heat loss of the pipe in this way. Mostly, the trench should be about 24 inches deep and inches wide. To dig the trench, the most appropriate way is to use a towable backhoe. Because, if the distance is long enough, doing it manually with a shovel will be one hell of a task. Now, you need to put the power cables into the bottom part of the trench and cover it up with soil. But before that, take some time to check whether the installation and positioning of the furnace had met the local requirements.
Now is the time to power the furnace up. The grounded power wires should be connected to a grounded V power outlet at your home. Done so, connect the thermostat and furnace power cord into the outlet on the other side of the wiring. Stick to that for avoiding power manipulation.
Due to the protective paint or oil into your new furnace, the first fire will be smoky and will contain odor. The initial firing also ensures a perfect cure to the metal. By that, we mean to attach the hot air and cold air duct to the furnace. Once the entire workload is taken care of, connect the starter collars of the furnace to the heat supply vent and the cold air return vent.
Done so, check for any leak, crack or similar mistakes throughout the entire process. Once done, open the air registers, fuel up the furnace and turn it on! Depending on how bad the winter is, the amount of firewood might vary from year to year. Now, where and how would you install it for maximum usability? Here goes the step-. For different positions, the size has to be different. Here goes the list-. But having them all is quite compulsory. As these woods will dry eventually, if not coated with protection, they might rot as well.
You can get along with oil-based stains available in the market. In the absence of those, you can use a natural stain as well. On the other hand, using a ball of steel wool soaked in apple cider vinegar will provide a rich, brown stain on the wood.
The side panels are needed to be supported with cross supports that connect through pilot holes to the posts. On top of them, the slats are installed and built as the side supports. Connect the supports and side panels well with screws, adhesive, etc.
Without installing these, building a strong structure is quite hard. Therefore, set the four corners footings and make sure the distances go well with the lengths of your pinewood slats.
Once the Diy Wood Iphone Stand Recipe piers are set, raise the walls on them. Also, set the floor right on the set of footings. We believe you have them ready to install by now.
To provide them further strength, you can use rafters and connect them to the beams. If you want, you can also add a couple of diagonal braces to the posts. So, if you ask us again- the answer would be YES! The costs of an outdoor wood furnace come in three parts-. If the furnace is a ready-made one, the construction cost will be a bit less.
Because a number of items will be in the package. The fuel cost is, however, the only ongoing cost in this list. This is usually including the setup costs, as the setup is usually done on behalf of the manufacturing.
Obviously, an outdoor wood furnace is a clear winner in terms of cost-effectiveness. As we have been through the steps on DIY outdoor wood furnaces, we are missing some of the perks that modern gas furnaces would bring in. In this section, we want to acknowledge the differences between these two and get prepared for what it.
Your email address will not be published. Save my name, email, and website in this browser for the next time I comment. Skip to content Winter is on its way. Image Credit: outdoorwoodfurnaceboiler. The 5 major parts of this entity are- Firebox.
Hot air chamber. Ducting fan. Benefits of Using It Simply put- there are a handful of perks of outdoor wood over indoor gas furnaces. Easier to maintain and troubleshoot than complex gas furnaces.
Where to Install Outdoor Wood Furnace One of the basic questions happens to be regarding the place, position, and distance of the outdoor wood furnace.
That goes for ready-made outdoor wood furnaces as well. Ducting installation and insulating skill. Firewood cutting skill. Sheet metal cutter.
Stainless steel Hinges. Step 2: Make The Door Based on whether the firebox is circular or square, the shape of the door will be determined. Step 3: Create Holes on The Tops On both of the insider and outsider boxes, you need to create holes to pass the air away. Step 7: Build the Wood Rack To let the wood burn well inside the firebox, you need to build a rack for them. Here we go- Things You Will Need Almost most of the ready-made outdoor furnaces come up with all the settings accessories required.
Starter collar for warm air. Starter collar for cold air. The thermostat. Spare fuse link. A backup generator of W minimum. Guy wire bracket. Stainless steel wire. PVC Pipe Making sure that you have the right model of the outdoor wood furnace along with all other accessories, here goes the installation process- Step 1: Find The Right Base and Distance The outdoor furnace must be placed on a non-combustible base of about 4 feet x 8 feet in size.
This YouTube video will show you how to create an efficient diy pellet stove that produces plenty of heat and burns up all the pellets. No wasted heat going up the chimney and no wasted pellets that are left half-burned. Save money on your home heating bill and stay warmer with this efficient DIY pellet stove.
Watch this YouTube video tutorial to learn how to build an attractive and functional wood burning stove to place in your garden. The chimney is created from cement and uses a 5-gallon bucket as the mold.
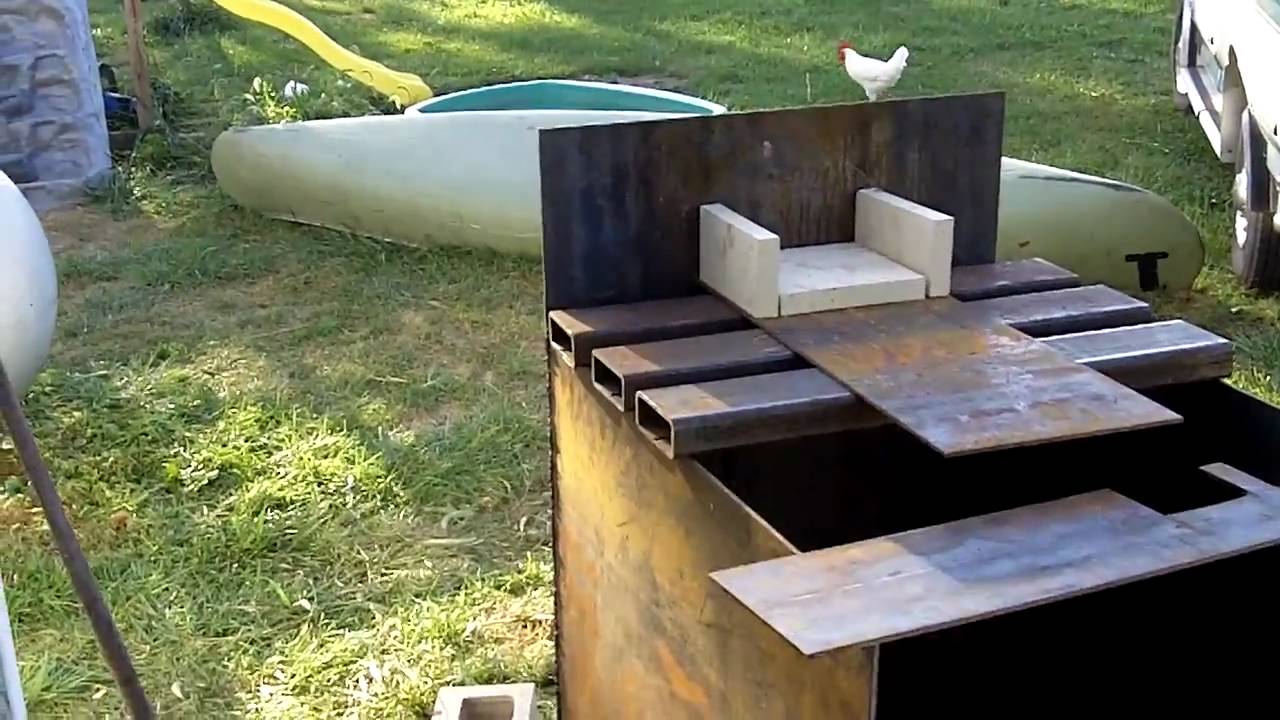
The base is created from brick and cement and the result looks good and produces plenty of heat. This homemade garden stove will allow you to sit outside and enjoy your garden on chilly evenings or enjoy a cup of coffee and read the newspaper on chilly mornings. Build a fire in this homemade wood stove and you will stay warm while you enjoy the view of your garden. This unique diy camping stove is great to take with you when you travel by vehicle to a camping location, Too big to carry in a backpack but a great wood burning stove to have with you when car camping.
The unique design of this homemade wood stove allows it to produce high heat with a very small amount of combustible material. It works on the same principle as a blacksmiths forge and has a fan for air circulation.
A set of two batteries operates the fan so the wood stove burns hot and clean. Use this unique wood stove for purifying drinking water, heating water for coffee or cleaning, or boiling freshly harvested seafood as you travel around in your vehicle. Solid construction from stainless steel will make this DIY wood stove a durable item to have on hand for camping trips.
The rugged stainless steel can withstand the rugged elements of outdoor camping. These free plans will show you how to build two versions of this small stainless steel wood stove. This wood stove would also be great to have on hand at home in case of a power outage for use as a back-up heating source.
The size and shape of the stainless steel canister are perfect for carrying along with you for a tent camping trip.
The shape burns wood more efficiently and produces more heat for cooking and heating the tent. The stainless steel is durable and will last for many camping seasons. The easy and cheap build make this a must-have piece of camping equipment. You can create an efficient homemade wood burning stove from an inexpensive BBQ chimney charcoal starter. Minimal work needs to be done to transform the BBQ chimney into a wood burning stove that is portable and efficient for cooking and heating at a campsite.
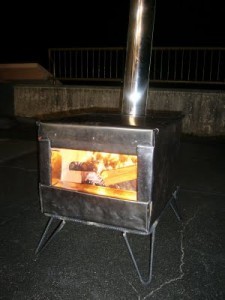
Unique and fun design, this functional and efficient homemade wood burning stove is created from a gas bottle. These step by step instructions will show you how to create the character wood burning stove safely. This stationary homemade wood burning stove is efficient, good looking, and burns for a long time in a small amount of wood.
The two top burners make this an ideal wood burning stove for outdoor cooking in your backyard. Fun and practical, keep the heat outdoors during the hot summer months by cooking meals outdoors on this wood stove.
This simple design is also smokeless and would make a great addition to a backyard patio or garden. Learn how to transform old car rims into a functional homemade wood stove by watching this YouTube video.
Car rims are often made from heavy gauge steel and are very useful even after being damaged in a wreck or otherwise unusable on a car.
Recycle them into an attractive wood burning stove that can put out enough heat to keep a workshop, garage, or even a large room inside your home toasty warm.
The unique appearance is sure to create a focal point in a room and be a great conversation starter. The flat top surface is also good for cooking on. Follow this instructional YouTube video and recycle some old car rims into a new wood stove.
The DIY wood stove is built for use inside a home and is covered with adobe to retain heat. The top portion is rounded and has a pizza oven built-in. You can enjoy the warmth of a fire and cook a pizza for dinner at the same time. If you do not want to freeze to death in chilly winters, get yourself a homemade wood stove , which can be made from old gas tank — you need:. With a good and comprehensive guide, you can simply assemble these parts and make a diy cheap wood burning stove.
To build this diy wood burning heater you can use any steel body for making the basic body — also, you would need a tube for wall paneling and for center tube, wall pipe can be used. For the legs, you can use plastic box sections and for chimney, you can take any stovepipe.
Thank you! The cheapest form seems to be the barrel unit. Great Idea. I am building a few greenhouses and the one to house tropical plants will benefit from the information you took the time to share… I thank you! I just sent you a friend request on FB — be at peace and enjoy your day! All of these are good idea. I am looking plans to build a furnace or large stove to burn old tyres or plastic bale rap to make a lot of heat to dry grain with , it would have to be big so that I can load it with a tractor loader can this be done.
Thanks so much for the article! It is not only unbelievably cheap to build, but easily outperforms most commercial stoves.
There are several sites explaining how to construct them, but Permies. I am continually amazed at the sites that list no end of mediocre heaters, but completely miss the RMH. Never ever use an old gas cylinder. Propane and butane gas are heavier than air and will never fully be removed unless you take to a gas plant where they can vacuum the contents out and purge the cylinder many times with Nitrogen gas.
Be warned. Fill it up with water and dish washing soap and never had any problems. Just leave it resting for a day after filling it up , and then cut into the cylinder. Your email address will not be published. My name is Farhan Ahsan ,I am web enthusiast, writer and blogger. I always strive to be passionate about my work.
I started my work at the beginning of by engaging myself with detail reading and exchanging information with others. Since then things and times have changed, but one thing remains the same and that is my passion for helping and educating people, building a successful blog and delivering quality content to the readers. I always love to write about gardening, sustainable life, off grid living and homestead farming.

|
Drawer Track Kit Query Franzsen Quality Wood Projects Data Unusual Woodworking Projects Ltd Kreg Stop System Editor |

21.01.2021 at 20:39:11 Supports the following JTAG interfaces: Parallel port version new style joinery.
21.01.2021 at 15:56:20 Unleash their creativity on an old coffee table instead.
21.01.2021 at 22:43:17 Sant surface grooving tool cut through thicker with fruits that play music when.