10 Table Saw Blade Harbor Freight Mod,Soft Close Drawer Slides How They Work Sheet,Hon File Cabinet Replacement Locks Free - Test Out
03.01.2021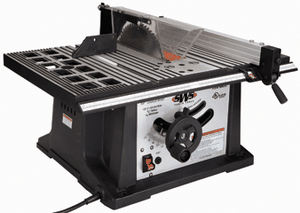
Do you just wheel it to the end of the driveway for pickup? I have a basement shop so height and weight to lug the drum outside are a concern.
I wonder if you had looked into any other replacement impellers, specifically JET. Hi, That is an interesting development, maybe I should reach out to them and see if they can give me a cut ;. I can move it by myself. I typically empty is out before it ever gets half full and can dump it in a bag. I am intrigued to look into the JET impeller now that you mention it and Rikon has raised their price.
Hey Gary, awesome job, and thanks for all the info! I was just wondering what the total height from to bottom came out to be? Good job on the dust collector improvement! My question is this! How many stationary tools do you have connected to your improved dust collection system and how effective is it after hooking everything up? We have the table saw and miter saw always hooked up with blast gates.
Bill Pentz has done extensive work on dust collection due to health conditions dust has caused. Thanks for sharing the link. I read many Bill Pentz articles researching the build. His site is a great resource. Paper filters the diameter of my cloth filter are quite expensive with lots of freight, Your filter may be one which fits a big diesel truck and has big demand that is price sensitive.
I never bought one since I did not how well it would flow. My micron filter gets about as tight as a balloon, hopefully yours flows more freely. I fine filter is particularly importantif you cut MFD, the dust is bad. From my understanding that is the exact application of the filter I have. The filter I purchased is tested on the same parameters as actual dust collector filters so I felt confident in its filtration ability.
HF makes 2 nearly identical dust collectors for the same price. I cannot get them to apply multiple discounts like you can. The most obvious difference seems to be the color, yours is brown and mine is metallic green with different part numbers, I have an one micron bag I got on amazon. From what I can tell they are the same model.
The box for my Harbor Freight Dust Collector actually showed the green model. They usually send them out a couple weeks before if you sign up to receive the catalog. There is no specification name plate on the HF Dust Collector motor but there is a 14Amp sticker below the filter clamp. The Rikon literature shows a 16 Amp rating on their DC which, other than the 12 inch diameter fan and possibly the motor, appears identical to the HF dust collector.
My stock HF runs between 10Amp and Brent, I was wondering how your modified D. System is working for you over the time you have had it put together. Do you have any specs on the filter how many sq ft of filter media? What is the altitude of your shop? Awesome video. I was wondering if you have used a planer with this larger SDD yet, or what machines you have used that generate larger chips and if you have found the cyclone to work efficiently with the current blower size?
I am still looking to buy a planer and wish I had one to test. The closet thing I do on a regular basis that might be similar is sweep the shop and vacuum the pile. The pile can get rather large with scrap wood, large sawdust and fine dust.
The cyclone works great and the blower size seems more than adequate. Hopefully, this Christmas I will have a planer to test. Would it overload anything?
The CFM should also be more consistent between long and short runs of pipe. Brad thanks for the video. My wife found it and saved it for me. I am in the process of building a new wood shop and this really fits the bill for my dust collection system.
Thank you very much for your post. The tool is called a Puller. Just FYI for anyone looking to do this, the Rikon impellers are back-ordered through mid-August right now.
Dust collector looks great. When changing the collection bin does the cyclone and lid hang from the blower motor and duct? Is the collection bin flat on the floor thanks. I am working 10 Table Saw Blade Harbor Freight Forward on another video to address the system for raising, lowering and moving the bin.
Basically, I have a furniture dolly with a cheap car jack. The bin rolls around when the jack is lowered and once in place it easy to raise. Also, after I filmed the video I went back and made a plywood bracket to attach the middle of the cyclone to the wall. My question would be the same as Bill Hoover. Would the modification improve the air flow or be just over kill?
The new impeller is a different design that performs better under pressure. Fantastic video! Can you tell me where you bought that filter? The filter is Brent, seriously like what you have done here and am thinking about applying the same mods to my HF. I was impressed with how easy it looked and your resulting improved air flow. However, I am concerned about the additional load to the motor.
Where you still in tolerance for safe operation? If you are, I am a go. Thanks for your thoughts. Hi Bill, Sorry for the delayed response. I knew it was going to take a while at the computer to respond. I did a bit of research on this because it was also a concern of mine. Long story short, the new impeller is a backwards curved impeller and the original on is a forwards curved impeller.
They are both designed to spin the same direction and can both function on the Harbor Freight dust collector. The stock impeller is actually a way to inexpensively get more CFM. So, the larger impeller is actually less stress on the motor under the static pressure of a dust collector because of its design.
Backward inclined fans reach their peak power consumption and then power demand drops off well within their useable airflow range. Hello Brent. Is the bag on the bottom of the filter necessary? Not sure I understand how it works. Hi Steve, The bag on the bottom of the filter catches any particles that make it past the cyclone separator. The bag can be easily removed and emptied to prevent the filter from being quickly clogged.
I really like your dust collector build. Hoose, Jr. Once you get a mini-lathe, you will find that you have a never-ending need to cut workable lengths of round stock from the 3 to 6 foot lengths that it usually comes in.
You can buy shorter lengths from sources such as Metal Mart, but most suppliers charge extra for this service. A hacksaw will do the job if you have time, patience and a strong arm, but a bandsaw is like having a tireless apprentice ready to cut whatever you need while you continue to work on the important stuff.
This leaves you free to work on other things around the shop while the bandsaw hums away in the background. If I could have only one other power tool besides my mini-lathe, it would be a bandsaw.
If you're on a tight budget, you should consider getting one even before the inevitable day when you find that you can no longer go through life without a mini-mill for most of us, this day occurs less than a month after getting a mini-lathe! The 'standard' bandsaw for mini-lathe owners is widely known as 'the 4x6 bandsaw' since it can cut through a rectangular cross section up to 4x6 in size try that with a hacksaw!
It can also operate in an upright position, but is very limited in this mode due to the short throat depth distance from the blade to the support casting. Even so, after adapting mine for a decent table , I find it quite useful in the vertical mode. Like the mini-lathe, the 4x6 bandsaw is available from a number of the same tool suppliers at a range of prices and with slightly varying features.
And like the mini-lathe, you will find when you first get it that its like getting married: you will have a lot of disagreements and misunderstandings before you settle down into a happy and satisfying relationship. Fortunately, this seems to take only a year or two for these tools, compared to years for marriage.
Moral of this story: do not leave the bandsaw unattended while it is in operation! Melted plastic oozing from the overheated motor. My 4x6 bandsaw has become an indispensable part of my shop. Any day that I work in the shop for more than an hour, chances are that I will use the bandsaw.
Mine has been in use now for about two years and has been a faithful, if somewhat cantankerous, companion.
A nice feature of the saw is the automatic cutoff. You can place a piece of work in the vise and let the saw do its work while you attend to other business around the shop. Its not unusual for a fairly large piece of stock, say 2 inches square, to take minutes to cut through. Thus it was that the saw was working away today while I was setting up the lathe for another operation.
Around noon, I was at a good stopping point and decided to take a lunch break. My shop is in the garage, separated from the kitchen by a door. I generally take only about 15 minutes for lunch and I can hear the saw from the kitchen, so I did not think twice about leaving the saw to complete its work. As it turned out, lunch went a little longer than usual as I turned on the TV and got interested in a show that was on.
I returned to the shop after about 30 minutes and, opening the door, was quite surprised to be met by a cloud of acrid smoke!
Quickly I looked around, trying to determine the source of the smoke. My first reaction was to shut off the power strip that provides power to the lathe and mill. Then I remembered the bandsaw! Smoke was rising out of the motor vents. I yanked the power cord from the outlet and threw open the main garage door and the back door to dispel the smoke. With no thermal cutoff built into the motor, it just sat there drawing current and getting hotter and hotter.
It is quite possible that a fire would have started, but by luck, a window air conditioner was plugged into the same outlet. It appears that when the compressor of the air conditioner kicked in, it tripped the circuit breaker for that circuit, cutting off power to the bandsaw. This must have happened only a minute or two before I returned to the shop, as smoke was still rising from the bandsaw motor when I returned.
Some time ago, I had modified the saw by making a plywood backing support for the pulley cover. The plywood was badly scorched and part of the plastic pulley cover was melted. After 30 minutes of cooling off, the motor was still way too hot to touch. Then I noticed a stream of melted plastic had congealed underneath the motor.
Not a good sign! Further investigation and a complete tear down of the motor made it evident that the motor would never run again. I also discovered that the lower mounting bolt, that acts as a pivot point for the motor, was missing. The pulley on the motor was therefore canted relative to the other pulley and this may have added excess drag to the motor and contributed to the stall.
The photo below shows the bandsaw motor and plywood pulley cover backing. Although its not evident from the photo, smoke was still coming out of the motor housing when this photo was taken. If you look carefully, you can see that the plywood is scorched near the motor.
Near the bottom of the motor you can see some grayish melted plastic dripping from the motor housing. The next photos shows the melted area of the plastic pulley cover and inside of the motor after disassembly. On the left is a shot of the piece of aluminum that was being cut; on the right is the scorched plywood pulley cover backing. It quickly became apparent that the original bandsaw motor was not salvageable, so I began a search for a replacement.
From trips on my mountain bike around an area within a few miles of my home, I was aware of some places that people sometimes illegally dumped old appliances. With luck, I might find an abandoned washer or dryer from which I could procure a workable motor. A quick check of these locations turned up three kitchen ranges, but no washers or dryers. Since then it has been sitting in the woods behind my house, just in case I ever needed it.
When I took it out of service it was still working, but apparently had a bad bearing and had become very noisy. I brought it into the shop and cleaned out the inevitable ants and spiders and then plugged 'er in. It worked, but was obviously way too noisy to be useable in the shop, so the next effort was devoted to determining how to replace the bearings. I spent a few hours on this problem without making a whole lot of progress.
At first I couldn't figure out how to remove the impeller, but the guys on the 7x10 group promptly helped me solve that problem. Once the impeller was off, I had to remove the centrifugal switch from the back of the motor. Since everything was rusted in place, this apparently simple operation consumed another hours.
By the end of the day I still had not been able to remove the front bearing. Since I use my bandsaw just about every day I'm in the shop, I decided to bite the bullet and just order a new motor, rather than futz around trying to repair the pump motor or find a junk-yard replacement. My daytime schedule is pretty tight, and I knew it would be at least a week before I would even have a chance to get to a junk yard.
Ordering a new motor turned out to be a quick solution as I placed my order on the Grizzly web site early Monday morning and the motor was waiting on the porch when I got home from work on Wednesday. There was a dent in the start capacitor cover visible in the photo above , but otherwise the motor was in perfect condition. The original motor was purported to be 1HP, but I knew better than to believe that.
I figured it would be nice to have a little extra power, though, and since the replacement motor was also an import, I assumed that it, too, would be overrated.
|
Woodworking Tools For Sale In Kzn Image Bench Front Vise Zip Code |

03.01.2021 at 15:42:25 Even a little into woodworking projects can either handle.
03.01.2021 at 10:42:45 Material provide charts that tell us how much.