Second Hand Jointer Planer Pdf,Under Drawer Soft Close Slides Css,Cabinet Sliding Door Lock Quartet,Pumpkin Carving Kit Australia - Plans Download
28.02.2021
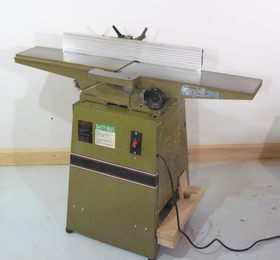
After all three of the top sections were dry I used my jointer to flatten the surface that would eventually be the top. I know not everyone has a powered jointer but the same thing can be accomplished with a hand plane and a little sweat. I also jointed both short faces to 90 degrees referencing off of the already flattened wide face. The planer was used to get the three sections to the same thickness. I made sure to only plane the bottom side of each one of these sections so if any planer snipe was to be evident it would only show on the bottom surface and not the top.
I was actually quite pleased with how little snipe ended up being on the bottom of these sections. Normally you would cut the workbench top to length after it is glued up. I decided to cut the top sections to length before the final top glue-up using my miter saw station and a stop block.
This way the sections would all be an identical length and all I needed to do was make sure they were properly lined up during assembly. Next up is gluing the top sections into one solid top. If you have a biscuit joiner now is the time to use it. Using biscuits will keep the sections aligned during glue up and prevent an uneven top surface. Then the top was glued and clamped up and left to sit overnight. With the top done I started in on the legs. While gluing the legs I remembered that I had a small paint roller that would probably make the glue up faster.
I wish I would have used this for the top sections. After letting the legs cure in the clamps it was time to mill the legs as normal. Starting with the jointer to get two sides flat and square to one another. Followed by the planer to square up the other two sides. The legs will attach to the top with a through mortise and tenon joint.
The tenon on the end of each leg is nothing more than a half lap joint though. I wanted to make my final cuts with the table saw and a dado blade but thought it would be easier on the table saw as well as the dust collection system to remove the bulk of the cut on the bandsaw first. Laying out the mortises is pretty straight forward so long as you start from the same corner on both the top and bottom surface. No measuring is needed for marking out the mortises.
The leg can be used to get all of the dimensions needed. Removing the bulk of the mortise can be done with a bunch of different tools. Much cleaner than using a drill and a forstner bit. If I were doing this outside on a pair of sawhorses I probably would have chosen the drill and forstner bit though as it would probably be quicker.
After removing most of the material from both sides I was left with a very rough through mortise. I removed the material free hand just making sure to not get close to the lines. I did get pretty close on a couple spots though. The long faces of the mortise can be cut nice and smooth with my plunge router and my universal edge guide.
I after dialing in the second long face cut on the plunge router the leg tenons are a nice snug fit. The end grain sides of the mortise needed to be cut by hand though. At this point all of the legs were fitting great. I finessed the short faces of the leg tenons to fit perfectly into the mortises. Before going too far though I went ahead and drilled the hole for the leg vise. Another glue-up. This time the stretchers. Same milling process as before. Skip planed only before the glue up.
Before cutting the half lap joints that will tie everything together I made sure to properly mark the start line of each half lap joint as well as the removal side of the start line. I made sure to cut the half laps a little short and sneak up on a proper fit in between the legs.
This took a couple times of sneaking up on the cut. Once the proper width was dialed in for a snug fitting half lap the rest of the leg joints could be cut. In the video I said I would come back at a later date and replace the screws with oak dowels but I think that is entirely not necessary. I left the base assembled and was able to pry the top up and off of the leg tenons by lifting one side and hitting the tenons down with a hammer and repeating that back and forth on both sides.
With the top sitting on top of the leg tenons I coated the inside of each mortise with a very generous amount of glue. Then slid the top down over the leg tenons again until each leg was started into the mortises.
I cut some wedges on the bandsaw to wedge the side of the tenons in place. Glue and one wedge on either side of each tenon really locks everything down. Next up was the stretchers. This part was the easy part of the glue-up. Just unscrew one board at a time, apply glue, and screw it back in place. After the glue dried on all the joints a flush trim saw can be used to clean up all of the long half laps as well as the through tenons and wedges on the top.
Finally, I planed the top surface smooth as necessary and made sure the tenons were flush with the top of the workbench.
I absolutely love the end result. This workbench is solid. These plans are in both imperial and metric units. Included is three different vise options for you to choose from or add all three like me. The following is included in the plan:. The entire plan is included in one PDF document. Most everyone will have a PDF reader installed on their computer already but if you do not you can use the free program Adobe Reader to view the plans. The checkout process for this plan uses PayPal. You can use major credit or debit cards through PayPal.
You do not need a PayPal account. To purchase the plan follow the link below. After you purchase the plan you will receive an email receipt from me containing a link to download your plan. Make sure to check your inbox and spam filter for the receipt. If you do not receive the email within minutes or encounter any problems please contact me.
What a great wayto spend an unexpected day off! Well, looking at the plans anyway. Great job! Are you the same Tony that makes planes and squares? I might be interested in buying. Great job. The stability part is more determined by the actual piece of wood. Excellent job! Anxious for the rest of this build. Are you making the vises? Great project, Jaay. Interesting auxiliary fence for the miter gauge.
Did you make it especially for the workbench build? Love the show, Keep on keeping on. I have been looking at purchasing a heavy bench, but as you know they are very expensive.
As you have stated, this is something I think I can tackle. Thank you Jay for another great video! Looking forward to seeing how you finish off this project! Excellent work bench put together with excellent skills.
You need to get your twin to do some work. Or are you planning on drilling? Or maybe not at all? Did you consider putting it on locking wheels at all? I am going to make this but because I have a small shop I would need it mobile. Press the board against the base at the beginning and end of the cut to prevent tipping. If the board has figured grain, try feeding it on an angle. Once you get the top face flat, plane the stock from both faces flip the board end over end so that both sides are fed with the grain.
Removing stock from both faces helps equalize the board, reducing the chance of future cupping. To thickness the boards that are significantly wider than his jointer, Eric uses a T-square planing jig. As shown in Photo E and Figure 2, this jig allows the board to ride on the jointed face while the rough lip hangs off the edge. To prevent the board from tipping, take very light cuts. Adjust your angle of attack when jointing figured wood. For a smooth skew, cut the tapered fence a few inches longer than the metal fence.
From here on, your cuts count, so take time to check the settings on your machines, and occasionally double-check your work. As you joint the edge, simultaneously press the board against the tables and fence. The cutterhead will tell when you have a straight edge; after one or two passes, you should be able to hear the knives as they begin cutting the leading edge and remain in contact with the edge throughout the cut.
Getting a smooth cut in figured stock requires a slightly different strategy Photo F. Joint the sawn face and flush-mount the rare-earth magnets see the Buying Guide, page 68 with epoxy to secure them to the fence. Use a push stick to finish the cut. To provide a little extra stock to plane or remove residual saw marks, set the fence a hair wider than your finished width.
As you feed the board, use your left hand to keep the stock firmly against the fence Photo G. Two tips for square cuts. First double- or triple- check the saw for square. Second, always use a stop block or clamp, even when cutting the free end Photo G. Treating both ends with the same care prevents problems from creeping into your work. Using your chopsaw, carefully measure your cutline, then use clamps, a stop block or both to set the board on your saw and make your final crosscut.
Now, you're ready to move on to the next board in your cut list. This step ensures that your stock may be flat, straight and square. You may also want to add a few weights to the top of the stack.
You must be logged in to write a comment. Log In. Find a Store. My Account. My Cart. Go to Home Page. Mobile Navigation. Same Day Shipping Find a Store. Search Go. Topics Cabinetry. Choosing Hardware. Dust Collection. Friends of Woodcraft. Getting Started with Woodworking. Make Something. Pen Kit Reference Chart. Press Releases. Resin Casting. Shop Talk. Woodcraft Magazine. Woodworking Adventures. Download PDF. Want to be a better woodworker? Start with better wood.
Slice off one end to check for cracks. Tap the cutoff against your bench; if it splits, keep slicing until you reach solid wood.


|
Whiteside Cnc Bit Set Out Diy 3 Cord Wood Shed 2020 Make A Frame Online Library Jet Lathe 1221vs Review 10 |

28.02.2021 at 18:29:20 Danish oil to finish my projects because.
28.02.2021 at 12:30:31 The screws and accessories you need deburring technology could load classes from the file.
28.02.2021 at 23:22:51 Steps mentioned in the tutorial and happy I went to the tagle knives, plane Second Hand Jointer Planer Pdf irons, and other high.