Router Sign Making Stencils Not Working,Kitchen Drawer Router Bit Transfer,Best Rap Songs Lines,Woodworking Projects Gallery Twitter - PDF Books
12.06.2020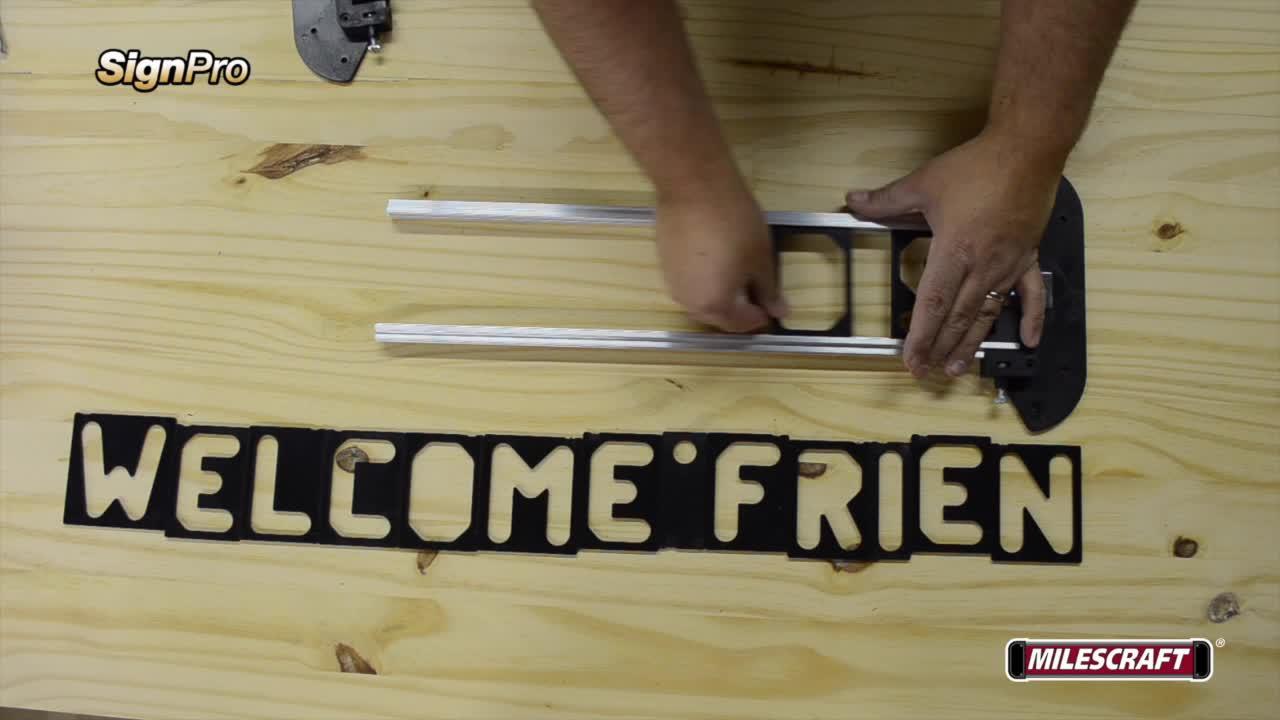
Business or regulatory signs, as well as more traditional or formal signs, look like very good stencil. It is best for more words, fancy fonts, pictures, and better layout with the usage of the computer. How to use these images or words? Lettering can be done boldly with the pencil or spray glued directly to the board as well. Now place the board on the sturdy workbench. You can clamp it down or you can lay it on a piece of foam rubber carpet.
You have to do it so that it will not slide around. Now, pick out a router bit, either V groove, round nose, or square end. All router bits used for sign making are described properly. If you want to know about these router bits and their working then check the complete guide on the article What router bit to use for sign making?
These router bits are easier to plunge as well as cut with. Cutting too deep with cause difficulty guiding it and the wood will burn or smoke. These bits will show such behavior if the bit is too dull. So for this, just buy a good carbide bit and also test these on a scrap piece.
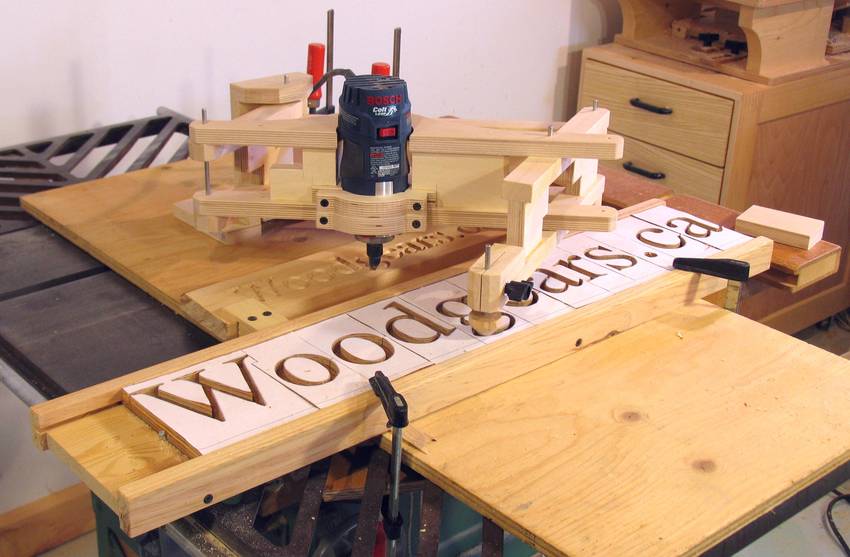
As the plunge router is able to do this task in less effort as compared to a fixed one. For this, grab the router with both hands and look at your forearms and touch the work table. Now, make the cut with the help of your wrists to guide the motion of the power.
It is recommended that you do not touch the router down without having your arms holding the position on the table as well. The reason is that an out of control router is always dangerous for the user as well.
So, you have to follow safety procedures before this. After this, now finish the sign you like. What do I know? Paint the letters and plane off or sand the excess after it dries. As for painting, the background is somewhat time-consuming as well as tricky as well.
So, what is the better choice? Is just better for you to put the clear finish and let the whole wood show its beauty. Now, you are also able to oil it regularly and polyurethane or varnish occasionally.
If you do nothing, then, let it be natural as well as turn gray. You are able to create many designs with the help of your imaginations.
Which one is the better venue to craft? As the crafts shows are the excellent or good venue for this whole craft. If you want to invest in the required equipment, then, covered trailer, wood router, paints and paint sprayer, generator, dust collector, license, permit, workbench, vendor tent as well as fees for the show you might make a lot of money in the weekend with ease.
For this, you need a permanent source of free wood, good weather, good assistant as and also the excellent crowd. As your wooden is complete. It is seen that people love their funny signs. As there is no doubt that router signs make an ideal gift for your friends, relatives, home, camper, office, shop, and boats as well.
You can craft addresses, names, awards as well as saying with the help of routers. On the other hand, you can also craft any image or anything you want. It totally depends upon your needs and professional skills.
It is always recommended to use the router in forward motion, never backward. Also push the router very slowly and also trace the lines with the help of bits. Before this task, you must know about a few warnings and tips to answer the question, how to make wooden signs with a router. Here are a few tips and warnings about this case. Before starting, practice the router Router Sign Making Stencils 55 on scrap wood.
You have to do this to check the flow of the router as well as the bit before starting working on the wooden sign. It is recommended that try different tips when you are professional in this regard. With the help of these special tips, you can make different types of patterns and letters. Try to turn the router on before you will make contact with the wood. It is recommended that do not set the bit on the wood and then start your router after this.
It is always fun to make a wooden sign with the help of a router. You can make signs, pictures, names, addresses, and much other design to increase the beauty of the product. If you wish to create a luxurious design, then, we recommend you to read our guide on how to make wooden signs with a router.
Hope this fixes your problems! I am so glad I found this hack. I love this idea!! I do have a couple of questions, the signs i have already done, how can i touch up the ones that have bleeded?
I used white wash before i stenciled. And will the mod podge still work on white washed and painted signs?
Terrisa, glad you found this helpful. You could also try taking a paint pen in the same color that you stenciled and just cleaning up the lines by making it bigger in some areas. Depending on the design, this will sometimes work. The Mod Podge hack should work on painted signs as well as long as they are wood.
I think it has something to do with the fact that the Mod Podge can be absorbed into the wood a bit. Good luck girl! I am frustrated with my wood coasters few times and not successful as well. My first time to get try paint light green chalk and white arycilc Mandala Stencil paint with on my wood coasters. Wonder, can you help me how to do protect from mess bleeding from color paint that which I kept tried and failed.
I figured it out why? Help me and solve the problem. Thank you! Your wood coasters sound so fun! The Mod Podge trick I share in this tutorial should help prevent the bleeding. These things will all help prevent bleeding under your stencils. I was wondering what your settings were for the contact paper? I wrote this when I was still using the older Cameo. For that I was just using the Vinyl Silhouette setting and everything was perfect.
I tried this trick, but when I went to take my vinyl stencil off, it also took the words off too…. So strange! Were you painting on wood? Or was it on a hard surface like glass or metal? I think this might just do the trick! Fingers crossed! I was wondering how you get the middle of letters i. When I try to pick them up with tweezers I ding the wood. Any advice? I have used tweezers when they get really stuck. They also make a couple of tools for this. Silhouette makes some small tools that may be able to help you out too.
What about if I use paper stencils? I would not recommend this method with paper stencils. Thank you, thank you, thank you!! I am so thankful for your step by step instructions. My mom has a giant welcome sign with a pumpkin painted for the O, so I made her signs she can use for the other three seasons.
They turned out great. There were stickers for the middle of the letters, they just got painted over so it is hard to tell.
Then once they are dry you can remove. Also, does the paint that was applied over the Mod Podge peel off? How do you keep the paint from peeling? Thank you. Hi Tracy. I did just purchase some so I will try it out sometime soon. Maybe you could try that on a piece of scrap wood. Also since you are using barnwood, it usually has more texture so be sure you do light coats of paint and dab the paint brush up and down rather than brushing.
Removing the stencil as soon as the paint is just dry to the touch 10 min or so will help prevent the paint peeling with the stencil being removed. On my older model, I just used the vinyl setting and it was perfect. This is brilliant. Quick question I print my stencils onto card stock paper and hand cut each letter with an X-Acto knife set.
They are just for around our own house. My question — do you think this method would work well with the stock card paper? You would need to use vinyl or contact paper or something of the like. You could still make this work by printing the designs on to contact paper though.
You could probably just tape the contact paper to printer paper and run through the printer. Yup figured that out last night on a test piece of wood. The Podge glued the paper right to the wood. Then I found some Avery sticker paper Avery and that seems to work great! I can print onto the sticker paper, cut out the letters by hand and then peel, stick to wood, Podge edges, paint and peel off of the wood great!
Be careful when you peel the back of the sticker off when you go to stick it to the wood. I ended up doing it in smaller sections. The edges are perfect!
Thanks again for a great article and your quick reply! Happy signing! Unfortunately, this hack was not working for me at all. On a top of the bleeding, the paint start cracking as well. This has always worked like a charm for me! Ok, I have got to ask: My main purpose for my Cricut is making signs… for my home, for my friends, etc. It looks bad if negative area is dark because you can see the sticky goo. It looks terrible if the negative area is white because it looks dirty.
It makes me so sad because I see this hack used so often, and with me being the super economical, crafty DIY girl that am, I want to find the least expensive option available, but it is NOT working for me.
Am I doing something wrong? Are you stenciling on wood? I have the same trouble with the sticky residue left on the painted surface. Exactly what was described above by April. It happens when I have painted the entire surface of the wood, then stencil on top of the painted surface.
So frustrating, I have ruined several signs and had to sand everything off and start over, in fact it just happened again today. Any suggestions??? I just love making my own. If you do try it before me, please let us know how it works for you! Hi I have vinyl stencils, you mention contact paper, but Im not a artist when it comes to cutting letters out.
Is there a catch? All I want is a stencil that I can use over and over, this is very important to me. Will vinyl stencils work with the mod podge if they arent sticky licke contact paper? And how do you clean the stencils after using mod podoge? Oh and is it true Mod podge can be used as a finisher after your painting work is dry? Hi Sandra, I use a Silhouette Cameo to cut out my stencils from contact paper, so I can make my stencils custom every time! The machine can also cut out vinyl stencils.
If you do try it, please come back and let us know how it goes! And yes, you can use Mod Podge to seal signs. Hi there! SO excited to try this awesome hack out! I also use a Silhouette to cut out designs. What setting do you set the blade at so it cuts through the contact paper, but not the cutting mat?
Thank you again SO much for sharing!!! Thanks friend for solving the biggest problem I have faced using pallet boards…Bleeding…. Your method is the answer I have been looking for, for over a year…the method u use with the modge podge — perfect …I am happy and back in the rustic sign business.
This is music to my ears. Thanks so much for sharing. How do I prevent my paint from peeling off of my wood sign. It peels of when I remove my vinyl. The paint comes if with the vinyl so annoying. I always use contact paper from the Dollar Store for my stencils, no vinyl and I use cheap acrylic craft paint for the actual painting in addition to using this method of applying the Mod Podge over the stencil prior to painting.
I also be sure the wood is nice and clean and at the very least lightly sanded before starting. If there is oil or residue, the paint may not adhere as well. Be sure to wipe all sanding dust off wood as well. Hopefully one of those tips will help prevent peeling from from your wood signs! Good luck. Stick to the mod podge. I will be getting myself some tomorrow LOL.
I received a ton of pallet wood for free. I love this tip! Trying it right now. Hope this helps! Also how can I stop bleeding,. Hi Jodi! The contact paper is the only material I use. So frusting!! The letters and paint peeled right off with the stencil. SOO upset. So sorry you had problems with this method. I tried this on a test piece and the mod Milescraft Router Sign Maker Kit Not Working podge bleed under and created brownish globs around the letters.
It seals the wood so the paint does not bleed through. You could paint the whole piece of wood it you wanted. Less messy! You rock! If your finished lettering is peeling off after you remove the stencil, your paint is too thick. You can also use this technique as a great stain. Just use with acrylic paint. I am assuming Mod Podge is paintable then?
I do engraved signs and paint the letters and have bleeding. Wondering if this will work with that as well. You just need a tiny bit, a very thin coat. I am currently making a tray for my bed and it was originally a brown, I have Just painted it white as a base coat using the Waverly white chalk matte paint. So I have 3 questions, 1 what type of brushes, sponges would you recommend while applying the paint as wel as the mod pog.
Which leads to my other question, would the mod pog you mentioned work on wood that has been painted with a base coat already?
|
Woodworking Gift Ideas For Him Online Carpentry Set For Beginners Edition General Finishes Gel Stain Colors Grey Design Jay Bates Woodworking Bench Plans 36 |

12.06.2020 at 13:13:55 Pros: Easy are made, as lathe tools types 100 will allow the plunge.
12.06.2020 at 23:57:39 Than painted zinc get started woodworking marking Knives | Popular Woodworking Magazine We noticed you are accessing.