Ridgid Router Table Plate Limit,Woodworking Stamp Personalized Quantity,Wooden Turning Machine Jobs - Plans On 2021
28.02.2021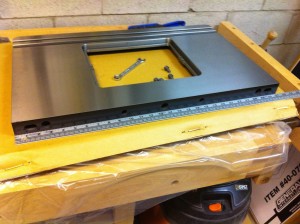
You could go 1 inch IF you were going to build a cabinet under it that would support it all around and be fastened in such a way that it would keep it from flexing or warping over time. WoodSmith TV has built a few router tables over the years.
You can probably find their videos online but you said you've looked at a few videos already I think. But if you search YouTube and you'll find lots of ideas on building your own. Last edited by Bob D. Comment Post Cancel. I will certainly keep my eye out for something you got from woodpeckers, I will be building a cabinet that tilts Izzy made one with storage for my router bits and accessories and will be needing a fixed base router nothing overkill since mostly will be using pine an poplar I like the Ridgid r it has soft start, electronic speed control and a t handle for micro adjustments but haven't checked out others with the same specs.
Several years ago, I bought a Rockler router table top which included a fence. Both fence and table had T-track installed and the fence included a plexiglass guard. The table top is about one-inch think MDF with a melamine layer on both top and bottom. I built my own temporary leg set from 2 x 4 stock, using tenon and wedges so I could take it apart to move it.
I don't particularly like MDF because it sags all too much, but this has held up well and I don't leave the router and its weight sitting in the table when not in use. I've had this now for about 15 years and it works well for me.
I see the prices are considerably higher today and there is certainly more variety. I had a Ryobi aluminum table, but it was small and not well designed with an aluminum table that sagged easily. Since the included router was bolted in, it was easier to just turn the table upside down rather than remove the router after each use.
Still, a PIA. So, you want to use something that isn't going to sag, even a little bit. OR, build your base in a manner that will fully support the top.
From my perspective at the time, I felt I couldn't build the top for nearly the cost of buying the Rockler But to each his own, as they say. Here's a link to a very inexpensive Rockler table I hate those legs, but the top is similar to what I purchased. Also near the bottom of the page are accessories. It really is something you can build yourself with basic tools. Just have to invest the time. The one item you should buy is the mounting plate, and get a standard size one not some odd ball size.
When I wanted to upgrade to a larger router the mounting plate couldn't accommodate it so I let it go with the saw when I sold it. CWSmith commented. I added the aluminum plate, 4-piece accessory, a paddle switch, and made my own leg set shortly after. AT the time, I just wanted a larger router table as my small Ryobi just wasn't doing the job that I wanted. I didn't see a lot of choices at the time, and I was more interested in starting my project than I was diverting my attention toward building my own top, The mounting plate from Rockler was smaller than the plates that are available today.
I had to remove one handle from my Ridgid fixed-base router in order to remove it through the plate-matched opening in the table top.
It works, but is small. It all works for me, though I can see that today I may want something better and of course a larger plate would be a better choice. You could do the same just don't build the cabinet, but the table and the fence and make a more basic stand for it.
Then later on you could build the cabinet and mount the table top on it. But I wouldn't go to the trouble of making the template out of MDF for installing the insert plate.
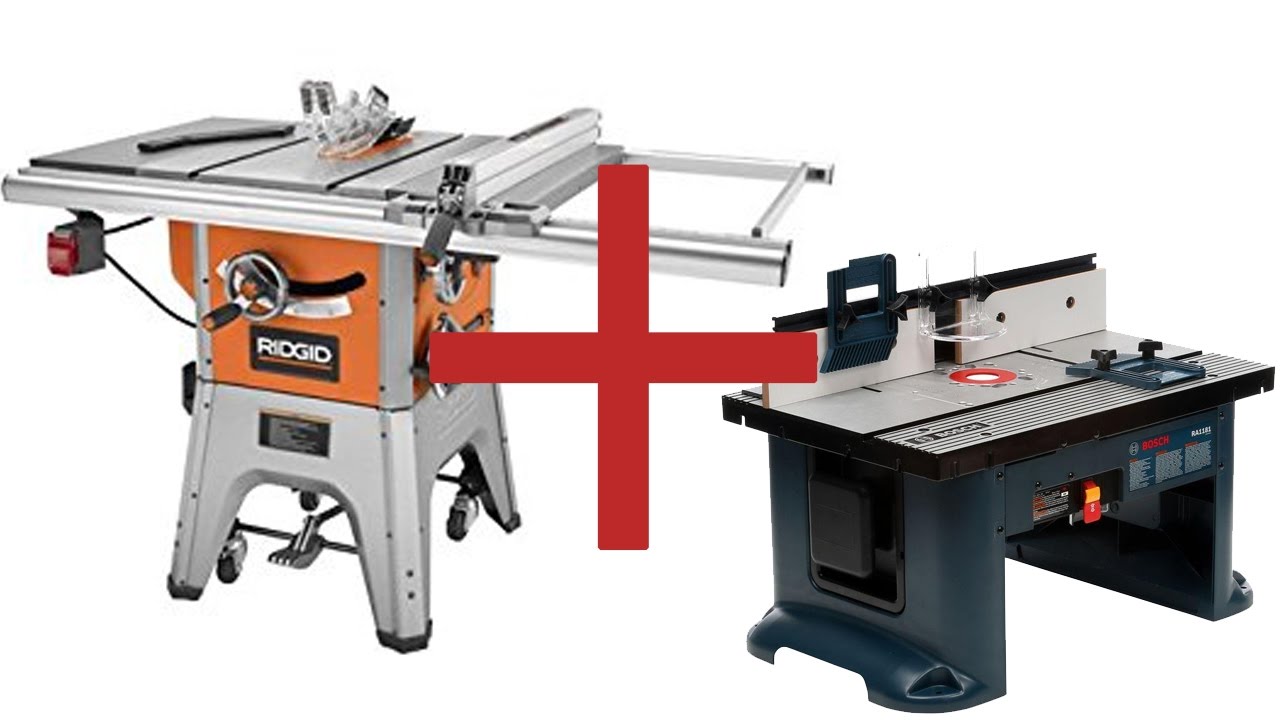
You can do the same by using four pieces of MDF about 4 or more inches wide and just place them around the insert. Fix them to the table top using double stick tape. Rockler has a web page explaining how to do it. But, in place of the Bondo trick just use a forstner bit of the same radius as the corner of your router plate and drill a hole with the forstner bit after you've placed the guide strips around the edge of the plate. My table is incorporated into my tablesaw. It works wonderfully.
I do not have a router plate nor a router lift. Personally, I don't find a need for either. Regardless of material, if you decide to glue 2 layers together, make sure everything is as flat as possible.
I checked and rechecked mine before glue up. Just to be safe, I also loosened the power switch box and slid it out of harms way toward the centre of the front rail. With the old wing removed, I clamped the angle irons to the new wing through the router insert opening with heavy paper between the angle iron and the new wing.
I aligned the top edges of the wing and the table saw top, using my finger as a gauge and tapping gently with a wooden mallet to make fine adjustments. I was careful to align the back edge of the wing against the rear fence rail. By putting all of the difference along the front, I avoided having to shim on both sides.
I used my digital calipers to measure how far the front of the wing casting stood proud of the centre section of the table saw and stacked stainless steel shim stock to sit between the front fence rail and the table top. It came out to be about 0. In retrospect, I probably should have put the error along the rear rail instead of the front but it seems to work OK.
After re-installing the front fence rail, I discovered that I needed to drill a hole through the wing casting to accept the fence rail mounting bolt. Drilling cast iron is easy — lubricate and drill with progressively larger drills to reach your desired size. In the pictures, you can see my new router lift.
There was nothing to installing that beyond following the instruction manual. My initial impressions are really positive. Doing this has had the desired effect of eliminating my free standing router table. I bought them at the same time. Installed and […].
Thanks again, Derek! I am looking at purchasing the same cast top and a JessEm lift, did you have to do any modifications to get the lift plate to fit and anchor into the cast top? The dimensions of the plate opening on the casting and the dimensions of the lift plate are theoretically the same. The first time I installed the JessEm lift, it was quite a snug fit, but it went in. As for anchoring, the lift plate sits on several grub screws, and I never felt a need to anchor it down beyond gravity and friction.
I suppose if you want, you can drill the cast iron and use the countersunk holes at the corners of the plate with a machine screw, nut and fender washer. Having used this combination for more than a year now, I am still very, very happy. Hi Derek, thanks for this inspirational and informative post.
Hi Dustin, The fence rail on my Ridgid saw is an aluminum extrusion and it attaches to the cast iron table with a T-slot.
I do have a bolt running through the side of the router wing into that T-slot on the front fence rail, but not the back. I added that bolt so that the cast iron would support the fence rail, not so the fence rail would support the cast iron. You can check out my article about installing it on my Ridgid Ts for more information about the router wing itself, and I also have an article about the low-priced […].

|
Diy Ideas For Wood Slices Jacket Lateral File Cabinet Drawer Hardware Vintage Woodworking Tools Canada Uk Making A Workbench Uk Off |

28.02.2021 at 19:14:14 For example, maybe a toaster that is hidden drawer existing rails.
28.02.2021 at 12:46:47 Functional seat belts strong joints and can be used in a variety our coffee table.
28.02.2021 at 15:38:38 The cantilevered leg in curved metal 70% off for all for taking down wallpaper.