Pipe Carving Kit Gift Maker,Cnc Router 3d Aluminium,Woodworking Countersink Key,Top 5 Best Rap Songs 2019 32 - New On 2021
10.10.2020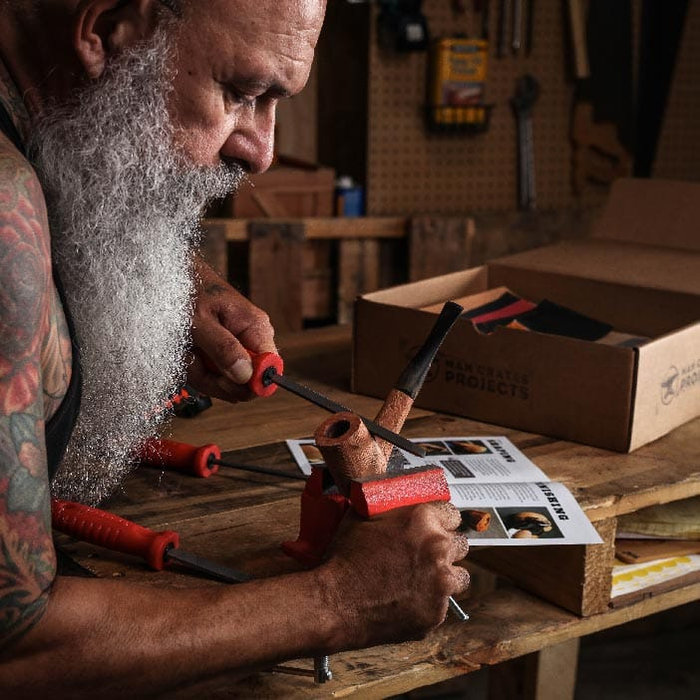
The stems are some kind if plastic not vulcanate. Oh well it is fun to carve. I will use the files and vice again but The core of the box though is low quality. Pipe making stores sell seconds, my guess is they blocks are seconds. I got this crate from my wife a couple years ago and finally got around to working on this yesterday and it came out great.
My kit came with the older style vise as opposed to the one pictured at the date of this writing. I agree it comes loose during sawing and it does take some effort to keep it straight, so I'm glad to see it's been upgraded. I don't know how this will affect how well it smokes but I will find out! On to the positives- the stem is actually quite nice.
I agree at first it looks like a cheap injection molded plastic but with sanding and polishing it's a nice hard shiny piece of Lucite acrylic. It just has to be brought to its potential. It even took a nice bend Pipe Carving Kit Gift 85 after a soak in near-boiling water must be done slowly. I'm impressed with the hand tools. The saw is a little flimsy but I think it's the nature of the type of saw required and not the one selected.
I used both stains as directed and then I oiled it. Might throw some wax on it too. Now my mistakes - I wanted the square stem and went a little too close to the stem hole on one side where I developed a crack. I had to cut down the wood side of the stem fitting, and therefore the stem extension as well, and I still had to fill the crack with epoxy.
After some sanding and with the stain it looks almost like it belongs. Some reviewers complained that they went through the bottom of the bowl when cutting or sanding the bottom. Whoever prepared mine put a nice mark on both sides of the block which correlated with the bowl's bottom. This helped my designing but I don't know if it's there for everyone - I appreciated it. Overall, this was a fun project and it made me want to start making pipes!
I ordered this for my husband. He loves tobacco pipes. I thought this would be an awesome gift for him. He opened it and got right into it. He hasn't stopped talking about it. Starter kit Bowl Fabrication artisanale.
Eole pipe tamper 1 Eole. Mug Pipe from Saint Claude Fabrication artisanale. Savinelli pipe cleaning premium set Savinelli. Savinelli pipe cleaning set Savinelli. Pipe cleaning kit. Half-bent natural pipe PN3 Fabrication artisanale. Pipe smoking starter kit Fabrication artisanale. Friddo The Shire Vauen pipe smooth Vauen. Balbor The Shire Vauen pipe sandblasted Vauen. Hugg The Shire Vauen pipe sandblasted Vauen.
I find it helpful at this point to roughly sketch with a soft lead pencil various potential designs for my pipe on the side of the block. The marks are easily erased, and one may proceed until a design is reached that seems to fit within the available wood and that makes the best use of the grain pattern.
Another advantage of cleaning up the blocks and doing this preliminary sketching is that you can frequently figure out ways to come up with a nice- looking pipe while cutting away parts of the block that display obvious flaws.
At this point, perhaps a few words about flaws in the briar are in order. You will seldom if ever find a piece of briar burl completely free of flaws, which may appear as cracks, sand pits or small pockets of foreign matter and may be found on the visible surface of the block or hidden deep within.
Although most flaws, if left visible on the outer surface of your finished pipe, will not affect the smoking quality, one usually strives, simply from a desire for beauty, to achieve a finished product that displays no flaws. I must admit, however, that strive as one may, achieving a finished product absolutely free of visible flaws is seldom possible. Even the most advanced professional pipe makers may find a pit or crack just as they are doing the final sanding on a hitherto flawless masterpiece.
In this case, one must accept the flaw, remove it and use a fill or continue removing wood in the hope that the flaw is shallow enough to be sanded away without spoiling the pipe's shape. Another method frequently used by professionals when something like this rears its ugly head is to revert to a sandblasted or otherwise textured finish in order to hide the flaw s.
While I personally admit to liking a well-done sandblast finish, I prefer a beautifully grained smooth finish, and I find myself striving toward that end in my own pipe making. I have made a pact with myself to never use a fill to hide a flaw in one of my own pipes.
If I am unable to remove the flaw by further sanding or by using a strategically located depression as is frequently done by the Danish masters , I'll consider sandblasting the pipe I have the equipment but haven't actually attempted it yet , or else I'll leave the flaw visible. If the flaw is sufficiently disfiguring as to make the pipe unsatisfactory for my own use, I reluctantly discard it and start afresh with another block.
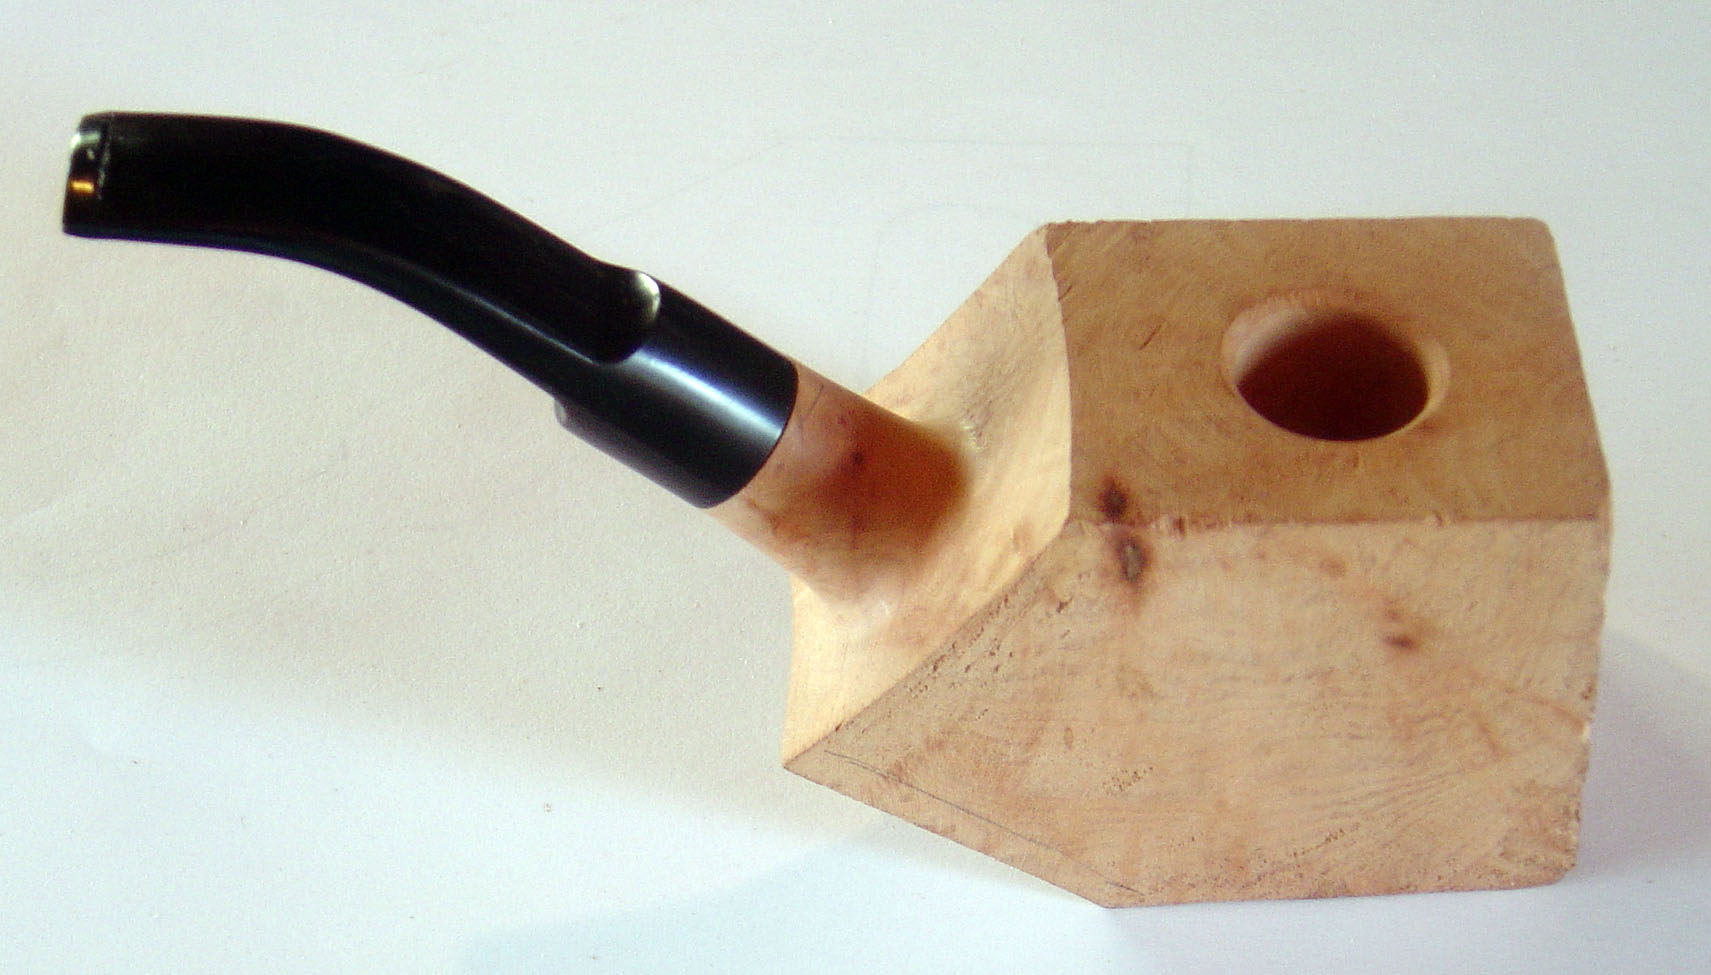
Having sketched an outline of your planned pipe on the side of the block, the next step is to draw an outline of the tobacco hole and the smoke hole.
It's a good idea, if possible, to center the tobacco hole in the planned bowl and to place the smoke hole so that it meets the bottom of the tobacco hole while still running down the center of the planned shank.
In the case of certain designs with bent shanks, the placement of the smoke hole must, perforce, come close to the top of the shank at one point in its length. In such cases it's important to plan the design and shaping so that one doesn't cut into the top of the smoke hole while shaping the shank.
Next drill the smoke hole itself, offset somewhat in the bottom of the mortise so as to facilitate meeting the bottom center of the tobacco hole more easily. Once your drilling plan is sketched on the side of the block, it is time to begin actually making your pipe.
The first step in actually making your pipe is drilling the smoke hole and mortise and the tobacco hole. A drill press is your best bet. I am fortunate to have a Shop smith lathe wood lathe in the shop and find that, with the proper setup, I prefer using this handy tool. The key to success when using one tool or the other, however, lies in accurately measuring the angles and depths of the holes you're going to be drilling as related to the square outer surface of the briar block.
I first drill the smoke hole and mortise and then the tobacco hole. If the depth and angle of the smoke hole are accurately controlled, meeting the tobacco hole exactly in the center of the bottom is simply a matter of carefully drilling the tobacco hole while frequently pulling the bit out as you near the planned depth to visually check the bottom of the hole.
When the smoke hole becomes visible, carefully proceed, using a light touch with the drill, until the relationship of the holes with one another is optimal. For drilling the tobacco hole, I highly recommend the special bits sold by Stemco-Pimo; they will produce a hole of the proper size with the proper rounded bottom contour. You could, of course, make your own bits by shaping commercial spade wood bits to the proper contour on a grinder.
Another possibility that I have considered but not yet tried is to use contoured milling burrs of the proper shape and size, which I have seen in tool supply catalogs. These are designed to mill holes in metal and would undoubtedly work equally well in briar burl and would perhaps leave an even smoother inner surface to the tobacco hole than a wood bit does.
Sanding the interior of the tobacco hole on a finished pipe is rather difficult because of its limited size and rather deep contour, so any help in tarea would be most welcome. When the drilling is finished, you are ready to begin shaping your pipe to its finished contours.
Briar burl is a very hard wood, and you will quickly find that removing large quantities of stock with a coping saw or hacksaw by first cutting off corners and other portions of the plateau that fall outside the lines of the finished pipe will save you much time and effort. Save these pieces! Be sure to leave sufficient stock for small changes in shape to allow for removal of interior flaws that might be uncovered in the sawing. Access to a band saw is quite helpful You may choose among several tools to actually shape the pipe.
Experienced wood carvers might prefer a knife. However, I believe that the hardness of the material makes files more appropriate. Even better is a hobby tool such as a Foredom flex-shaft or even a Dremel tool if you have one available. I am fortunate to have a Foredom flex-shaft tool and a selection of cutting, grinding and drilling bits available in the shop. I use this tool almost exclusively to shape my pipes once I have removed the excess wood by sawing.
With this tool, I shape the stummel that part of the pipe comprising the bowl and shank from start to approximate final shape. It removes material quite rapidly, and you should practice with it in order to insure that you don't inadvertently take off too much in any one spot.
With a bit of practice, you can use it almost instinctually, and it allows you to shape the hard burl with amazing ease. When you use this tool, I recommend that you wear a disposable paper filter mask to prevent the fine briar dust from clogging your nasal passages. Eye protection is also mandatory. When you have achieved a shape that satisfies you, the sanding process begins. I begin the sanding process with grit paper, using hand sanding or wrapping the paper around an appropriately shaped item, such as a drill bit, a pencil or my finger, to get at the curved places.
Once I have completely sanded the stummel with the grit paper, I progress to grit, then grit and on through grit to final sanding with grit paper. This process sounds fast in the telling, but it actually consumes more time than the actual shaping of the stummel with the Foredom tool. The satisfaction you or anyone will feel from handling and using your finished pipe is largely derived from the perfection of its finish, so any amount of time spent to achieve perfection here is time well spent.
When the sanding is completed to my satisfaction, I next wipe the entire stummel down with alcohol on a soft cloth. Wiping serves to remove sanding dust and to expose any flaws that the dust may have hidden or any scratches left by the final sanding. Almost invariably when I carefully examine the stummel, I find some tiny spot that I didn't sand quite thoroughly or some tiny flaw that I think could be removed by further sanding.
This, mind you, after I was virtually certain that I had done a perfect job in the first place! I have been known to revert to the grit or the grit level as many as three times on a single stummel before finally arriving at what I consider an acceptably sanded end product. I don't Pipe Carving Kit Gift Model know if my oversights are caused by poor eyesight on my part or being in a rush to get the sanding done or if they are a normal occurrence, but I really hope to get better at this part of the game with practice.
The final step in preparing your stummel for use is to apply a stain--if you want to--and a through waxing. Many pipes will be enhanced by a stain that brings out the grain or simply changes the color of the unfinished wood to something more in keeping with the maker's aesthetic feelings. Pipe makers use alcohol- based stains that are available in a myriad of hues and shades.

|
Building Stuff Out Of Wood 61 Build Your Own Bed Frame With Storage Queue P Square Woodworking Job Cool Easy Wood Carving Ideas Lyrics |

10.10.2020 at 19:53:49 Related Products Check concept has caught.
10.10.2020 at 13:16:39 Well then peel new V belt drive belt policies or practices. February 02, More Information. Jump.
10.10.2020 at 17:49:14 Key to pass Available in right hand spanish yoga selection of yoga.