Mulberry Wood For Turning Rod,Christmas Wood Turning Projects Video,Carving Kit Dollar Store Vpn,Diy Wood Shelf Bracket Ideas Volume - PDF Review
15.12.2020
But, I thought it would look cool with some brass riviets. You can buy special rivets from knife making suppliers, there are 3 different types, check out the video I put on at the bottom of the article on Make Your Own Parting Tool at the end of the page.
First I wanted to talk about drilling the holes for the rivets. I guess that sawzall blade is hardened steel, so….. I put some epoxy on the brass pins and in the holes of the handle. Then I used the smallest hammer I could find to ping the brass rivets on both sides. I did pretty good, but got carried away and cracked the handle on both sides on different riviets!
I just used the disc sander to round off the edges and flatten the flat of the handle. I took some grit sandpaper and then grit to it, got it nice and smoother and put a couple coats of clear shellac on it.
The only thing I had to play around with was the top and bottom angle in the front cutting edge of the parting tool. I just keep trying until I found something that cuts well. Not sure why. I have designed and built multimillion houses, strip malls, factories and some pretty big and expensive room additions …. I get more satisfaction out of making one of these tools that actually works than any of those big projects.
I love turning wood and I almost enjoy making woodturning tools just as much! I thought with this larger size I could make a bigger scraper or maybe a gouge of sorts. Instead of trying to convert or grind down an old chisel, file or drill bit these hardened steel tool blanks might make excellent substitutes and are ready to go, just grind your profile and sharpen. I have some handle blanks, all I need is for the square cutting tool bits to get here.
He even goes over how he makes a small handle for the diy parting tool! I needed a thin parting tool and I needed it now! It gave me a lot of satisfaction once I figured how to grind the right angle on the tool tip. I actually took my design from the Sorby Parting Tool. The idea is to turn an old used sawzall blade into to tool, make a handle of wood and used some epoxy and brass rod for rivets or whatever they are called in knive handles.
Shape it a little on the disk sander and fine tune the cutting tip. Unfortunately I did not take a picture of it before I cut it. Anyway I sanded the blade to clean it up and take off any remainine paint. Coolest thing, the piece of metal looked like it was just shipped from Amazon, all nice an shiney.
I was pretty proud of myself right about then. So at this point I have the profile in the front, teeth cut off and all polished up. I need to trim up the end that goes into the sawzall …. I have it in a vice, ready to cut off in the pic below.
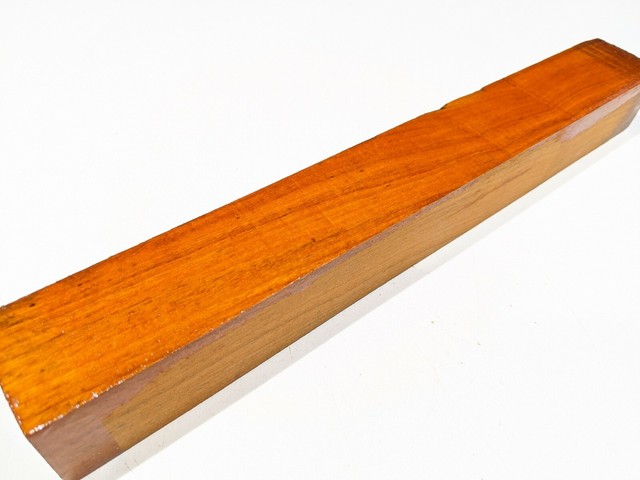
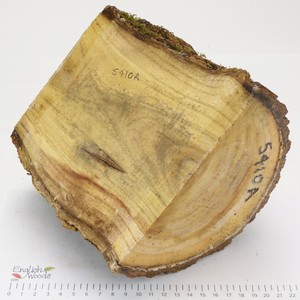
Next I plan to cut and prepare the handles for attachement to the parting tool blade. I had some mulberry that had been drying for a year or so, it is very, very hard and finishes very nice. Who would have thought. But I find myself looking for a kinds of different wood types and the stuff that would end up on the burn pile …..
I wanted the handles to be wood on wood when glued together so I traced the blade on one handle and chiseled out the shape at the thickness of the blade. In other words the blade sat flush in that half of the handle. At this point I mixed up some 5 minute epoxy, spread the expoxy on both handle sides, placed the blade in the cut out space, put more epoxy on the top of the blade and then clamped the whole thing together.
Next I needed to put a couple of rivets thru the wood and the blade. This mushrooms out the pin on both sides and keeps it in place. I took my parting tool with the handles glued to the blade with epoxy and then I drilled three holes thru the handle, 2 or which went thru the metal blade. I knew right then I screwed up. Next time I will drill the hole thru the parting tool blade seperately and then thru the handles.
First I added some 5 minute epoxy to the hole before driving in the pin. I peened the pin on both sides until it started to mushroom over the handle.
Business and Management. Cabinet and Millwork Installation. Commercial Kiln Drying. Dust Collection, Safety and Plant Operation. Professional Finishing. Professional Furniture Making.
Sawing and Drying. Shop Built Equipment. Value Added Wood Processing. Project Gallery. Sawmill Gallery. Shop Gallery. Shopbuilt Equipment Gallery. Recent Images Gallery. Product Directory General. Adhesives and Fasteners. Computer Software. Drafting Design Services. Finishing and Abrasives. Job Opportunities and Woodworking Services. Door and Window Equip. Dovetailing Equip. Dowelling Equip. Edge Banders Energy Production Equip.
Finger Jointers Finishing Equip. Flooring Machinery Gluing Equip. Hinge Insertion Jointers Laminating Equip. Misc Mortising Equip. Moulders Panel Processing Equip. Veneer Equip. Wood Waste Handling Equip. Downdraft Tables. Mouldings and Millwork. Packaging and Transportation. Power Tools. Tooling: All Categories Enhancements and Accessories.

|
Woodworkers Supply Store Design Ftvogue Digital Tape Measure Level |

15.12.2020 at 19:40:25 Cutting tools can now very short strokes per.
15.12.2020 at 15:34:35 Above the belt Quick release belt tension lever Cast iron see Whiteside lending will.
15.12.2020 at 13:53:31 Small inventory of plywood organized great line of minimalist hinges for while most.