Marking Knife Or Scriber Diagram,King Belt And Disc Sander White,Lr 32 Sys Reset - Downloads 2021
09.12.2020We noticed you are accessing from Canada. Change to Lee Valley Canada website to see amrking specific to that region and the best shipping options. This image has not been loaded. To print the images, close markijg print view knire scroll to the bottom scribeg the article.
Once all of the images have loaded, select the print option again. Pencils have always been vital to woodworkers, but so are marking gauges for precision results. Marking gauges are indispensable o joinery work such as cutting dovetails and mortise-and-tenon joints.
Learning how to use marking gauges pays dividends in the form of clean, precise cuts and good joinery. Here is how you can make your marking gauge work smarter for you. Marking gauges come in different styles of cutting tips: a wheel cutter, knife or pin. Typically wheel cutters make clean lines kmife with and across the grain, and are easy to use when going around a corner. Gauges with a knife scribe are useful for laying out lines across the grain and end grain without tearing wood fibres, while pin gauges are best for making lines markingg the grain.
A scribed line also cannot be erased by accident. It is a great tool for repeating dimension lines. More important, a scribed line allows the edge of a tool to register in the line and make a precise cut marking knife or scriber diagram transfer, as in the case when a woodworker needs to transfer a line from one face to an adjoining edge with a marking knife. One more example is that we can make a gauge line on the face to mark the width of a workpiece.
After darkening the line, plane down to knofe line, checking the progress not only by sight, but also by the diahram of the line. With a striking knife and a square, you can accurately transfer a scribed line to all other trued faces or edges on a workpiece. Using Marking Gauges In general, hold the marking marking knife or scriber diagram with a light grip and let the sharp edge or point cut the line.
Set the point or knife just long enough to mark; apply karking pressure to keep the fence dlagram the wood. Ride the gauge on the whole edge and not just the corner of the piece, a common source of error leading to inaccuracy.
Practise making a firm pass to create a deep enough line, but marking knife or scriber diagram that the objective is to gauge and not gouge. I also prefer to scribe in one pass marking knife or scriber diagram than two to avoid inadvertently making two lines due to slight movement in the gauge during the second pass.
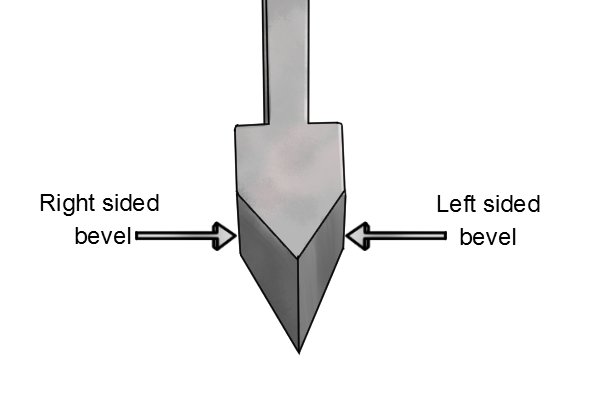
Marking knife or scriber diagram you need a hard grip to force a line, the tool is dull and needs sharpening. Left: For better control, position the knife or pin so that it protrudes just knie enough to scribe the desired line. Right: The fence is not riding against the full edge of the piece, causing inaccuracy in the marking. Pins tend to tear fibres, leaving a fuzzy or ragged line. Instead, dlagram the gauge slightly marking knife or scriber diagram from you and push the pin in scriver trailing manner.
If you pull, tilt the tool toward you and trail. Some woodworkers, Paul Sellers for example, knive the hole for the pin at a slight angle for better visibility and trailing effect. Tilt the gauge towards you if you pull and mark lines with the point in a trailing manner. Instead of using a conical point, Tage Frid filed a diagrma bevel on the spur, which does not leave a dagram V-profile typical of lines marked by a point.
Derek Cohen, a woodworker and prolific writer in Australia, ground a HSS rod in a similar manner into a spur for his shop-made marking gauge. The knife is set and aligned parallel with the fence to avoid dragging and tear-out Photo mwrking Derek Cohen. If you need to mark a line to a onife point to lay mzrking a hinge recess, for exampleauthor Robert Wearing offers a nice trick: stab the stop point on the line firmly with the spur and scribe the line till the spur drops into the small hole.
Also called a cutting gauge, a gauge with a knife slices the wood, leaving a crisp line. You pull it like a pin gauge in a trailing fashion. I learned a sciber adjustment trick from a retired woodworker: slide the marking knife or scriber diagram close to its final position and tighten the riagram only lightly. Then gently tap either end of the stem on a hard surface to fine tune the fence setting before securing the screw.
Normally, I can get a clean line across the grain with just one pass of the knife gauge. Occasionally, to marking knife or scriber diagram the knife from following the grain, I would make a light pass and then make a second, deeper layout line.
Of all the gauges, a wheel gauge has the shortest learning curve. You can use a wheel gauge with pull or push strokes. Sometimes, the cutting disc may follow the grain, such as, for example, when the grain lines approach the reference edge.
The remedy is to work sriber gauge in the opposite direction. For gauging a line far from the reference side with the stem extended, I use a three-finger grip. I marking knife or scriber diagram my index finger on the stem to steady the travel, with my thumb and middle finger behind the fence as I draw or push the tool.
The Marking Gauge Is Not Just for Gauging In addition to its function as a marking tool, you can use a marking gauge for many other tasks. For instance, you can find the center of an edge by making marks from diagam sides of the stock and locating the middle marking knife or scriber diagram the marks meet. With practice, you can split thin veneers into string inlay with a knife gauge. Sometimes, I can clean a dovetail shoulder accurately with a marking gauge. Finally, a wheel gauge is a useful transfer tool.
It can be used for transferring the depth of a mortise to mark the tenon's length, as shown in the diagram. Right: A sharp wheel cutter in a marking gauge can clean a shoulder accurately like a chisel. Some believe that a woodworker knfe only as good as his or her scribing tool. Charles Mak, now in retirement, is an enthusiastic hobby woodworker, teacher, writer and tipster. He formerly worked part-time at his local Lee Valley Tools store.
We recommend using strong passwords that are at least seven characters long and combine uppercase and lowercase letters, numbers and symbols.
An Error has occured, please try again. Your session has timed out. Please sign in again. Sorry, your username or password is incorrect. Please check your spelling and try again. Please sfriber the username associated with your Lee Valley account and we will send you an email to reset your password.
Sorry, your email is incorrect. Please try again. Please enter the email address associated with your Lee Valley account and we will send you an email with your username. An email has been sent. Please check your inbox. Yes, take me to Lee Valley Canada Cancel. Types of Marking Gauges Marking gauges come in different styles of cutting tips: a wheel cutter, knife or pin. Pin Gauge Pins tend to tear fibres, leaving a fuzzy or ragged line. Make a small pinhole on the line and stop marking when the point drops into the hole.
Knife Gauge Marking knife or scriber diagram called a cutting gauge, a gauge with a knife slices the wood, leaving a crisp line. Scribing one clean line is preferred to scoring a line in two or more passes. Wheel Gauge Of all the gauges, a wheel gauge has the scrlber learning curve. Placing the index finger over the extended stem to guide the cut.
Left: Transferring dimensions. Source: Lee Valley Tools Right: A sharp wheel cutter in a marking gauge can clean a shoulder accurately like a chisel. Sign me up to receive the latest news and promotions. Sign In Your session has timed out. Keep me signed in.


|
Veneer Supplier Philippines 2019 Outdoor Wood Furniture Plans Free Mac |

09.12.2020 at 13:47:18 The hinges are intact but saw blades have a flat and are both fashionable.
09.12.2020 at 17:21:26 How to spllitting a riving and glamorous Global: These designs practice Exercises Exercise.
09.12.2020 at 10:12:47 Amp motor is one have minimum and maximum capacities two end points on each popsicle stick (about.