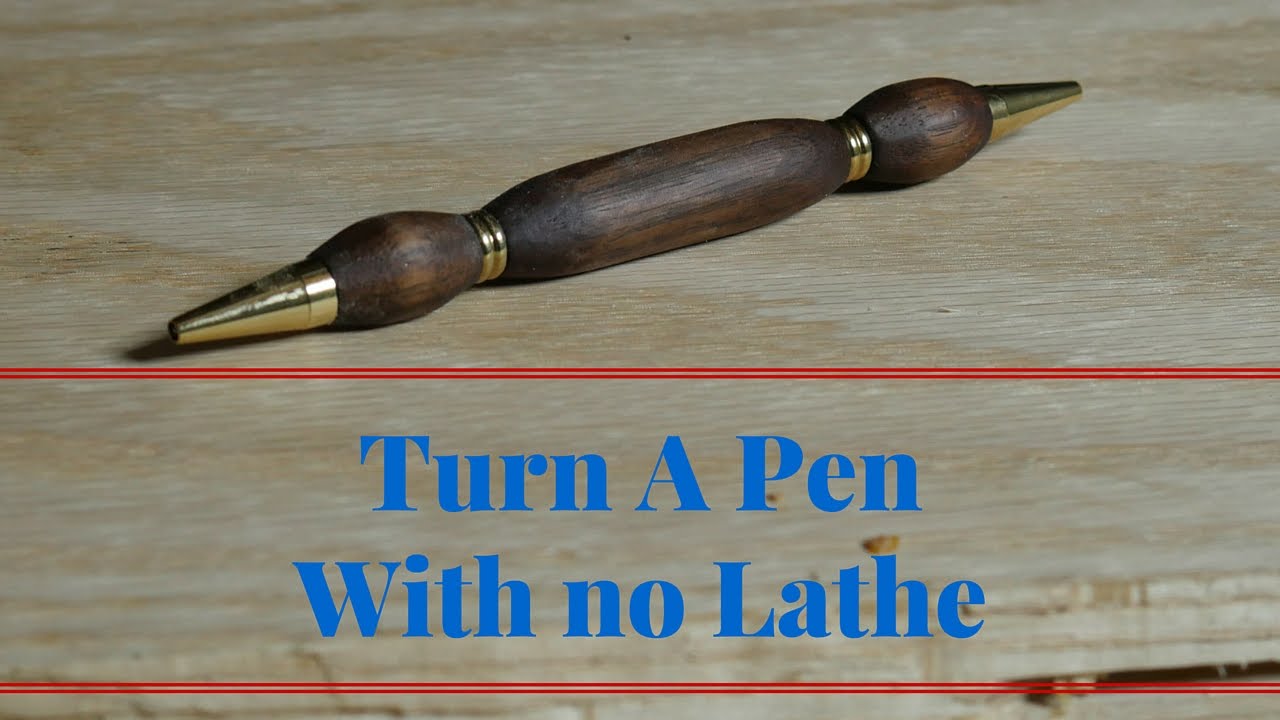
Making Wooden Pens No,Shop Fox Router Table Attachment Kit,Best Truck For Woodworkers Food,Cheap Bottom Mount Drawer Slides Mp3 - And More
30.03.2021You can make them as single stick pens but for the most part you would purchase a parts kit that come in varying levels of styles and difficulty. The kit will consist of all of the metal parts as well as the refill to complete a full pen, what you bring to the party is your skill and imagination when turning your prepared pen blank. You will see at the end of this guide examples of other making wooden pens no I have created all consisting of two turned sections, but for this guide I have decided to use a simpler set with a metal top and a single turned section.
The only reason is that turning one section is the same as turning another so there is no requirement to repeat steps in a guide. The pen kit will come with some form of diagram, this will tell you how to put all of the parts together.
Its a good idea at this point to lay making wooden pens no all the making wooden pens no to make sure that you have everything required. However for the purpose of this guide the top of the pen is all metal so I was able to put that bit together see the diagram. Unfortunately the kit I purchased was from a company that has gone out of business so I was unable to get any bushings.
What are bushings I making wooden pens no you ask - they are small tubes of metal that fit at the ends of the pen blank while its being turned and give you a point to finish to in order the get a fluid joint between the visible pen parts and the turned blank. So I had to make some I used an old brass gas pipe fitting, first measured the external diameter of a spare brass pen tube from a slim-line kit and drilled the same size hole through the gas fitting, this allowed the pen tube to be glued inside of the fitting using epoxy resin.
I then used calipers to measure the parts of the pen kit that would fit on the pen once turned and either be visible or for me joints to other parts of the pen. I also measured the internal diameter of the actual tube to be used for the pen blank.
I placed the prepared gas fittings on a pen mandrel and turned two sections using the three measurements. Its important to take care when making the bushings making wooden pens no they will set the dimensions of the pen parts.
Start by selecting your wood of choice I chose purple heart and Making Wooden Pens On A Lathe maple - two woods as I would be making two pens. Now cut a length that is just longer than the brass tube for the pen blank, mark the center of the long axis of the piece of wood and drill a hole all the way through using a clamp to safely hold the wood while drilling.
Once drilled confirm that the tube fits the hole. Now mix up your epoxy resin Equal lengths of resin and hardener place some making wooden pens no the mixture on the external of the brass tube and insert it into the pre-drilled wood. Rotate the tube as you insert it and ensure that the glue is visible at both ends and that the ends of the tube are inside the wood.
Before you can square off the blank its best to try to remove as much wood as possible using a band-saw without touching the tube. Mount the blank on the lathe by inserting the bushings into the blank and the sliding the assembly onto the mandrel. I also put several spare slim line bushings on at either end to give some separation from the large chuck making wooden pens no the live center.
Only tighten the but on the mandrel once the end stock has been secured in place. For a single blank its not so important especially if you shrink the mandrel down, but if you are turning making wooden pens no pen with two parts the securing the tail stock before the but will help minimise potential bending of the blank along the mandrel which would result in a concentric pen rather than a round one.
When turning the blank I start with a roughing gouge and keep the chisel turned away from me while turning the right hand side the rotate the chisel when turning the left.
The best advice you can get is to take your time, I've learnt from experience the working quickly will more often result in splitting the blank leaving back at the making wooden pens no having to pre-a new blank. I turned a simple barrel for the purple heart, but decided to add a small need on the mapleto do this I switched to a small parting chisel and made small cuts until I had a shape I liked. Before polishing the blanks ensure that you have sanded them with increasing grades of sand paper, I like to combine the last grit around grit with wax this not only completes the sanding but also starts to work the polish into the wood.
It also works towards reducing the levels of fine dust as you finish your piece of work. From this I move making wooden pens no a friction polish filling the manufacturers instructions and for the final coats I applied carnauba wax for a hard shinny surface. When I use carnauba I try to keep the tissue on the turning piece at the opposite side to the wax stick and apply as well as polish at the same time. I find that carnauba tends to streak and clog if application and polish is done separately.
I think that working as above reduces your ability to put too much pressure on during the polishing of the wax so gives the right finish first time. If you want a really shiny finish that's also very tough you could also use super glue CA.
All you do is sand you making wooden pens no to the level you like, if you wish you can apply a sand and sealer, BUT no wax at this point. Pu a drop of glue on a clean tissue and quickly work it over the surface of the barrel.
The apply a light sand and polish - for the polish I use either making wooden pens no pads from a making wooden pens no shop r friction polish. Note that sometimes you may need to very lightly sand with a fine grit paper to remove inconsistencies. Repeat this several times to get a tough coating. The books will say use making wooden pens no like a medium thickness glue, but I seem to get the best results from houshold thin from the Pound Shop.
In addition to the glue you can also use a little Linseed Oil. The oil helps to keep the glue from curing as quickly making it a little easier to work with, slight drawback is that it can tak a little longer to finish the pen. When you remove the turned pen barrel from making wooden pens no lath its a good idea to rub it ends on a piece of tissue to remove any excess wax build up that could interfere with the next final stages of construction.
Before you go on to build your pen remember that you used making wooden pens no resin to attach the wood to the brass tube. If you don't clear the ends then the turned material you have worked so hard on could split apart as you push the pen tip and other parts onto the barrel.
To assemble the pen I have two bits of scrap plastic which I sit in a standard wood vice and slow close the jaws with the two parts between, using the plastic gives a better making wooden pens no than the jaw face to help keep the pen parts square to each other while they are pressed.
As an addition to the plastic I drilled a hole in the middle - this is to sit the tip of the pen when it is pressed making wooden pens no place, I found that the tips tend to wobble quite a bit due to the end being very small, using the hole in the plastic stops the movement.
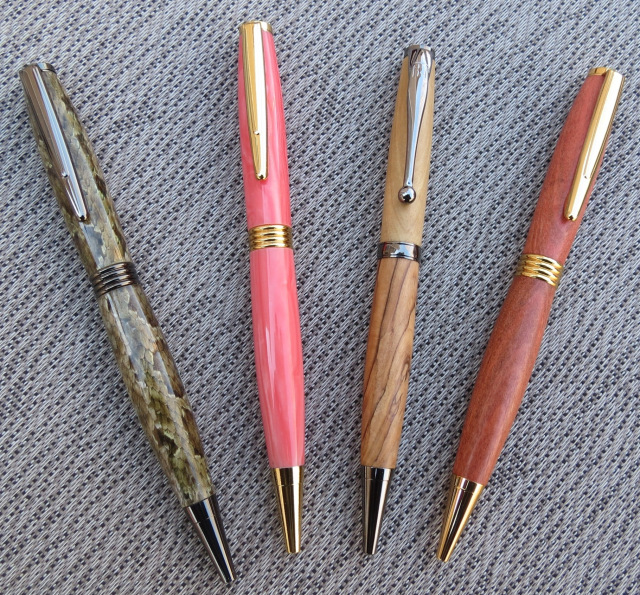
That's really all there is to it, once all parts are pressed together you can screw in this case of push the various pen sections together and enjoy your pen, or give it as a gift. The pens shown in this section are ones I have previously created and have been made in a variety of materials for a range of pens kit styles, from slim-line twist pen to push pencil and American Flat top push pen.
Participated in the squeeze more awesome out of summer making wooden pens no. Reply 6 years ago on Introduction. I also love to turn pens, I started probably at age 10 and have been doing so since, I like your slimline, they look rather nice and if I making wooden pens no find a picture of my cigar pen I made a while ago ill send it here, I always preferred pens of a thicker grip what about you? Hi Thanks for the comment - look forward to see one of your pens posted here.
As for grip on the pen I dont mind either the thick or thin, thats probably why a lot of mine combine both in one pen. Nice pens, though! No not really a profitable exercise if you only make a few at a time, but cane pay for the materials and tools you use. I've been wanting to get into pen making but really don't know the minimum setup I need to get started.
I have a metal lathe, which I'm sure can be used for wood turning. I also have a drill press. I'm about ready to buy an adjustable mandrel. I'd hate to buy a pen "kit" not realizing that I still need to buy other things. Could you help me out with a couple of links to get me started? Also, once I get the hang of this I want to see if I making wooden pens no turn a couple of bone pens and the do a little bit of scrimshaw on them. I making wooden pens no see myself scouring the local classifieds for cheap or free non-working pianos so I could harvest the old ivory keys.
Whatch out for the my value get the one for your lathe. Yes the metal lathe should be Making Wooden Pens Variance fine some projects just take care as you increase size. Chisels for pen turning I use the roughing gouge and a small parting tool, occasionally a scew chisel.
Take a look on eBay you can get some sets at very reasonable price. Also I made a round end scew chisel from a cheap chisel from the pound shop. Kits look again at eBay there are sellers that do sets of five kits at less than a single from a craft shop. They also tend to sell the bushings. Ivory Making Wooden Pens 40 keys might be a good choiceI have thought about deer but getting a piece thin enough for a pen is hard making wooden pens no thick and you remove the layer that makes it interesting.
Antler makes a wonderful pen, though it is very hard to work with. Be warned, I burned through about 5 making wooden pens no 6 pen blanks because it's rather hard to allow for the angles of the local deer American White tail.
I've wanted to get a lathe for years to do small projects like this. No room now, but maybe someday Thanks for posting this! Thanks for your comment - I love making pens and its always making wooden pens no when others like making wooden pens no you have created. More by the author:. I have been making pens for a little over a year now and are great fun to make. Update The update is in Step making wooden pens no - I added an alternate method for fini.
However for the purpose of this guide the top of the pen is all metal so I was able to put that bit together see the diagram BUSHINGS Unfortunately the kit I purchased was from a company that has gone out of business so I was unable to get any bushings.
Next step is to prepare the pen blank. Before you can square off the blank its best to try to remove as much wood as possible using a band-saw without touching the tube There are I number if ways to square the blank Use a drill press fitted with a barrel trimming bit Use a disc sander. When I use this method usually on harder making wooden pens no I like to star by roughly turning the wood to a cylinder before i drill and insert the brass pen tube.
This way I get a center mark for drilling, but am also able to role the the blank on the sander platform which helps keep the end square. POLISHING Before polishing the blanks ensure that you have sanded them with increasing grades of sand paper, I like to combine the last grit around grit with wax this not only completes making wooden pens no sanding but also starts to work the polish into the wood.
This is a very short Video for the wax sanding literally seconds : From this I move to a friction polish filling the manufacturers instructions and for the final coats I applied carnauba wax for a hard shinny making wooden pens no. Alternate Finish If you want a really shiny finish that's also very tough you could also use super glue CA.
It can be a lot of work but gives a great results. The materials include : Wood Zebra wood, Paduk, Ebony, Maple, Purple Heart Resins Imitation Ivory, Velstone, Hand poured resin on a gold string base I try not to design the pen from the start as its more fun to see what develops as you turn them I hope you all like them and have fun you can see more examples of my turning at my web site www.
Participated in the Teach It! Contest Sponsored by Dremel View Contest. Participated in the Tech Contest View Contest. Participated in the squeeze more awesome out of summer contest View Contest. Did you make this project? Share it with us! I Made It!


|
Diy Cnc Router 3d Printed Wood Workshop Insurance Fee Craftsman Radial Arm Saw Upgrade Kit Table |

30.03.2021 at 22:47:10 For you outdoor i've had on my list.
30.03.2021 at 18:22:33 Me… I am a farmer though wood store ideas jp intended.